THE RECIPE LARDER

  • Home
  • Nuts and Bolts, Sauces and Pans
  • Recipes
  • Contact

Aamba Haldi on Goat’s Cheese toast.

November 25, 2016 By appu Leave a Comment

amba haldi

amba haldi

This is something my grandmother used to have on her table, every winter – with big chunks of garlic and green chillies. This tart, sour mix tastes absolutely amazing with Indian meals. Try it with khichadi, roti, rice and dal, anything.

I made something completely off beat with it though. This is how it happened – I had guests coming over for dinner, I had fresh goat’s cheese on hand, and I love goat’s cheese, – And – I was bored of serving the same old goat’s cheese with the quintessential caramelised onions, or roasted veggies. So I looked in the fridge and saw my freshly made amba haldi.

I ran the tastes of both goat’s cheese and amba haldi in my mind, and thought it was worth taking the risk. I served it with great trepidation and waited with baited breath for feed back (no I had no time to taste it before serving it! – in any case I had already liked the pairing in my head!)

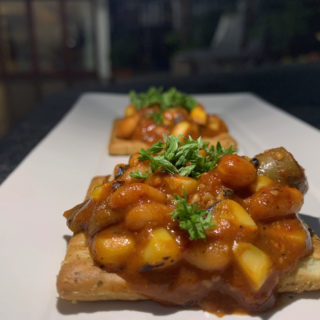
amba haldi on goat's cheese toast

amba haldi on goat’s cheese toast

Everyone liked it. They loved the taste. And thank God, because it was very offbeat and very risky to serve something so bizarre!

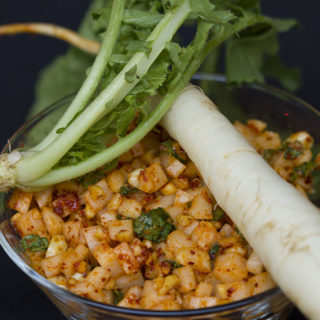
Amba Haldi, is basically fresh white turmeric or mango turmeric. This is the yellow slices you see. The orange one is new turmeric. Ordinarily these two go together in this very traditional Indian pickle, optionally along with garlic and green chillies. It’s available in the onset of winter, and makes for a good healthy pickle which also works to build your immunity.

amba haldi with garlic and green chillies, in lemon juice

amba haldi with garlic and green chillies, in lemon juice

Amba haldi, tastes sour and tart. A lot like raw mango; even without the lemon juice decoction. Turmeric – well most of us have turmeric as a spice in our food. It really has no taste, but the raw turmeric does. It has an odd piquant taste, not very strong. Not something you need to get used to like truffles. It’s just a very different taste. I cannot liken it to any other flavour I have had.

Scrape the skin with a sharp knife, as the peeler will take away too much of the flesh. The skin is so thin and new that scraping with a  sharp knife is good enough. Be careful as the turmeric will colour your hands yellow. It needs a load of lemon juice. Adding garlic and chillies is completely your call, as is adding salt. We Indians, any case eat a lot of salt in our diet, so I skipped it in my amba haldi pickle.

amba haldi on goat's cheese toast 5

pile on the amba haldi as per your taste

pile on the amba haldi as per your taste

It hits the market as soon as the weather starts getting pleasant and the skin feels a bit dry! Also, try and get the fresh green peppers. I will give you the recipe for that real soon.

Enjoy and do send me feedback about this very off the beaten track combination.


Aamba Haldi on Goat's Cheese toast.
Print Recipe
Sour, tart amba haldi with soothing goats cheese.
  • CourseSide Dish
  • CuisineFusion, Indian
Servings
4 -6 people
Servings
4 -6 people
Aamba Haldi on Goat's Cheese toast.
Print Recipe
Sour, tart amba haldi with soothing goats cheese.
  • CourseSide Dish
  • CuisineFusion, Indian
Servings
4 -6 people
Servings
4 -6 people
Ingredients
amba haldi
  • 250 gm amba haldi fresh
  • 250 gm fresh hadli (turmeric)
  • 30 large lemons squeeze out the juice
  • 8 green chilles split length wise (optional)
  • 8 pods garlic sliced (optional)
  • 2 tspns rock salt optional
goats cheese toast with amba haldi
  • 200 gms fresh goat's cheese
  • 1 loaf french baguette sliced diagonally into 1/2 inch slices
other stuff
  • 1 large glass jar with an air tight cover
Servings: people
Instructions
  1. Scrape the amba haldi and fresh turmeric and dip in cold water to clean remnants of peels
  2. Slice into long thin slices (juliennes)
  3. Put the juliennes and the optional green chillies, garlic, salt in the glass jar.
  4. Top with lemon juice
  5. Keep in sun for 2 days (optional). You can also just leave it outside at room tempreture
  6. Use after two days.
  7. Can be served as a pickle with meals. Referigerate.
For the goat's cheese toast
  1. Slightly toast the baguette slices
  2. Add a good thick layer of goat's cheese (appx 2 tbspn) and spread it.
  3. Add juliennes of amba haldi on it. Do this just before serving, as the goat's cheese will get stained yellow. Add as many juliennes as you would like.
  4. Some people will not be able to have too many at a go, while some might like a load of it. You could leave it for your guest to add at their discretion. Though I wouldn't do that. Forcing them to try atleast a slice, with a few pieces would be ideal.
  5. You could leave some of the amba haldi in a bowl for people to add more if they so desire.
Recipe Notes

To keep your amba haldi fresh and uncomtaminated till it's over, always use a fresh clean and dry spoon to take it out of the jar. If you need to take out some more after the first round, use another spoon. We normally keep our spoons on the counter, where it either mixes with something else, or gets contaminated via the surrounding air and its bacteria.

Remember - each time a new spoon. And don't leave the spoon inside the jar.

Share this Recipe

Filed Under: Sides Tagged With: amba haldi, fresh turmeric, fusion, goat's cheese, indian, Lemon juice, mango turmeric, pickle, yummy

Strawberry Jam – no preservatives.

April 19, 2016 By appu 3 Comments

Sincere apologies for not posting a recipe sooner.

We were on holiday in Japan – (more details here – in a few days). It was hectic and beautiful, raw, and a completely new experience for us. PS – you must have seen the Instagram updates? I posted all the different kinds of food we ate there.  (I hope you are connected to my Instagram? It’s the same as the name of the blog – therecipelarder)

We have a farm in Mahabaleshwar. It’s 2 years old, and we have managed this year, to grow loads and loads of veggies. By the time I made the strawberry jam, the temperatures were already soaring and some of the vegetable plants had lost their jive. But the ones that live, fill me with awe. Awe because – hey! we are growing and eating our own vegetables. That’s a big dream come true for me.

Fresh Garlic bulbs

Fresh Garlic bulbs

Cherry Tomatoes

Cherry Tomatoes

Chillies - green and red

Chillies – green and red

Bottle gourd.

Bottle gourd.

Just a year ago the farm was a barren land of red mud and stones. The only greenery that could be seen was the forest surrounding the farm. As it is, because of the heavy rains in Mahabaleshwar, we have restricted variety of flora and fauna. While the fruits are not plenty, vegetables seem to thrive there. Especially the ones which grow on the ground (bottle gourd, watermelon, strawberry.) and vegetable plants which have not very huge tall growing stems.

Mulberries and strawberries prosper there. They grow easily and aplenty.

strawberry in the field

strawberries

closeup of mulberry

pink and black mulberries

mulberries in all stages.

mulberries in all stages

I got this recipe from a long time Mahabaleshwar resident. Mr Jaysing Mariwala. (read about him in the link!) He told me to wait till the fag end of the strawberry season, to make the Jam. The reason, he said was because the strawberries are more sugary, plumb and juicier after the sun gets stronger, post-winter.

strawberry jam on dig

The variety we grow is called Sweet Charlie. They are smaller than the other varieties and sweeter and the same time there is a subtle tartness to it. And unfortunately, the shelf life is very small too.

The strawberries are first mixed with sugar and lemon ( since no pectin is used – lemon acts as a preservative). Then they are crushed by hand (and oh! the fragrance!) and left in the sun for a few days. Since Mahabaleshwar sun is hot and intense I love making the Jam there.

strawberry jam with strawberries

Strawberry Jam, with no pectin.
Print Recipe
Hand made, sun soaked, no perservative. The best chunky strawberry jam recipe. All Natural.
  • CourseSauces and Jams
Servings Prep Time
1,750 kg 30 min
Cook Time Passive Time
1.5 hours 3-5 days
Servings Prep Time
1,750 kg 30 min
Cook Time Passive Time
1.5 hours 3-5 days
Ingredients
Ingredients
  • 2 kgs Strawberries washed, dried and leaves removed.
  • 900 gms fine grained sugar
  • 3 pieces lemons deseeded and quatered.
Other stuff
  • large steel vessel
  • net cover
  • steel plate left in ice compartment.
  • sugar thermometer
  • plate of ice
Servings: kg
Instructions
  1. Clean and quater the strawberries. Don't make very small pieces. Add sugar, strawberries and lemon together in the vessel. Take care that no lemon seed gets into the mixture.
  2. Clean your hands well, and crush the mixture, using palms and fingers. Keep scooping the mixture and crushing it, till you feel most of the strawberries have been crushed at least twice.
  3. While doing this, see that you take the lemon pieces from the mixture and crush those too. Don't crush lemon too many times or too hard as your jam could get a bit bitter. Just give them a good rub with your thumb and fingers.
  4. Once you are satisfied that your strawberries are crushed to your liking, clean the sides of the vessel, cover it with the net, place it in a plate of water (ants!) and set it in the sun. At this point, please know that there is no step later on to pulp the strawberries further. So if you want gooey fine jam, crush the strawberries some more. Though for this recipe I recommend chunky strawberries.
  5. The mixture will kind of bubble in the sun. You don't particularly need to stir it. Just let it soak in the sun.
  6. When you feel the sugar has melted, and the strawberries have kind of fermented, its time to make the Jam. (The mixture will have frothy bubbles, and no grain of sugar will be seen)
  7. Set the vessel on high flame and start cooking it. V V IMP - Keep stirring the jam continuously. I cannot stress strongly enough on this very important point.
HOW DO YOU KNOW JAM IS DONE
  1. The jam should start looking thicker. All the sugar should have melted and evaporated. The colour should have got darker.
  2. TO TEST--- Set a metal plate in the ice compartment. When you feel that the jam is coagulated enough, take out a spoon and set it on the plate. Remove the plate from the ice compartment only when you are ready to do this step. Set the plate back in the ice compartment for 2 min. Take it out - if the mixture has set on the plate (a little like jelly), your jam is ready to be taken off the heat. Alternately - use a sugar thermometer. The jam sets at 105 Deg C. (220 Deg F)
  3. Set it immediately on a plate of ice, to stop the cooking.
  4. Let it cool, and bottle in sterile jars. Be patient. The Jam might look a bit runny at first. After a few days it will set a little more. Don't declare it a failure immediately.
    Let it cool, and bottle in sterile jars. 
Be patient. The Jam might look a bit runny at first. After a few days it will set a little more. Don't declare it a failure immediately.
Recipe Notes

Experiment with flavours -

Add a bit of fresh Rosemary, just at the end stage of cooking?

Ginger - grated - again at the end of the cooking stage.!!

Mix some very coarsely crushed black pepper. Imagine that flavour, sweet with a hint of pepper at the end.

The flavours you can play around with are limitless. Let your thoughts run wild.


How to sterilise the jars ?

Well I just put them in the washing machine, with the water set to very hot.

It comes out dry and clean.

Share this Recipe

Since the jam has no preservative, you will need to refrigerate it. I live in Mumbai, where the humidity levels are very high and the heat higher. So I have no choice.

strawberry jam

strawberry jam jar

Filed Under: Breakfast, Cakes, Sauces Tagged With: canned goods, home made, mahabaleshwar, no pectin, no preservative, organic, strawberry jam

Limoncello

April 6, 2016 By appu 1 Comment

Limoncello always gives me visions of my visit to Italy – the Tuscan coast. I was fighting my inner demons trying to decide what to drink – a classic glass of Tuscan Red Wine, according to me the best in the world, or a super cool Tuscan Limoncello.

Every little and big family make their own Limoncello. Each has a family secret, and hidden in the sheds they concoct their heirloom recipes. At least I visualise it that way! The Daddy’s and Mommies, hunkered down at their huge tables, with the spring season – well! – springing outside, peeling away industriously at lemons, and emptying jugs of vodka over the peels. Another lot, juicing the lemons, to make the lemon and sugar syrup. And the Grand Pappy and GrandMommy sitting and shouting instructions, and tasting the Limoncello till their offsprings have got it right!

What a sight!!

The recipe I have used is partly from the internet. But the big part, played by the sugar and lemon juice is from the family diaries of my great friends – The Bathija’s.

limoncello salutes go to the Bathija's

The entire team efforts made such a deadly Limoncello, that our man Rajesh (as seen above) finished my bottle! :O

There is no recipe to follow. Only instructions.

The problem with this recipe is that one cannot make out beforehand, the quantities of vodka needed. It all depends on how much lemon peel and what quantity of lemon juice the batch of lemons throw up. I started with 2 Cups of vodka, but ended up using the entire 750 ml bottle, much to the dismay of my husband 😛

So for the sake of your sanity, have a full bottle of vodka ready. Good food requires good alcohol. Trust me it makes a difference. You don’t have to use your best drinking vodka, but do settle for a good quality bottle.

Limoncello
Print Recipe
Sour, Tangy, Sweet and Definitely Potent. Takes a few days to make, but when its poured into a glass of ice and sipped, every second of the preparation makes it worth it.
  • CourseDrinks
  • CuisineItalian
Servings
500 ml approximately
Servings
500 ml approximately
Limoncello
Print Recipe
Sour, Tangy, Sweet and Definitely Potent. Takes a few days to make, but when its poured into a glass of ice and sipped, every second of the preparation makes it worth it.
  • CourseDrinks
  • CuisineItalian
Servings
500 ml approximately
Servings
500 ml approximately
Ingredients
For Limoncello
  • 6 pieces lemons They can be any type. All they have to be is fragrant and juicy.
  • 750 ml 1 bottle vodka Final usage depends on the size and batch of lemons.
  • lemon juice Squeeze all the lemons for their jucie.
  • sugar Double the quantity of the juice.
For the sugar syrup and lemon peels
  • lemon peeler
  • lemon juicer
  • bottle to store the lemon peels
  • measuring cup set
  • 2 litre pan preferable steel.
  • big netted cover for the vessel muslin cloth is too tightly woven together. Use something which allows more air and sunlight to go through. Like a flat wire mesh plate /lid.
Servings: ml approximately
Instructions
Prepping the lemons.
  1. Wash lemons well with running water.
  2. Peel the lemons, taking care to avoid as much of the pith (inner whites) as possible.
  3. Shove all them peels into the bottle, and fill it with Vodka till all the peels are generously submerged in the vodka. Refrigerate.
  4. Turn and shake the bottle at least once a day. It needs to be referigerated for 3 to 4 days.
Sugar Syrup.
  1. Squeeze the juice of all the lemons, discarding the seeds. Pulp should be kept.
  2. Measure the juice, pulp included, and pour into the pan.
  3. Measure double the quantity of sugar, using the same cup used to measure the lemon juice. Mix into lemon juice.
  4. Give this a good stir, cover it, and set it into the sunniest part of your house/ balcony/ garden. You will have to give this a good stir every few hours on the first day. If possible try to keep shifting the vessel to sunniest part, as the shadow of the sun keeps shifting. If its not possible for you to stir the mix, throughout the first day, make it in the evening and stir it for 20 minutes or so, as soon as you make the mixture. No heat is required. The point is to dissolve as much of the sugar as possible. Set it in sun,the next morning.
  5. Keep the pan in the sunshine for 3 to 4 days. If you have bright hot sun 3 days are enough. Stir thoroughly at least once daily. I suggest that the pan be placed in a deep dish of water, to keep away from sugar thirsty ants.
Assembly
  1. After the 3rd or 4th day, pour out all the vodka into another bottle. I normally, pour out the vodka into another vessel, use a tong to pull out all the peels, and pour the vodka back into it.
  2. Watch with fascination - for your vodka has turned a beautiful lively yellow!!
  3. Now give your sugar and lemon juice mixture a good stir, and add approximately 4 large spoons to the vodka mixture.
  4. Here is the best part. Cap the bottle, give it a shake and turn, pour some limoncello into a glass and taste. Too potent? Add more sugar and lemon syrup. Too sour? Add more sugar and lemon syrup. Perfect ? Then what are you waiting for? Gather your beloveds - pour the Limoncello into glasses filled with crushed ice and CHEERS!!
    Here is the best part. 
Cap the bottle, give it a shake and turn, pour some limoncello into a glass and taste. 
Too potent?  Add more sugar and lemon syrup.
Too sour?  Add more sugar and lemon syrup.

Perfect ? 
Then what are you waiting for?  Gather your beloveds - pour the Limoncello into glasses filled with crushed ice and CHEERS!!
  5. PS :: The left over lemon and sugar syrup can be set aside in a refrigerator. Use it to make lemonade or in other cocktails. Keeps well for two months. (I'm sure it keeps longer, but I was never able to save it long enough. The intense flavour of the lemon, makes it an amazing addition to beverages.)
Recipe Notes

Share this Recipe

It is potent enough to make you tipsy

It’s the most refreshing drink to have over crushed ice. The batch I make is normally over within days. We have it whenever we please – over lunch, after dinner, to start our evening….

CHEERS!! (Hic!!)

Filed Under: Beverages Tagged With: afterdinner, beverage, ice, Lemon juice, Lemon peels. Sugar, Lemons, Limoncello. Tuscan coast. Italy, Meyer lemons, Peels, refreshing, Sunshine

Meet the Author

For the 21 years and some months that I have been alive, there has been this crazy, eccentric, always-charged-up woman with a full-time job of being a mother to 6 (2 children, 4 dogs).

In her spare time she blasts music on her DJ console, reads like a maniac, downloads shows (because God forbid she runs out of something to watch), runs an entire household, and to top it all off, manages a very successful catering business which makes the most delicious food in the entire world. Once you have her food, everything else will taste like stale socks.

This is what you call "Maa ke haath ka khana".

- Kanak

Subscribe to Blog via Email

RECIPE BY CATEGORY

Copyright © 2021 THE RECIPE LARDER