THE RECIPE LARDER

  • Home
  • Nuts and Bolts, Sauces and Pans
  • Recipes
  • Contact

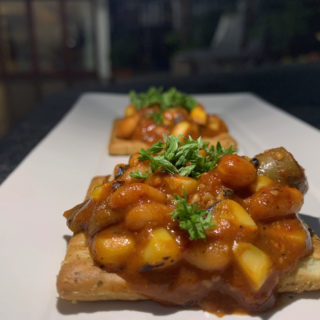
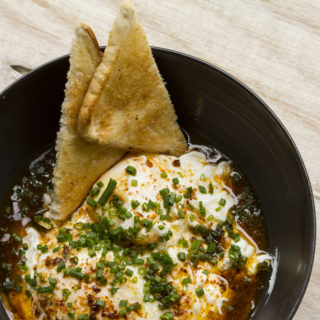
Cheesy paprika beans – by Rekha

March 28, 2020 By appu Leave a Comment

Cheesy paprika beans - by Rekha
Print Recipe
A quick easy and super tasty recipe by Rekha, one if my favourite cooks in this whole wide world. Best part about this recipe is that it can be used as a dip or a main.
  • CourseAppetizer, Main Dish, Side Dish
  • CuisineFusion
Servings Prep Time
6 pax 15 min
Cook Time
10 min
Servings Prep Time
6 pax 15 min
Cook Time
10 min
Ingredients
  • 2 Tbspn olive oil
  • 1/2 Cup onion Finely chopped
  • 2 Tbspn Garlic ginger paste
  • 1 Tspn Green Chillies Finely chopped
  • 1-2 Tbspn Red Chilly Paste (depends on your level of spice)
  • 1 1/2 Cups tomatoes Skin removed and finely chopped
  • 1/4 Cup Water
  • 2 Tbspn Red Pepper Charred and finely chopped
  • 2 Tbspn Yellow pepper Charred and finely chopped
  • 2 Tbsn Green pepper Charred and finely chopped
  • 1 Fresh Jalapeno Charreed and finely chopped (optional)
  • 1 Corn on the cob Charred and corn kernels removed
  • 1/4 Cup Sliced Green Olives
  • 1/2 Cup Grated Cheese (any good melting cheese)
  • 1 tspn salt
Servings: pax
Instructions
  1. Char the corn, pepper and jalapeno.
  2. Take the corn kernels off.
  3. Chop the charred peppers and jalapeno and keep aside.
  4. Skin and finely chop the tomaotes.
  5. In a pan, add the oil. When hot add the onions and saute for a bit till onions are translucent
  6. Then add the ginger garlic paste and saute till a bit brown.
  7. Add the chopped green chillies and saute again.
  8. Now add the chilli paste and saute once for for appx 2 minutes.
  9. Add the skinned tomatoes, and saute till it becomes a bit pulpy and mashed. Add water and let it cook till completely mush. Add the salt.
  10. Add the charred and chopped peppers and the jalapeno and saute for a bit.
  11. Now add the corn and mix well.
  12. Then add the cheese and stir till it melts completely and incorporates with the other ingredients.
  13. Add the olives stir and turn off the fire.
  14. Add the beans and mix and incorporate everything together.
  15. This can be served on toast, on cream cracker or salted biscuits, on sourdough etc. Can be served as a starter or a main dish.
Recipe Notes


My mami (Rekha) is my backbone and my best friend. All that I have learnt in cooking and about cooking is from her. She has this fabulous gift – she opens her pantry cupboard, randomly pulls out ingredients and makes the most amazing dish you could never have thought of. Some ingredients you would not even imagine cohabiting well together. And the best part is that all these dishes are simple, and can be made really quickly. What I find most amazing is that she rarely ever repeats any dish!

For this post, I asked her to come up with one of her creations. We were in Mahabaleshwar, with odds and ends and luckily I had all the things she wanted for this dish. I tried it and it was as usual flawless.


At this point, when things are going all over the place, I really want to express my gratitude for having her in my life. We have had such wild, hilarious and at times intense moments together. Life has been very good because she existed in it. Her laughter is so infectious, her dancing so enjoyable and she sparkles wherever she goes.

I love you mami, and may we do more wild things together soon!


About the recipe :

Char the corn and peppers very lightly. We don’t want black stuff coming onto the dish. The purpose of charring is to draw out the juices and not burn it. Once charred, scrape off the few black skins that have burnt completely.

Olives gave an excellent tang to the dish. If you don’t have sliced olives, just pit the ones you have and slice them. Add them last like I have shown in the recipe. It does not cook and leaves the slight sour and crisp taste at every bite.

Skinning the tomatoes is a must. It mashes super well into the mix and leaves behind no fiber. It looks better also, than pieces of skin floating around in a otherwise neat looking, colourful dish.

Jalapeno is optional if you don’t like heat. But do not reduce quantities of any other ingredients.

It can act as a main dish, just serve with toast. Or serve it on cream cracker biscuits or on sourdough. Garnish with some chilly flakes and I would also recommend a hint of finely chopped chives.

Any cheese which melts and does not clump is good. I used normal Britannia cheese mixed with a little left over Britannia Cheeza (pizza cheese mix).


The Trick: in this recipe is that, each time you add an ingredient, sauté it for a bit. Take your time, the flavours just swell up and burst.

I hope you like this recipe. Do tag us on our insta page. #therecipelarder

PS: the dish in the video and pictures were made on two different days. Same recipe - different cheese.

Cheers!

YOUTUBE LINK to recipe :   https://youtu.be/uXKI5UPpY-s


Recipe Video here:


http://therecipelarder.com/wp-content/uploads/2020/03/Cheesy-Paprika-sauce-with-beans-converted-with-Clipchamp.mp4

Share this Recipe

Filed Under: Cocktail Parties, Sides, Snacks Tagged With: bakedbeans, maindish, mains

Guacamole

February 12, 2018 By appu Leave a Comment

avocado and all other ingredients ready and prepped for mashing

To be very frank, I’m not a huge fan of Guacamole. Actually not a huge fan of Avocado either. The son, daughter and husband love it though!!

My son is on a full blown -I am going to build my body, and eat healthy – kind of streak, and he makes a lot of Guacamole, or Guac as the kids call it.

This here, is his recipe. Quick and super easy, and very filling. He made it for me last winter when he was here on holidays, and though my eyes don’t start shining in emotional gratefulness at the sight of Guac, I did dip a couple of nachos into it and I must say I was thoroughly impressed with it.

Avocado is not easily available where I stay. It grows in abundance in Bangalore, but the taste, texture and flavour is not as good as the one available in California.  When I went to spend sometime with my daughter in San Jose – California, I accompanied her to the super market. My eyes popped out, seeing the gigantic heaps of Avocado, spilling on to the floor, overflowing from their baskets. And the price!! Oh! Boy, it was being sold for peanuts.

I wanted to take back a few with me to India, but my kid gave me a fairly accurate description of the way it would get squashed and then get in between my clothes and when I would try to pull them clothes out, I would have slimy, gooey flesh smeared on my hands ….. you get the gist, don’t you?! Disheartened I gave up the idea, but began a hunt in Bombay for good Avocados. It was quite a task. They would be either underdone or over ripe and always, always very expensive.

I finally found a store, and now I get ripe to be eaten – the day I want – type of Avocado whenever I so please. It’s still a tad expensive, but it’s exotic fruit (yes Avocado is a fruit!) in India, and we pay for the glamour.

Do try out this recipe. It’s super easy and actually mashing the fruit – I found it kind of stress relieving.

avocados

http://therecipelarder.com/wp-content/uploads/2018/02/guac-converted-with-Clipchamp.mp4

Storage

Guac gets black very fast, as it starts oxidising when exposed to oxygen in the air. Lemon helps keep its colour, but it still needs further help. As such it’s best to make Guac just before serving, but it’s not always possible. To store Guac without letting the exposure affect it, store in a air tight box, or in a bowl, and cover with cling film, letting the cling film stick right on top of the guac. When you serve the guac, you will have to scrape the guac off the cling film, but it’s worth the effort.

If you want to use only one half of the fruit, retain the stone (seed), push it back into the cavity of the left over half, and cling film it tightly and keep refrigerated. This helps to a certain level, but eventually you better consume the fruit as soon as you can.

Cheers! to good fat!


Guacamole
Print Recipe
Quick and easy recipe for a healthy snack.
  • CourseAppetizer, Snack
  • CuisineMexican
Servings Prep Time
3/4 pax 10 minutes
Cook Time
5 minutes
Servings Prep Time
3/4 pax 10 minutes
Cook Time
5 minutes
Guacamole
Print Recipe
Quick and easy recipe for a healthy snack.
  • CourseAppetizer, Snack
  • CuisineMexican
Servings Prep Time
3/4 pax 10 minutes
Cook Time
5 minutes
Servings Prep Time
3/4 pax 10 minutes
Cook Time
5 minutes
Ingredients
  • 1 Ripe Avocado
  • 2 Tbspn onions Finely chopped
  • 1 Tspn Sea Salt
  • 1 Tspn Jalapeno Chillies Fresh and finely chopped, (or any other spicy green chilly)
  • 1/2 Tspn Paprika
  • 2 Tspn Cumin Powder (jeera)
  • 2 Tspn Black Pepper Coarsely ground
  • 2 Tspn Fresh Corriander roughly chopped
  • 2 - 3 Tspn lemon juice
  • 1-2 cloves garlic optional
Servings: pax
Instructions
  1. Cut the Avocado from the stem to the root, slicing the fruit into two
  2. Pull apart the two ends, and scoop out the seed with a spoon.
  3. Using a sharp knife, make horizontal and vertical slits into the flesh of the fruit.
  4. Now scoop out the flesh with a spoon, scraping into the skin of the fruit.
  5. Put all the flesh into a bowl.
  6. Add all the ingredients into the bowl with the avocado, and start pulverising with a fork. First break down the fruit and then start mashing the rest of the ingredients with the avocado.
  7. Lastly add the lemon juice and mix some more.
  8. Voila - it's ready to serve with nacho chips.
Share this Recipe

Filed Under: Cocktail Parties, Snacks Tagged With: avacado, foodfad, garlic, glutenfree, goodfat, guac, guacamole, healthy, healthyfat, healthysnack, highfibre, mexican, nachos, nogluten, snack, tortillas, Vegan, vegetarian

Palak Kebab

March 25, 2017 By appu 2 Comments

Palak Kebab

Another shout out from my daughter, for this recipe. I had made it for their friends when they were here and it was polished off in no time.

Well, many a good news hovering around me. The daughter got into Yale, my cooking classes have taken off and this darned blog has got fixed. There were some major issues, so all those of you who tried to come back for your favourite recipes and found gibberish in the ingredient section, my apologies. My very profound and heartfelt apologies. It could have got fixed earlier, but as usual, I was travelling.

I was in Mahabaleshwar, a small quaint hill station a few hours from Bombay. I have a home and a farm there, so this time the 12 days I stayed there, I ate off the farm, played with the new pup and chilled with my best friend Nishi.

We cooked, ate and drank!

We would wake up in the mornings, sit in the sun, (it was cold there!), and sip our tea and coffee. Then after a leisurely breakfast, we would put face packs (moisturising ones – like I said it was Brrrrr!) and jabber away for an hour or so. By the time the watch thought of turning both its hands to 12 – we would be sitting with our afternoon drinks – again yakking away to our hearts’ content. It was the most idyllic holiday one can have.

I plucked fresh Spinach, from the field and made this ultra easy and very delicious recipe. It needs very little preparation time. I have cooked it on a non-stick, with very little oil, but if you have a large party you can easily fry it in oil. I did it for the kid’s 21st birthday party and it vanished into mouths as soon as freshly fried plates were put in front of them.

cocktail snacks

I have also made a video, for a quick look-see. The first video I made was not “good enough” and my niece and son insisted I work a little harder and produce a better one. Well, they are not all that happy with this one either, but I lack patience so there is for all to view.

Unfortunately, I am not able to load the video here because of (temporary – I will fix it asap) data restrictions. But here is the Facebook URL

FACEBOOK URL FOR VIDEO OF PALAK KEBAB

and there is the google drive URL.

CLICK HERE FOR GOOGLE DRIVE LINK

I hope you will see the video and try the recipe. It makes for great cocktail snacks, lunch box sides, or sides.

Promise to get back with a recipe soon. I’ve been tardy!


Palak Kebab
Print Recipe
Quick and easy, with minimum fuss and preparation. Great as cocktail snacks.
  • CourseSide Dish, Sides
  • CuisineIndian
Servings Prep Time
3 /4 Pax 30 minutes
Cook Time
15 minutes
Servings Prep Time
3 /4 Pax 30 minutes
Cook Time
15 minutes
Palak Kebab
Print Recipe
Quick and easy, with minimum fuss and preparation. Great as cocktail snacks.
  • CourseSide Dish, Sides
  • CuisineIndian
Servings Prep Time
3 /4 Pax 30 minutes
Cook Time
15 minutes
Servings Prep Time
3 /4 Pax 30 minutes
Cook Time
15 minutes
Ingredients
  • 1/2 Cup Whole Black Masoor Dal (Indian Brown Lentils)
  • 1 Bunch Spinach
  • 1/3 Cup Cottage Cheese (or Ricotta cheese)
  • 5 Cloves garlic
  • 2 pcs green chilles
  • 1 Inch Ginger
  • 1/3 Cup onion Finely chopped.
  • 2 Tbspn Cashews, crushed
  • 1 1/2 Tspn Garam Masala
  • 1 Tspn salt
  • 2 Tbspn - Plus oil for cooking and oiling hands
  • Water
Garnish
  • 1 Tbspn Chaat masala
  • 1 onion Sliced.
Servings: Pax
Instructions
  1. Soak the dal for 30 minutes.
  2. In a mortar and pestle, pound together the chilles, garlic and ginger.
  3. Wash and chop the spinach into very fine strands.
  4. Bring water to a boil, and boil the Spinach for a 2 / 3 minutes.
  5. Wash and grind the soaked dal into paste with as little water as possible. Preferably no water.
  6. In a non stick skillet, add a appx 1 Tbspn oil.
  7. Add the ginger, chilly and garlic paste. Fry till it is brown.
  8. Add the onions, and fry till brown.
  9. Now add the Dal paste, and again fry till it forms lumps and all the water has evaporated.
  10. Now add the spinach and mix and cook till incorporated.
  11. Add the cottage cheese/ ricotta cheese. Break it and sprinkle it all around for a better mix.
  12. Mix till incorprated.
  13. Add the cashews, garam masala and salt.
  14. Mix well and take off the fire on a plate to cool.
  15. Oil your hands and make small rounds, appx the size of a small lemon.
  16. Flatten it. Repeat with the entire mix.
  17. In a skillet add appx 1 Tbspn oil and cook the kebabs, pressing it and turning it till it browns on both the sides.
  18. You can also fry these kebabs in oil.
  19. Serve hot, sprinkled with chaat masala and garnished with onions. Serve with a corriander chutney.
Share this Recipe

Filed Under: Cocktail Parties, Sides, Snacks Tagged With: cocktail snack, healthy, quick and easy snack, snack, spinach, vegetarian

Cucumber Boat Salad

February 20, 2017 By appu 2 Comments

Chilled Cucumber Boat Salad

The Daughter made another demand — I’m so pleased she has got into cooking! The chef in me feels fulfilled and the mom and me feel happy! 😛

I make this salad very often at home. It needs to be served really really chilled, so it is a good idea to make it a wee bit in advance.

It’s a messy salad though! Be prepared for a white moustache and a few drips down your chin! But it’s worth the dishevelled look you will sport while eating it.

Look for crisp cucumbers with a clean green interior. I always cut off the side of the cucumber and taste it before using it. Sometimes cucumbers can be very very bitter, and even one bitter cucumber in a salad of 20 cucumbers can spoil the entire dish. Taste it and throw it away if its bitter. (You can always chuck it in the compost pile of course!)

The yoghurt should be thick, so hang it for an hour or so if you want. There is zero neatness in this salad, so there really isn’t any right or wrong way to fill it. Slice the spring onions really thin and small. Garlic can be upped as per your taste. To my mind, too much garlic takes away the sweetness of the yoghurt and the original taste of the cucumber.

I add a little of chilli flakes, but you can always add some herbs too – parsley, thyme, oregano. Don’t use very strong herbs. Again – it takes away the original flavours.

The boats can get very wobbly, as the base is rounded. You can slice off a small part of the cucumber from the bottom to make a little steadier base. But – mostly, it will wobble and fall a little to the side, but if the yoghurt is not too drippy things should not slide out and drip into the plate.

I’m attaching a quick video for you.

I hope you enjoy this salad. Do write in.

As always – Cheers! and Happy Times!

http://therecipelarder.com/wp-content/uploads/2017/02/cucumber-boat-salad_CLIPCHAMP_480p.mp4

Cucumber Boat Salad
Print Recipe
Crips. filling, gooey, and crunchy. Great as a cocktail snack, as well as a salad. Don't let the fancy look deter you from making this perfectly easy and hearty salad.
  • CourseSalad
  • CuisineFusion
Servings
4 peopl
Servings
4 peopl
Cucumber Boat Salad
Print Recipe
Crips. filling, gooey, and crunchy. Great as a cocktail snack, as well as a salad. Don't let the fancy look deter you from making this perfectly easy and hearty salad.
  • CourseSalad
  • CuisineFusion
Servings
4 peopl
Servings
4 peopl
Ingredients
  • 2 large cucumbers peeled and slit lengthwise
  • 1/2 cup hung curd or greek yoghurt
  • 1 green oinion finely chopped with greens
  • 1 tspn salt
  • 1 tbspn garlic coarsely pounded
  • 1 tspn Black Pepper
  • 1 tspn chilli flakes
  • 1 tspn herbs optional.
  • 50 grams alfa alfa sprouts soaked in cold water
Servings: peopl
Instructions
  1. Peel and slit the cucumbers lengthwise.
  2. De seed the inner core using a spoon (see video) Chill in refrigerator till you need to fill it.
  3. Chop the green onions finely. Use all the whites and some of the greens
  4. Soak the alfa alfa in iced water, so that it untangles and the sprouts open up. Drain before using.
  5. In a clean bowl, mix the hung curd or greek yoghurt with all the other ingredients.
  6. Taking a small spoon, fill the cores of the cucumbers with the filling. A little will drip out. You can either leave it, or wipe it with a clean paper towel.
  7. Heap the sprouts on the yoghurt mix.
  8. This salad can be filled in advance, or just before eating. Either way, the filled boat, or the filling and cored cucumber should be in the refrigerator till served.
Share this Recipe

Filed Under: Brunch, Cocktail Parties, Dinner, Lunch Tagged With: Alfa Alfa Sprouts, Chilled Salad, Chilli flakes, crisp, cucumbers, Foodie, Greek Yoghurt, Hung Curd, salad, Serve Chilled, Stufed

Zucchini flowers stuffed with goat’s cheese

January 6, 2017 By appu 1 Comment

zuchini growing

It’s that time of the year when the farm turns green once more. Flowers, fruits and vegetables, growing over red soil, makes my heart soar. The thought of walking around the gardens and randomly plucking what is ready to harvest, tasting ripe strawberries on the way back to the house – and planning in my mind, what to make with the mud-encrusted produce in my hands.

pea shoots

Pea Shoots.

I planted Zucchini seeds this year, hoping we will get some fresh organic ones to eat. Frankly, I am not a great lover of Zucchini. I was actually eyeing the flowers. I had eaten some delicious stuffed Zucchini flowers, in a restaurant long ago. These flowers are not available in Bombay markets. The only way to get hold of them was to grow them – so grow them we did.

zuchini flower

And grow they did –Oh! Boy. How they grew!! Wild and unrelenting. An entire plot is covered with various sizes of Zucchini. I was completely delighted to see huge Zucchini’s hidden amongst the foliage. Sunshine yellow flowers, curling under the leaves, nestled next to the vegetable.

The flowers are very very delicate. I had my camera and some more equipment in my hand and bent down to pluck a flower. –And I damaged it. By the time I could stand up to see what I had pulled out, the poor little flower was almost wilting. I freed my hands and did what the flowers wanted to me to do. Show them some reverence. We were only two of us, so I slowly, with great care, plucked 5 more flowers from the stems.

zuchini flowers

The flowers in themselves, have a soft cosy mouthfeel, and a certain mild sweetness leant to it by the stamens. I had goat’s cheese at hand, so I decided to use that, with no additional flavouring.

stuffed flowers

I had to gently reach into the flower, (an not matter how careful I was, the petal tore at one end) and pull out the stamen. There is only one stamen per flower. Then I stuffed the cheese into the flower and gently, very gently closed the mouth. At this point, the flower should not be handled too much. Just a gentle two-fingered pinch at the mouth works. The cheese is a bit sticky, and will not come out, so this process is just to our satisfaction.

After this, I dredged the flower in egg batter, and then in breadcrumbs. I like the egg batter as it gives a lovely crisp edge. But I will also be giving you the recipe for eggless batter, which works just as well.

frying zuchini flowrrs

When you bite into soft petals, oozing with salty yet tart, goat’s cheese and the mouth fills up with a party of textures, just close your eyes and savour the goodness of this sunshine yellow very seasonal, and very difficult to get – flowers.

close up pf finsihed flowers

zucchini flowers stuffed with gat's cheese

zucchini flowers stuffed with goat’s cheese

finished stuffed zuchini flowers

close up of finished flowers2

Zucchini flowers stuffed with goat's cheese
Print Recipe
Exotic soft flowers, tart interior and crunchy crumbly crust. Simple to make, yet so fancy it makes a party come alive. The sunshine yellow flowers will take a powerful hold over you.
  • CourseSide Dish, Snack
  • CuisineFrench
Servings Prep Time
2 people 10 minutes
Cook Time
10 minutes
Servings Prep Time
2 people 10 minutes
Cook Time
10 minutes
Ingredients
  • 6 flowers
  • 6 Tbspn goat's cheese
  • oil for frying
Egg batter
  • 1 Small egg
  • 1 Tbspn mixed peppers
  • 1/2 Cup Bread crumbs
Eggless batter
  • 1 Cup all purpose flour
  • 1 Cup Ice cold water
  • 1/2 Cup Bread crumbs
Servings: people
Instructions
  1. Open the flowers delicately with two fingers, pinch the stamen and pull it out.
    Open the flowers delicately with two fingers, pinch the stamen and pull it out.
  2. Make oblong shaped rounds of Goat's Cheese, just a little smaller than the flower that you are going to stuff it in. Compact the cheese, to make it like a small lump.
    Make oblong shaped rounds of Goat's Cheese, just a little smaller than the flower that you are going to stuff it in. Compact the cheese, to make it like a small lump.
  3. Open the petals very gently, and pop the lump of goat's cheese inside the flower. Don't push and prod too much.
  4. Gently close the mouth of the flower. Be careful not to put too much pressure.
Egg Batter
  1. Whisk egg and milk together till it is just mixed. Do not over-beat.
  2. Transfer the crumbs in a shallow plate.
  3. Dredge the stuffed flowers in the egg batter, turning it continuously. The flower should only touch the surface of the egg batter. Do not drown the flowers.
    Dredge the stuffed flowers in the egg batter, turning it continuously. The flower should only touch the surface of the egg batter. Do not drown the flowers.
  4. Gently flick away excess egg batter and now coat the flowers in the breadcrumbs.
  5. In a flat pan, take approximately 1/2 an inch of oil and fry the stuffed flowers turning it till all sides are done.
    In a flat pan, take approximately 1/2 an inch of oil and fry the stuffed flowers turning it till all sides are done.
  6. Drain in paper towel. Eat immediately.
Eggless Batter
  1. Whisk the flower in ice cold water really well, so that no lumps remain.
  2. Dredge the stuffed flowers in the excess batter, turning it continuously. The flower should only touch the surface of the excess batter. Do not drown the flowers.
  3. Gently flick away excess batter and now coat the flowers in the breadcrumbs.
  4. In a flat pan, take approximately 1/2 an inch of oil and fry the stuffed flowers turning it till all sides are done.
  5. Drain in paper towel. Serve immediately.
    Drain in paper towel. Serve immediately.
  6. In a flat pan, take approximately 1/2 an inch of oil and fry the stuffed flowers turning it till all sides are done.
Share this Recipe

Filed Under: Cocktail Parties, Snacks Tagged With: farm, goat's cheese, mahableshwar, stamen, sunshine flowers, zucchini flowers

Beer Battered Onion Rings

October 27, 2016 By appu 2 Comments

First and foremost let me be fiercely profuse in my apologies for just disappearing. I spent 3 weeks running around Europe having a mad time. First two weeks with my girlfriends in Ireland, and then with the husband and another couple in Germany. It was a sabbatical of enormous proportions.

The super special girls' trip.

The super special girls’ trip.

Our farm in Mahabaleshwar is well on its way to being planted. The rains were particularly vicious this year. We lost many trees and shrubs. But well, that’s the ebb and flow of life, and we are looking forward to some organic, homegrown fruits and vegetables.

I had my best friend over in Mahabaleshwar, and we kindled up the wood-fired oven and made ourselves some pizza. I make the dough using fresh yeast. When it is nice and plumply risen, I roll out small rounds and give it an initial dance into the fire. Once it’s mildly pre-cooked, I add the pizza sauce, cheese and toppings and send it for another jig. As a result, I get thin – and I mean ultra thin pizzas, with a crunchy crisp bite.

Nishi and me.

Nishi and me.

This time around, the wood was still wet from the rains. The fire would not catch, the hearth would not heat and the pizzas would just not pre-cook. After a few exasperated tries (the dough was rising, and would have spoilt) I picked up the rolled out pizza dough and flipped it straight into the flames.

I heard a collective gasp from my helpers. One started dancing on his feet, saying “ It will burn, it will burn”. I just grinned and took a tong and flipped it over to let it cook the other side. All this took just a few seconds. And out came the most fantastic precooked pizza. It had blown up like a pita bread, but the results were sooooo good. Crunchy, with oozing melting cheese which stuck to our palates and teeth.

beer battered onion rings

beer battered onion rings

What I am trying to say here is cooking is an art – agreed, but it is also instinct. When I give cooking classes, I always tell my students, don’t think too much. If you want to substitute an ingredient with another do it. If you want to increase the heat do it. There is no right or wrong in cooking. Some person somewhere must have had jam with goat’s cheese and then started the trend of serving preserves with cheese. To my taste buds – nothing tastes better!

beer battered onion rings with a sprinkling of chaat masala

beer battered onion rings with a sprinkling of chaat masala

Enjoy the beer battered onion rings. These are my favourite fried snack, and my kids love them.

Darned easy to make. Just a little planning, as the onions have to marinate at least for two hours before they can be fried.

I make a quick fix, cheat sauce with these onion rings. They taste way better than, some store-bought sauce (though mine is a mix of store bought sauces :P) The fried ring, with the tart hot sauce gives it an amazing balance. Of course, you can substitute it with any other sauce of your choice. But do give my recipe a fair chance too.

beer battered onion rings and a chilled beer

beer battered onion rings and a chilled beer

Baking powder is a crucial ingredient in this recipe, so don’t try to substitute or do away with it. It is what gives the onion rings the crisp and crunchy texture when mixed with a beer in the batter.

My friend and me feasted on them, in Mahabaleshwar. Hope you like them too – PS: they go really well with chilled beer!!!


Beer Battered Onion Rings
Print Recipe
My favourite snack, darned easy to make. It will be an instant hit amongst your friends.
  • CourseAppetizer
  • CuisineAmerican, Fusion
Servings Prep Time
4 people 15 minutes
Cook Time Passive Time
15 minutes 2 hours
Servings Prep Time
4 people 15 minutes
Cook Time Passive Time
15 minutes 2 hours
Ingredients
For the onion rings
  • 2 large onions peeled and diced into 1 cm thick rings
  • 2 cups beer - larger appx 1 pint
  • 2 teaspoons vinegar
  • 1 tspn salt
  • 1 tspn Black Pepper crushed
For the batter
  • 3/4 cup corn starch or corn flour
  • 3/4 cup all purpose flour (maida)
  • 1 plus cup beer appx 1/2 pint
  • 1 tspn Baking Powder
  • 1 tspn salt
  • 1 tspn Red chilly flakes crushed
other stuff
  • Milk for frying
  • 2 tbspn Chaat masala
  • deep pan for frying
  • tongs for frying
  • kitchen towel for drying the onion rings before frying
Quick Cheat Sauce
  • 2 tbspn Ketchup
  • 1 tbspn hot sauce Use any. Even Tobassco is good.
  • 1/2 tspn soya sauce
  • 1 tspn garlic finely minced
  • 1 tspn Black Pepper
Servings: people
Instructions
To make the marinade
  1. Mix all the ingredients of the marinade in a vessel.
  2. Pull out all the rings of onions from the diced rounds. Each onion should be separated. The ring should be whole, without any cuts.
  3. Submerge the rings into the beer marinade and refrigerate for minimum 2 hours, and a maximum of 4 hours.
To make the batter
  1. Add all ingredients of the batter in a bowl
  2. The batter should be thick and should fall with a plop when dropped from a spoon.
  3. Give the batter a good mix with a whisk. It should have no lumps.
  4. Make this batter just before you need to fry the onion rings.
For frying the rings
  1. Pour oil into the non stick and heat well on slow to medium flame. It should not start smoking. If it does, let it cool down before popping in the onion rings.
  2. Wipe each ring, using a kitchen towel or a good quality paper napkin. Each ring should be completely dry.
  3. Dip one ring at a time, into the batter. Give it a quick flick to take off extra batter.
  4. Drop the ring into the hot oil.
  5. Work quickly and put in as many onions as you can, till the pan fills up.
  6. After appx 30 seconds (or when the batter looks well fried) turn the rings, using the tong, so that the other side can fry.
  7. Pick out the fried rings with the tong and place on a paper napkin to drain off excess oil. You can press it down slightly (not too hard) with another towel to drain off more oil.
  8. Sprinkle some chaat masala and serve hot, with the cheat sauce.
For the sauce
  1. Add all ingredients together and mix well.
Share this Recipe

Filed Under: Cocktail Parties, Sauces, Sides, Snacks Tagged With: beer, beer battered, beer battered onion rings, cheat sauce, onion rings, quick sauce., sauce, snacks, yummy

Hummus Beiruti

July 26, 2016 By appu Leave a Comment

I had Hummus for the first time as an adult. It picked up as a rage, and every party had a bowl of Hummus, with Pita. Then came the Lavash. Crisp flat wheat savouries topped with seeds.

Hummus with Lavash.

Hummus with Lavash.

I had Hummus for the first time some 20 years ago, in a restaurant called Olive. They had the typical platter of Baba Ganoush, Hummus and Tzatziki. At that time – I thought it was made with magic. How could something so tasty, so creamy be so amazing and healthy? When I learnt to make hummus, I was amazed at how easy it was, but I never seemed to like it as much as I liked the ones in a restaurant.

The fact is – I used terrible shortcuts. Sesame instead of Tahini. Sacrilege!! (my logic – Tahini is made out of sesame right??) Too much garlic, not enough creamy texture — blah blah!

I thought I would never be able to replicate the hummus, we have in good Mediterranean restaurants.I love the Hummus Beiruti. Its creamy with a mild tang of spice. Polishing off a small bowl is no big feat.

Hummus Beiruti

Hummus Beiruti

I tried Hummus again, (after my many not so good tries) and this time I used the proper Tahini. Another thing a chef friend of mine suggested was using cold water.

In this recipe, I use a little leftover water after boiling the chickpeas. I like to soak the chickpeas at night, and cook it the next morning and make the Hummus a few hours later. The water left over from cooking the chickpeas and the chickpeas itself are cooled down and refrigerated.

The hard work is soaking and cooking, after that its the quickest recipe you can make.

Serve it with a Rocket and cucumber salad, over toast with Avocado, obviously with Pita and Lavash. So many ways!! Do write in and tell me how you like to present it.

 Hummus


                                                                               Hummus

I made Hummus for my son last evening, thinking he could have it with Avocado. Confidently, I also made a small olive oil, garlic and Sumac drizzle for the top. Failure of failures! – the Avocado was not ripe enough and we had to chuck it. (Once cut it turns black quicker than a piece of charcoal rubbed on a face!) Then he suggested that we caramelise some onions, and top it with the same. Bigger flop. I had no brown sugar with me, and any case something made in a hurry not always turns out good. It was sticky …. basically – a flop!! I was flapping around about what he would eat, but he said the Hummus was good enough to eat on its own.. YAAAY!! Hummus saved the day!

hummus

hummus

hummus


Hummus Beiruti
Print Recipe
A Meditteranean staple, creamy and yummy!
  • CourseAppetizer
  • CuisineMediterranean
Servings Prep Time
4 people 10 minutes
Cook Time Passive Time
15 minutes 12 hours
Servings Prep Time
4 people 10 minutes
Cook Time Passive Time
15 minutes 12 hours
Hummus Beiruti
Print Recipe
A Meditteranean staple, creamy and yummy!
  • CourseAppetizer
  • CuisineMediterranean
Servings Prep Time
4 people 10 minutes
Cook Time Passive Time
15 minutes 12 hours
Servings Prep Time
4 people 10 minutes
Cook Time Passive Time
15 minutes 12 hours
Ingredients
  • 1/2 Cup Chick Peas Soaked over night
  • 2 Tblspn olive oil Virgin if possible
  • 2 Tblspn Yogurt
  • 5 Pods garlic peeled
  • 2 Tblspn Tahini
  • 1 Tblspn Water left over from cooking chick peas cold
  • 2 Tblspn Cold Water
  • 1 Tspn salt
  • 1/2 Tspn Cumin Powder
  • 1/3 Green Chilly Deseeded and chopped
  • 1/2 Tspn lemon juice
Garnish
  • 1 Tspn parsley chopped fine
  • 1/2 Tspn Sesame Seeds Roasted
  • 1 Tblspn olive oil
  • 1/2 Tspn Paprika
  • 1/4 Tspn salt
Servings: people
Instructions
  1. Soak the chick peas over night.
  2. Wash and cook till its soft. It should not disintegrate. It should retain its shape. I like to use a pressure cooker for this.
  3. Drain the water, cool and refrigerate.
  4. Cool chick peas and refrigerate.
  5. After a few hours, add all ingredients in a blender and blend till you get a fine paste. Keep opening the jar and spoon the mixture stuck on the sides back into the jar. PS: if you use the Tecnora brand of mixie (available on amazon) which comes with a very handy stirrer in the jar. While blending, one can keep stirring the mixture, so that it blends easily. You don't have to keep opening the jar.
  6. Once you have the consistency you want, plate it and garnish with olive oil, sesame seeds, parsley and mint leaves.
  7. Serve with Pita, Crisp Pita and Lavash.
  8. NOTE ON TAHINI: When using Tahini, please stir well and take from the bottom of the jar, as the solids settle way down.
Share this Recipe

Filed Under: Cocktail Parties, Sides, Snacks Tagged With: Chick Peas, Lavash, Mediterranean, Vegan, vegetarian

Mango Salsa

May 12, 2016 By appu 2 Comments

mango salsa

mango salsa

Mom’s house has this huge mango tree. It’s not ours. It belongs to the next compound, but every single leaf and mango grow into our side. Those poor dudes watered the tree and looked after it, but we reap all the benefits.

As kids, we would make this huge stick, one tied to the other to make it as long as possible. On the edge, a blade was jammed in and using a sawing motion many a raw mangoes have been cut and taken down. Of course, we had to do it as unobtrusively and slyly as possible. But even then the gardener would hear his beloved tree rustle and run after us with a stick. He was not allowed to cross over to our side, so obviously we dangled our stolen goods under his nose and felt thoroughly pleased with ourselves. This was summer holiday time and a very seriously planned agenda in our schedules.

We would then proceed to cut open the raw mango (we never washed it!) and spread salt and chilly and lick it for hours. Then spread some more salt and chilly and bite into the tart fruit. Our palate would go pop, and eyes would tingle, but the taste is embedded somewhere deep in my soul. Now when I eat a raw mango, I am transported back to that spot under the tree, where I either helped to hold that huge stick and saw off the mango bunches, or I stood under the falling mango, to try and grab it so that it did fall and get damaged.

As I grew up, the love for raw mango became a love for mangoes. I still love raw mangoes, but I cannot go at it with wild abandon like I used to.


mango salsa

mango salsa

mango salsa with nachos

mango salsa with nachos

I saw my friend Rekha, (the one who has to lead me to this wonderful thing called food!) make a mango salsa. She whips up the most delicious of dishes, with the most absurd of combinations. When I first saw her make the mango salsa, I was stunned. I mean, she was adding olive oil and herbs and spices to a fruit. A fruit which is so revered in India, for its taste and limited availability? Weren’t fruits supposed to be eaten as is???

mango salsa

mango salsa

Very reluctantly I tasted the mango salsa and immediately landed myself under the tree, where we caught falling mangoes. I tweaked the recipe, but I cannot call it mine. It still belongs to Rekha – my mentor.

The sweet and mildly sour, and extremely wholesome flavour of the fruit will pop open your eyes. You might then pick up the spoon and wolf it down! That’s what my friend does, whenever I make it.

 mango salsa

Serve it with nachos, or chips.

Its not an Indian recipe.The closest is Mexican Fusion.

I love it with my all time favourite – Whisky.

mango salsa nachos


Mango Salsa
Print Recipe
Quick and easy to make. A sure fire hit in a party.
  • CourseAppetizer
  • CuisineFusion
Servings Prep Time
4 people 15 minutes
Servings Prep Time
4 people 15 minutes
Mango Salsa
Print Recipe
Quick and easy to make. A sure fire hit in a party.
  • CourseAppetizer
  • CuisineFusion
Servings Prep Time
4 people 15 minutes
Servings Prep Time
4 people 15 minutes
Ingredients
  • 2 Mangoes Not over ripe
  • 1/2 Cup Chopped Spring onions
  • 1/4 Cup Chopped Garlic
  • 1 1/2 Tspn Virgin Olive oil
  • 1 Tspn salt
  • 1 Tspn Red chilly flakes
  • 1 Tspn Coarsely ground black pepper
  • 1 Tspn Finely chopped parsley
  • 1/4 Tspn Red Wine Vinegar
Servings: people
Instructions
  1. Peel and chop the mango. Cut the fruit into small squares. Don't cut so small that the fruit gets mashed up while mixing.
  2. Chop the onions into thin rounds. Chop some of the green as well. So basically it should be more that 3/4th whites and rest the greens, finely chopped.
  3. Add the onions to the mango.
  4. To the olive oil, mix all the other ingredients,( except the spring onions) and mix.
  5. Add the olive oil mixture to the mango and onions, and very gently toss it all together.
  6. Voila - its ready! Simple?? Serve Chilled!
Recipe Notes

Serve with nachos, chips, on a salted biscuit, with toast, toss it with croutons and serve as a salad!

Share this Recipe

Filed Under: Cocktail Parties, Sides Tagged With: childhood, Mango, mango tree, my mentor, raw mango, salt and chilly

Fried Garlic

April 26, 2016 By appu 7 Comments

It’s garlic again folks, and I am very excited to share this recipe with you.

This almost pedestrian cousin of onion (yes, it’s first cousins with onion, shallots and leeks!) can add flavour to almost any dish.

Freshly harvested garlic, drying in the sun.

Freshly harvested garlic, drying in the sun.

It has its own health benefits too. 

I love garlic, and it seems so does the world! There is a restaurant in San Francisco by the name of “The Stinking Rose”, which even serves garlic ice cream. I haven’t eaten there, but just for the sake of being a good foodie, I will definitely try it out once.

spicy fried garlic

spicy fried garlic

This dish was suggested by my mother in laws, a gym instructor. It intrigued me to no end, so I decided to try it out the very next day. Simple, easy and one of the tastiest tidbits I have ever had with a drink. So much so that I forgot the drink and kept eating the fried garlic.

fried garlic. my new go to fa v cocktail snack

fried garlic. my new go to fa v cocktail snack

It’s one of the quickest most simple dishes to make. Try and get new garlic, with the pink/purple skin. It tastes much better, as it is fried with the skin on and the thinner the skin, the nicer it is to eat it.

Chillies can be added as per your taste – I love spicy food, and it tastes absolutely yum with whisky!

When you bite into it, its crisp and then the tender garlic hits your tongue and causes the taste buds to do a nice little jig. And then the salt and chillies ping inside your mouth and the entire taste makes you want to go on and on eating fried garlic.

on the rocks with fried garlic

on the rocks with fried garlic

I’m going to try these with scrambled eggs, cheese toast and pizza!

Try variations – With wasabi and light soy sauce. Black pepper and sea salt. Fry some green chillies with it!

Do let me know if you try any of these variations. I would love to hear from you.

_MG_9070

fried garlic

fried garlic


Fried Garlic
Print Recipe
Super easy, super quick and super yummy!
  • CourseDrinks, Sides
  • CuisineIndian
Servings Prep Time
2/ 3 people 10 min
Cook Time
10 min
Servings Prep Time
2/ 3 people 10 min
Cook Time
10 min
Fried Garlic
Print Recipe
Super easy, super quick and super yummy!
  • CourseDrinks, Sides
  • CuisineIndian
Servings Prep Time
2/ 3 people 10 min
Cook Time
10 min
Servings Prep Time
2/ 3 people 10 min
Cook Time
10 min
Ingredients
  • 50 gms garlic Pull out cloves from the bulb, but don't peel the cloves.
  • 200 ml oil for frying
  • 1/4 tspn salt heaped.
  • 1/4 tspn red chilly powder
For Frying.
  • heavy bottomed pan
  • slotted spoon
  • paper napkin to blot extra oil.
Servings: people
Instructions
  1. Heat the oil till hot but not smoking. Set stove to medium heat.
  2. Fry cloves of garlic with skin on.
  3. When the garlic looks a tad brown take it out with the slotted spoon and blot on paper.
    When the garlic looks a tad brown take it out with the slotted spoon and blot on paper.
  4. Add salt and red chilly powder.
  5. Tah dah!! It's ready. Pour yourself a drink and enjoy! It tastes very nice warm. But I quite liked the taste when it has cooled down too. Something about piping hot and spicy, is not very enjoyable.
    Tah dah!! It's ready. Pour yourself a drink and enjoy! 

It tastes very nice warm. But I quite liked the taste when it has cooled down too. Something about piping hot and spicy, is not very enjoyable.
Share this Recipe

Filed Under: Cocktail Parties, Sides Tagged With: cocktail snack, fried garlic, garlic, new garlic, rum, spicy garlic, tidbits, whisky

Meet the Author

For the 21 years and some months that I have been alive, there has been this crazy, eccentric, always-charged-up woman with a full-time job of being a mother to 6 (2 children, 4 dogs).

In her spare time she blasts music on her DJ console, reads like a maniac, downloads shows (because God forbid she runs out of something to watch), runs an entire household, and to top it all off, manages a very successful catering business which makes the most delicious food in the entire world. Once you have her food, everything else will taste like stale socks.

This is what you call "Maa ke haath ka khana".

- Kanak

Subscribe to Blog via Email

RECIPE BY CATEGORY

Copyright © 2023 THE RECIPE LARDER