THE RECIPE LARDER

  • Home
  • Nuts and Bolts, Sauces and Pans
  • Recipes
  • Contact

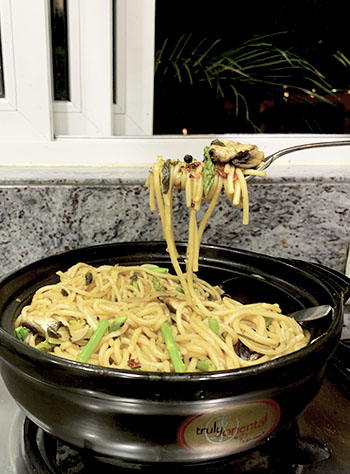
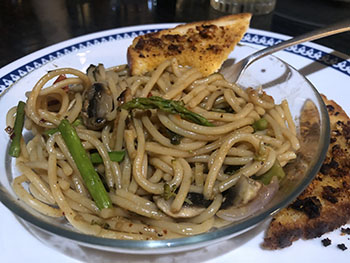
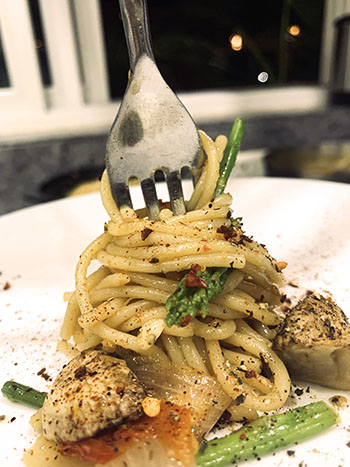
One Pot Pasta with Mukka Pyaz

March 31, 2020 By appu Leave a Comment

One Pot Pasta with Mukka Pyaz
Print Recipe
Easy and quick, and makes use of all your left over veggies.
  • CourseMain Dish
  • CuisineItalian
Servings Prep Time
3 pax 10 min
Cook Time
15 min
Servings Prep Time
3 pax 10 min
Cook Time
15 min
One Pot Pasta with Mukka Pyaz
Print Recipe
Easy and quick, and makes use of all your left over veggies.
  • CourseMain Dish
  • CuisineItalian
Servings Prep Time
3 pax 10 min
Cook Time
15 min
Servings Prep Time
3 pax 10 min
Cook Time
15 min
Ingredients
  • 2 Tbspn olive oil
  • 1 Tbspn Butter
  • 10 cloves garlic sliced thin
  • 1 med sized onion (do not peel)
  • 5 Black Pepper coarsely ground
  • 10 Cherry Tomatoes Cut into half
  • 1/3 packet Spaghetti (or any other pasta)
  • 2-3 Cups Water (you can use stock water if not using Veg Bouillon)
  • 1 Tbspn Veg Bouillon dilute in 2 tbspn water (can use stock water if you dont want to use Veg Bouillon)
  • 2 Tspn salt
  • 10-12 Leaves basil
  • 2 strands Rosemary
  • 1/2 Cup Brocolli cut into small florets
  • 1 Tspn Chilly Flakes
  • 1/3 Cup Asparagus Chopped into 3
  • 1/3 Cup Mushrooms Cut into 2 or 4 depending on the size.
Servings: pax
Instructions
  1. Without peeling the onion, cut off both the bases.
  2. With the broad side up, pound it hard a few times with your fist.(ie mukka pyaz)
  3. Tears will appear. Starting from the tear peel the onion and then start cutting and tearing the layers (see video) Keep aside
  4. In a thick bottom pan, add the olive oil and butter. When a little brown add the sliced garlic. Saute for a few minutes
  5. Add the black pepper then the onions
  6. Saute till onion is a translucent.
  7. Add the cherry tomato and saute for a few minutes.
  8. Add the herbs (basil and rosemary).
  9. Add the broccoli and then add the salt.
  10. Add the pasta and break it with the spoon and then douse it with water till the top of the pan. (see recipe notes - IMPORTANT)
  11. Dilute the bouillon in water and add to the pasta. (IMPORTANT - see recipe notes )
  12. Cook on medium heat till the pasta cooks and water soaks up completely.
  13. Keep stirring intermediately.
  14. If the water soaks up and the pasta hasn't cooked, add more water, but little at a time.
  15. If the pasta has cooked and some water is left, let it be. The pasta will soak it up.
  16. Add chilly flakes.
  17. When done and just before taking off the fire add the asparagus and mushrooms and mix into the pasta.
  18. Serve with garlic bread on the side.
Recipe Notes


Times have come when we are very very careful about wasting any food. This recipe hits the spot because it uses up all the left over veggies and wilting herbs in your fridge. It's an amazing recipe for students or those who need to cook quickly and minimally. Needless to say both my kids made this quite often when in college. But- for this recipe my son used a very Indian road side restaurant trick of Mucca Pyaz - ie fist broken onion.

Somehow when the onion is broken with the fist, the juices flow and dissipate in such a manner that the onion looses its fiery pungency and for some reason tastes way sweeter. Just for your info - try this with the very Indian Chola Kulcha.
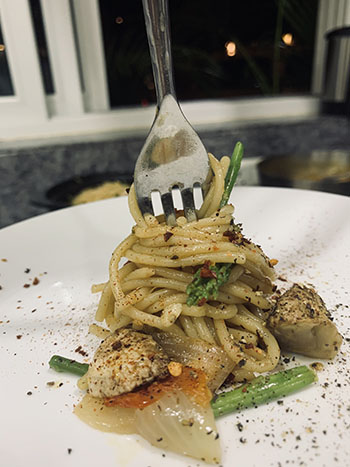
We have used broccoli, asparagus, some left over mushrooms, herbs that existed in our fridge. You can of course replace with any other her you have. Parsley, chives, oregano etc all go really well. If you dont have fresh herbs, dried herbs will also do the trick.

You want more heat add  some Spicy chillies while the pasta boils. Green chilly does not do well, so I would avoid that.

You can add any cheese you have, just before taking off the fire, stir some in.

We add the asparagus and mushrooms last, as they are veggies that cook really fast, and adding them earlier would have turned it to mush.

We hope you enjoy this recipe. Do tag us on #therecipelarder on instagram.
VEG STOCK V/S VEG BOUILLON

Since I did not want to use any extra veggies to make veg stock, I used veg Bouillon. I rather use veg stock as however organic bouillon is processed. But having said that bouillon has strong flavours and works well when you don't have too much time or patience at hand.

HOW TO MAKE VEG STOCK. For this recipe - take 4 cups of water. Add to a pan and in it add some bay leaf, black pepper and roughly cut white veggies - ie onions, bottle gourd, cabbage, cauliflower, pumpkin (not the very sweet one)etc. Boil everything together till the water boils down to half. Strain. Use the veggies in your chapati dough, or  mix it into your dal. Use this water for cooking pasta.

If you use stock do not add veg bouillon.

SEE VIDEO HERE:
http://therecipelarder.com/wp-content/uploads/2020/03/one-pot-pasta-with-mukka-pyaz-edited.mp4


Share this Recipe

Filed Under: Dinner, Healthy, Lunch Tagged With: healthy, spaghetti

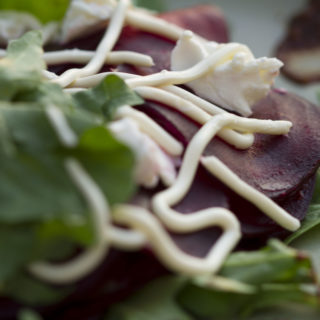
Beetroot Carpaccio with Tamarind Redution Vinaigrette.

March 19, 2020 By appu Leave a Comment

Beetroot Carpaccio with reduced Tamarind Redution.
Print Recipe
Thin veils of roasted beetroot, a fusion tamarind reduction and goats cheese. A salad made for cosy afternoons.
  • CourseSalad
  • CuisineFusion
Servings Prep Time
3 pax 15 minutes
Cook Time Passive Time
1 hour - plus 30 minutes
Servings Prep Time
3 pax 15 minutes
Cook Time Passive Time
1 hour - plus 30 minutes
Ingredients
  • 2 Beetroots
  • 2 Tbspn Tamarind
  • 2 Kashmiri Chillies
  • 1 Chipotle Chilly
  • 1 Tspn Corriander seeds
  • 1 Tspn Fenel Seeds
  • 1 Tspn Cumin Seeds
  • 1 Tspn Black Pepper
  • 2 Tbspn Water for cooking the tamarind reduction.
  • 1/2 Tspn salt
  • 1/1 Tspn soya sauce
  • 100 gms goat's cheese
  • 10 Salad Leaves preferably - rocket, aurugula, baby spinach.
Servings: pax
Instructions
  1. Preheat oven to 200 Deg F.
  2. Wash the beetroots well and scrub it.
  3. Enclose the wet beetroots in foil and place in the middle rack of the oven. This should take appx 1 hour.
  4. Soak the tamarind in hot water and leave aside for appx 30 minutes. Use only as much water to soak the tamarind. Do not use excess water.
  5. Soak the chillies and seeds and black pepper together in a bowl, with hot water. Keep aside for appx 30 minutes
  6. After appx 30 minutes, mash the tamarind and strain the juices with a strainer. Throw away the pulp (or use for marination) and keep the juices.
  7. In a grinder, grind to paste the strained tamarind, chillies, seeds and black pepper.
  8. Heat some oil in a pan and saute the tamarind and red chilly paste.
  9. Add salt and the 2 tbspn water and let it cook for appx a minute.
  10. Set aside to cool in a bowl.
  11. ASSEMBLY: (see video) 1) Place the leaves on the plate. 2) Arrange the beets in a circle on the leaves. 3) Smear scantily, the reduced tamarind vinaigrette. 4) Place blogs of goats cheese on the smeared beets. 5) Repeat again with the beets, then tamarind reduction and goats cheese, till all the beets are over.
  12. Garnish with piped cheese cream and more salad leaves.
  13. Serve totally chilled.
Recipe Notes

I have been a wee bit obsessed with all things carpaccio for a bit. Those thin, almost translucent slices of veggies fascinate me. These thin veils, with their dressing or sauce, melting in the mouth – the whole experience just makes me feel so good. I mean how can something so thin leave behind an explosion of flavors?


Goat’s cheese is my all time favourite cheese, snack, and go to for balance in taste. Tamarind is one of my favourite sour sides, and a very underrated variety. When have you heard of tamarind being used as a salad vinaigrette and yet it’s a kin of the oft used balsamic (sort off!!)


I don’t want to gabber too much, because you really need to go check out the recipe and make it. Now is a good time to experiment huh?


Please do tag us on #therecipelarder on insta and facebook, with pictures if you make this recipe.


Cheers!

Check out the video here


http://therecipelarder.com/wp-content/uploads/2020/03/Beetroot-carpaccio-with-reduced-tamarind-reduction-edited.mp4


Share this Recipe

Filed Under: Dinner, Healthy, Lunch Tagged With: tamarind, vinaigrette

Soong Dal

March 4, 2019 By appu 1 Comment

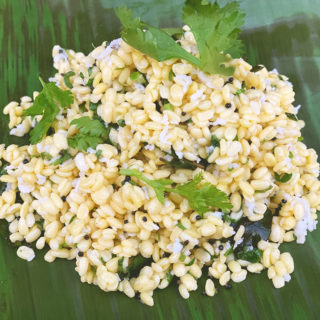
It’s that time of the year when Mahabaleshwar beckons, with its myriad sunsets, fresh fragrant strawberries and over powering array of flowers. We had ourselves farm fresh and organic vegetables just off the farm.


Since we do not use fertilisers or pesticides of any kind, we pluck off cherry tomatoes and radish straight from the Canadian pharmacy plants and merrily munch it on the go!

fresh off the farm.

For a day and a half, we were just mom and son! We ate, drank and had some crazy conversations.

We both wanted something a bit healthy for our brain doping lunch, and anyways friends who love this dish have been asking for the recipe. So we decided to make it and blog it.

This is a super healthy snack.  I sometimes have it as the lonesome dish for dinner too. It’s super filling, high in protein and very very healthy. It does not sit in your tummy, but leaves you feeling full and satiated. The tangy, spicy flavour makes it soooo very edible and tasty.

I optionally also add finely chopped raw mango (kairi) to it and reduce the lemon a wee bit. You can play around with it as you like. Reduce the spice, increase it (yaay!), add onions, take off the coconut, add a dash of green chutney!!! Just go for it. Not much can destroy this dish!

Add to it a dhokla mix, or to some other chaat item. Serve it mixed with broken idli and podi chutney. Let your creativity flow and do tell me also how you played with it!

Soong dal goes amazingly well with drinks. But serve it chilled. Like – absolutely and totally chilled. If you think of heating it – u might as well eat dal. So DO NOT HEAT this dish!!

Have fun! Cheers!


PS: Here is the video shoot we did for the Soong Dal. It’s very basic and rustic, as is the kitchen in our farm.

http://therecipelarder.com/wp-content/uploads/2019/02/soong-dal-converted-with-Clipchamp.mp4

Soong Dal
Print Recipe
A healthy and tasty snack. Super with drinks.
  • CourseAppetizer, Salad, Side Dish
  • CuisineIndian
Servings Prep Time
4 pax 5 minutes
Cook Time Passive Time
5 minutes 4 hours
Servings Prep Time
4 pax 5 minutes
Cook Time Passive Time
5 minutes 4 hours
Soong Dal
Print Recipe
A healthy and tasty snack. Super with drinks.
  • CourseAppetizer, Salad, Side Dish
  • CuisineIndian
Servings Prep Time
4 pax 5 minutes
Cook Time Passive Time
5 minutes 4 hours
Servings Prep Time
4 pax 5 minutes
Cook Time Passive Time
5 minutes 4 hours
Ingredients
  • 1 Cup Yellow Moong Dal
  • 1 Tspn oil
  • 1/2 Tspn Mustard Seeds
  • 1/4 Tspn Hing
  • 10-15 Curry Leaves
  • 1 Tspn salt
  • 1/4 Cup Coconut grated
  • 2 Tbspn Corriander Leaves finely chopped
  • 1 Tspn Green Chillies (or less/ more - according to taste)
  • 1 Tbspn lemon juice
  • 1 Tbspn Raw Mango (optional) finely chopped (reduce lemon juice)
Servings: pax
Instructions
  1. Wash and soak the yellow moong dal for 4 hours.
  2. Drain the water, rinse the dal and keep on a draining sieve for appx 20 minutes, so that no water is left.
  3. Once the water has drained, get the tadka ready. Keep the moong dal in a mixing bowl.
  4. In a tadka pan, add the oil.
  5. When hot, add the mustard seeds.
  6. When spluttering, add the hing and finally the curry leaves.
  7. All the curry leaves should splatter, so mix it with a spoon once, while still on the fire.
  8. Take off the fire and put it on the moong dal.
  9. Now add the salt, chopped corriander, coconut and green chillies (and optionally the raw mango)
  10. Lastly squeeze in the lemon juice.
  11. Mix well.
  12. Serve completely chilled.
Share this Recipe

Filed Under: Healthy, Sides Tagged With: appetizer, fresh, healthy, indian, lentils, Moondal, protein, protein power, quick, salad, Serve Chilled, snacks, south indian, spicy, tangy, yellow dal, yum

Radish Salad

April 6, 2018 By appu Leave a Comment

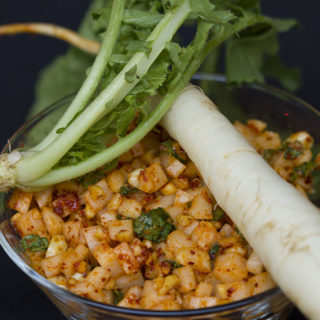
I detest radish! It’s bitter, pungent and according to me serves no purpose in the culinary world. The Japanese use a lot of radish in their cuisine, and I always wondered what they do to it to make that pungent and mouth twisting bitter taste, disappear ?! Even after tasting that kind of radish, I could still not lift a piece of raw radish from a salad! Until – this lady made me taste her concoction.

…

Read More »

Filed Under: Brunch, Healthy, Lunch Tagged With: cold pressed mustard oil, farm fresh, farm to table, gluten free, healthy, indian, indian cooking, indian salad, mooli, organic, peanuts, quick and easy, quick salad, radish, salad, vegetarian, wholesome

Puffed Rice (Kurmura) Poha

March 14, 2018 By appu 2 Comments

It was evening, and hunger pangs were making our stomach growl furiously. There was no time to make a time consuming snack, we all wanted something healthy and not too heavy. (The dinner menu looked very mouth wateringly promising!).

Rekha, our house keeper jumped to the rescue of our collective moaning tummies. She quickly chopped some onions, made a tadka of spices and curry leaves, took a large helping of puffed rice and to my astonishment, dumped it in a sieve and ran it under running water for a good 3 to 4 minutes.

By now I should not be surprised and astounded by the different ways and methods people around me cook. Rekha and my cousins and family continuously come up with new techniques and unique mixes. My last post was one such experience.

As recipes go, this one is the easiest, quickest snack you can make. You can make the onion mixture ahead of time and soak and mix the puffed rice (kurmura) just before serving.

Most of the ingredients are normally available in all Indian house holds, so there is no need to go rushing to the nearest grocer to buy something. You can of course make it spicer, more sour, add garlic … there is no end to how you can play around with the dish.

On this note, let me announce with the greatest of excitement that I have started my own Youtube channel. Its called The Recipe Larder, same as this blog.

The youtube video link to this recipe is available here. It shows you the step by step method of making this recipe. Do subscribe for more off beat recipes.

Hope you end up making this. Do send me pics!!  Cheers! and Ciao!

PS: please tag therecipelarder on istagram, if you wish to share your pics.

Puffed Rice (Kurmura) Poha
Print Recipe
A quick, easy and healthy snack made with puffed rice (kurmura).
  • CourseMain Dish, Snack
  • CuisineIndian
Servings Prep Time
3/4 pax 10 minutes
Cook Time
5 minutes
Servings Prep Time
3/4 pax 10 minutes
Cook Time
5 minutes
Puffed Rice (Kurmura) Poha
Print Recipe
A quick, easy and healthy snack made with puffed rice (kurmura).
  • CourseMain Dish, Snack
  • CuisineIndian
Servings Prep Time
3/4 pax 10 minutes
Cook Time
5 minutes
Servings Prep Time
3/4 pax 10 minutes
Cook Time
5 minutes
Ingredients
  • 3 Cups Puffed Rice (kurmura)
  • 1 Tspn Mustard Seeds (rai)
  • 1 onion Chopped finely
  • 15 -20 Curry Leaves
  • 2 Tspn Green Chillies finely chopped
  • 1/2 Tspn Turmeric powder (haldi)
  • 1/4 Cup Peanuts roasted and coarsely crushed
  • 2 Tbspn Coconut Grated
  • 1 Tbspn lemon juice
  • 1 Tspn salt
Servings: pax
Instructions
  1. Dry roast, remove the skin and coarsely crush the peanuts.
  2. Keep aside
  3. Grate the coconut and keep aside.
  4. In a pan, add the oil.
  5. When hot add the mustard seeds.
  6. When the splutter, add the chopped onions.
  7. Fry for a bit, then add the curry leaves.
  8. Fry for a few minutes more. When the onion becomes translucent, add the green chillies.
  9. Add the turmeric powder and salt and fry well.
  10. Shut the flame and keep this mixture aside.
  11. When you want to serve it, put all the puffed rice into a sieve and wash for 3 to 5 minutes under running water.
  12. tightly squeeze all the water out and keep the soaked puff rice aside.
  13. Before serving, add the puffed rice to the onion mixture. (you don't have to start the fire at this point)
  14. Add the peanuts, grated coconut, coriander leaves and lemon juice.
  15. Mix well and serve immediately.
Share this Recipe

Filed Under: Healthy, Snacks Tagged With: easy snack, healthy, indian cooking, indian food, indian snack, kurmura, muri, nutritious, organic, puffed rice, quick meal, vegetarian

Basil Pesto and Pesto Pasta

January 10, 2018 By appu Leave a Comment

It’s that time of the year again, when our farm in Mahabaleshwar is thriving and blooming. The entire farm is disrupted during the monsoons, which are heavy, non stop and torrential. In fact Mahabaleshwar gets the second highest rainfall in India, next only to Cherrapunji.

Just before the rains are predicted to stop, (and these predictions never come true!), we start planting some seeds in a sheltered area. Once the rains stop, the seeds are now seedlings and can be re transplanted in pots or beds. It’s a lot of work! The soil has to be turned, aired and new top soil has to be spread. Since we plant over almost 2 acres of land, it’s a busy time for all of us.

Seeing the seedlings burst forth into vegetables and flowers is the best thrill and pure fodder for my soul. I love the city but off late ever so often I just want to vacate my senses and vegetate with the vegetation.

This year started with a wild, wild and massive bush of Basil. So much that I did not know what to do with it. I plucked them and got them back to Bombay, still pondering in my head and actually stressing over not wasting this lot. It was fragrant, the leaves heavy with taste. I decided to make Pesto and sell it to my customers.

Pesto made with fresh fragrant organic basil

I came home and experimented with a batch. It was perfect, green and luscious. I bottled it and announced the sale, and it was gone within hours! All the bottles were booked!

Over time, the green becomes pale and dark. So if you want really bright green pesto, make it on the spot and use it. Making it a day in advance allows all the flavours to steep. But if you want to use it as a dip, or in an open sandwich, then make it on the spot.

Basil grows very easily in home cultured pots. And mind you, it can grow wild. Now when you have too much Basil, and your heart is breaking at the wastage, you know what to do with it.

We were all having fondue, and one of our friends did not like the smell of the cheese. So I made Pesto Pasta for her and her husband. I do believe the plate was polished off!!! 😀

Basil Pesto mixed with pasta

I hope you enjoy making this recipe, because there is no better smell than that of, fresh basil, smooth virgin olive oil and fragrant new garlic.

Cheer!


Basil Pesto and Pesto Pasta
Print Recipe
Fresh fragrant basil, made into pesto. Can be used as a dipping sauce, over sandwiches and salads, and of course made into a pasta.
  • CourseMain Course, Main Dish, Sauces and Jams
  • CuisineItalian
Servings Prep Time
4 pax 10 minutes
Cook Time
15 minutes
Servings Prep Time
4 pax 10 minutes
Cook Time
15 minutes
Ingredients
Pesto
  • 1 Cup Fresh Basil Leaves packed
  • 1/2 Cup Walnuts toasted
  • 1/4 Cup garlic Peeled
  • 1 1/2 tspn Sea Salt
  • 10 pcs Black Pepper
  • 1 1/2 Cup Extra Virgin Olive oil
Pasta
  • 1/2 Packet Pasta Boiled
  • 1/2 Cup Exrtra Virgin Olive Oil
  • 1/2 Cup Grated Parmesan Cheese
  • 4/5 Cherry Tomatoes for garnishing, optional.
Servings: pax
Instructions
  1. Add all the ingredients of the pesto to a food processor and mix till its cohesive and no coarse pieces can be seen or felt.
  2. Put aside to use immediately or bottle in sterilised jar for future use.
Pasta
  1. Boil the pasta and keep aside
  2. Add the oil to the pan, and then add the pesto.
  3. Add the pasta and half of the parmesan cheese.
  4. Toss well and add 1/4th cup of the pasta water to the mix
  5. Toss again
  6. Serve hot garnished with the remaining parmesan cheese and cherry tomatoes.
  7. Add a side of toasty garlic or plain bread with this dish.
Share this Recipe

Filed Under: Dinner, Healthy, Lunch, Sauces Tagged With: basil, black pepper, comfort food, farm to table, fragrant, fresh, garlic, healthy, italian, organic, parmesan cheese, pasta, quikc dish, virgin olive oil, walnuts

One Pot Chole Chawal

December 7, 2017 By appu Leave a Comment

one pot chole rice.

My grand mom made the best Chole in the world. It was a hand me down recipe from her mother who was according to me was an un hailed, un acclaimed legendary cook worth atleast a couple of Michelin Stars. Not only did she cook like her hands were blessed by the gods, but she also remembered amongst the dozens of grand and great grand children, who thronged at her home each summer, what each of us loved to eat. Our stomachs and souls were in heaven when at her home. Every morning, no matter how early we woke up, we would find her tinkering in the kitchen, singing bhajans to her beloved Krishna. I asked her one day if she has any recipes written down – and she looked at me like I was asking her if Krishna liked dance music. Every single recipe, and there were thousands in her repertoire, was stored in her head. And not once was there a variation in what we ate. Each and every time over the years the dishes tasted the same – tasty, heartwarming and soul stirring.

My nani, handed me this recipe of Chole, very casually over dinner one day. I scrambled up and wrote it down. Over the years, I have also perfected this recipe with trials and error. And while it still does not taste like how she or her mom made it, it stills holds good on it’s own….

Read More »

Filed Under: Dinner, Gluten Free, Healthy, Lunch Tagged With: childhood meals, chole, comfort food, glutenfree, grandmom's recipe, indian, memories, one pot recipe, onepot, punjabi, soul food, spices, spicy

Seed Paté

August 6, 2017 By appu Leave a Comment

Some time back, the husband and I started on a diet with Deepika, who works with Luke. She has been in touch with me on a daily basis, and I cannot convey in words how wonderful we both started feeling within weeks of our nutritional plan. Unlike other “dieticians” they don’t nail our heads to a wooden plank, if we cheat or if we don’t follow instructions to the hilt. It’s actually a slow gentle coaxing to start changing our lifestyle and eating habits. So many small issues like sleeplessness, bloating etc are taken care of, using natural home remedies. And I must say it works, because now I sleep like the proverbial log, and in the mornings the bed and I are like lovers – loathe to leave each other.

Without realising, we have now changed our eating habits. The old hogging days no longer appeal to us, and on a very elemental level, we have started opting for healthy, nutritious and wholesome meals. Overeating even a little bit makes us groan and moan unbelievably.

This diet takes care of us very holistically. Small ailments are sorted almost immediately. Over the period of a year, my blood pressure and cholesterol are within normal limits.They care for our mental, emotional and physical health. After all this, we cannot return back to our old ways of eating aimlessly and only for taste. I now look for recipes that are healthy but tasty. This  Seed Paté is one of the many such recipes.

It’s a very versatile recipe. You don’t have to follow it the way it’s written. The dill can be replaced with coriander or any other herb of your choice.  Please read the notes following the recipe, before making the Seed Paté.

It can be used in many different ways. Eat it like a sandwich, mix it in vegetables as a gravy, dip with pita, layered with a salad — the options are endless and left to your imagination.

I hope you enjoy it as much as we do.


Seed Pate
Print Recipe
Versatile, super quick, easy, gluten free and healthy.
  • CourseSnack
  • CuisineFusion
Servings Prep Time
4 pax 5 minutes
Cook Time
5 minutes
Servings Prep Time
4 pax 5 minutes
Cook Time
5 minutes
Seed Pate
Print Recipe
Versatile, super quick, easy, gluten free and healthy.
  • CourseSnack
  • CuisineFusion
Servings Prep Time
4 pax 5 minutes
Cook Time
5 minutes
Servings Prep Time
4 pax 5 minutes
Cook Time
5 minutes
Ingredients
  • 3/4 Cup Mixed Seeds (Mildly roasted) Pumpkin, Water melon, Melon, Sunflower, Flax, Sesame.
  • 1/2 Cup Boiled Chickpeas
  • 1/4 Cup Water from boiled Chickpeas
  • 8 Cloves garlic
  • 1 1/2 Tbspn Tahini
  • 1 Tspn Dill
  • 1 Tspn parsley
  • 1 Tbspn Extra Virgin Olive oil
  • 1/4 Tspn soya sauce gluten free or optional
  • 1 Tbspn Black Pepper
  • 1/2 Tspn salt
  • 4 Slices Multigrain toast.
  • 1 Tbspn Sesame seeds - roasted for garnish
  • 1 Tbspn Extra virgin
Servings: pax
Instructions
  1. Put everything in a mixie and grind to a coarse mix.
  2. Don't over grind. You want a coarse texture. Even if some seeds are only partially ground, it's fine. That's what you want.
  3. Cut the bread slices into 1 inch broad fingers and toast till crisp.
  4. To serve, heap the paté on the toast and spread. It should be a thick layer.
  5. Garnish with sesame seeds and olive oil and serve immediately. Preparing too much in advance will make the toast soggy.
  6. The paté can also be had as a dip.
Recipe Notes

Seeds : You can use any of these seeds, or a mix of all. I have used Pumpkin, Water melon, Melon, Hemp and Sunflower.

Water: I have used the same water which was left over from boiling the chickpea. The left over water is thick, and sluggish and does not flow easily. This lends a heavy texture to the paté and does not make it runny. If for some reason, you are not using this water, you can use normal filtered water. BUT REDUCE THE QUANTITY. Use a little at a time. You will not need more than 1 - 2 Tbpsn max.

Herbs: The flavour of dill is very strong. But the quantity in the recipe is just enough to give you a hint of flavour. You can do away with dill altogether and increase the parsley. You can also replace it with coriander, or basil. It's totally up to you and your preference. But some herb definitely has to be used.


Share this Recipe

Filed Under: Gluten Free, Healthy, Snacks Tagged With: deepikarathod, easysnack, glutenfree, healthy, highfibre, lukecoutinho, quicksnacks, s esayfood

Meet the Author

For the 21 years and some months that I have been alive, there has been this crazy, eccentric, always-charged-up woman with a full-time job of being a mother to 6 (2 children, 4 dogs).

In her spare time she blasts music on her DJ console, reads like a maniac, downloads shows (because God forbid she runs out of something to watch), runs an entire household, and to top it all off, manages a very successful catering business which makes the most delicious food in the entire world. Once you have her food, everything else will taste like stale socks.

This is what you call "Maa ke haath ka khana".

- Kanak

Subscribe to Blog via Email

RECIPE BY CATEGORY

Copyright © 2023 THE RECIPE LARDER