THE RECIPE LARDER

  • Home
  • Nuts and Bolts, Sauces and Pans
  • Recipes
  • Contact

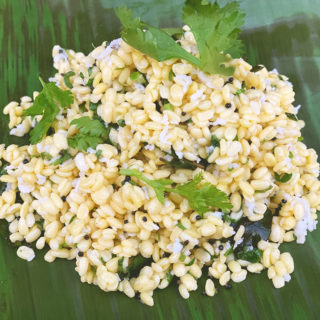
Puffed Rice (Kurmura) Poha

March 14, 2018 By appu 2 Comments

It was evening, and hunger pangs were making our stomach growl furiously. There was no time to make a time consuming snack, we all wanted something healthy and not too heavy. (The dinner menu looked very mouth wateringly promising!).

Rekha, our house keeper jumped to the rescue of our collective moaning tummies. She quickly chopped some onions, made a tadka of spices and curry leaves, took a large helping of puffed rice and to my astonishment, dumped it in a sieve and ran it under running water for a good 3 to 4 minutes.

By now I should not be surprised and astounded by the different ways and methods people around me cook. Rekha and my cousins and family continuously come up with new techniques and unique mixes. My last post was one such experience.

As recipes go, this one is the easiest, quickest snack you can make. You can make the onion mixture ahead of time and soak and mix the puffed rice (kurmura) just before serving.

Most of the ingredients are normally available in all Indian house holds, so there is no need to go rushing to the nearest grocer to buy something. You can of course make it spicer, more sour, add garlic … there is no end to how you can play around with the dish.

On this note, let me announce with the greatest of excitement that I have started my own Youtube channel. Its called The Recipe Larder, same as this blog.

The youtube video link to this recipe is available here. It shows you the step by step method of making this recipe. Do subscribe for more off beat recipes.

Hope you end up making this. Do send me pics!!  Cheers! and Ciao!

PS: please tag therecipelarder on istagram, if you wish to share your pics.

Puffed Rice (Kurmura) Poha
Print Recipe
A quick, easy and healthy snack made with puffed rice (kurmura).
  • CourseMain Dish, Snack
  • CuisineIndian
Servings Prep Time
3/4 pax 10 minutes
Cook Time
5 minutes
Servings Prep Time
3/4 pax 10 minutes
Cook Time
5 minutes
Puffed Rice (Kurmura) Poha
Print Recipe
A quick, easy and healthy snack made with puffed rice (kurmura).
  • CourseMain Dish, Snack
  • CuisineIndian
Servings Prep Time
3/4 pax 10 minutes
Cook Time
5 minutes
Servings Prep Time
3/4 pax 10 minutes
Cook Time
5 minutes
Ingredients
  • 3 Cups Puffed Rice (kurmura)
  • 1 Tspn Mustard Seeds (rai)
  • 1 onion Chopped finely
  • 15 -20 Curry Leaves
  • 2 Tspn Green Chillies finely chopped
  • 1/2 Tspn Turmeric powder (haldi)
  • 1/4 Cup Peanuts roasted and coarsely crushed
  • 2 Tbspn Coconut Grated
  • 1 Tbspn lemon juice
  • 1 Tspn salt
Servings: pax
Instructions
  1. Dry roast, remove the skin and coarsely crush the peanuts.
  2. Keep aside
  3. Grate the coconut and keep aside.
  4. In a pan, add the oil.
  5. When hot add the mustard seeds.
  6. When the splutter, add the chopped onions.
  7. Fry for a bit, then add the curry leaves.
  8. Fry for a few minutes more. When the onion becomes translucent, add the green chillies.
  9. Add the turmeric powder and salt and fry well.
  10. Shut the flame and keep this mixture aside.
  11. When you want to serve it, put all the puffed rice into a sieve and wash for 3 to 5 minutes under running water.
  12. tightly squeeze all the water out and keep the soaked puff rice aside.
  13. Before serving, add the puffed rice to the onion mixture. (you don't have to start the fire at this point)
  14. Add the peanuts, grated coconut, coriander leaves and lemon juice.
  15. Mix well and serve immediately.
Share this Recipe

Filed Under: Healthy, Snacks Tagged With: easy snack, healthy, indian cooking, indian food, indian snack, kurmura, muri, nutritious, organic, puffed rice, quick meal, vegetarian

Guacamole

February 12, 2018 By appu Leave a Comment

avocado and all other ingredients ready and prepped for mashing

To be very frank, I’m not a huge fan of Guacamole. Actually not a huge fan of Avocado either. The son, daughter and husband love it though!!

My son is on a full blown -I am going to build my body, and eat healthy – kind of streak, and he makes a lot of Guacamole, or Guac as the kids call it.

This here, is his recipe. Quick and super easy, and very filling. He made it for me last winter when he was here on holidays, and though my eyes don’t start shining in emotional gratefulness at the sight of Guac, I did dip a couple of nachos into it and I must say I was thoroughly impressed with it.

Avocado is not easily available where I stay. It grows in abundance in Bangalore, but the taste, texture and flavour is not as good as the one available in California.  When I went to spend sometime with my daughter in San Jose – California, I accompanied her to the super market. My eyes popped out, seeing the gigantic heaps of Avocado, spilling on to the floor, overflowing from their baskets. And the price!! Oh! Boy, it was being sold for peanuts.

I wanted to take back a few with me to India, but my kid gave me a fairly accurate description of the way it would get squashed and then get in between my clothes and when I would try to pull them clothes out, I would have slimy, gooey flesh smeared on my hands ….. you get the gist, don’t you?! Disheartened I gave up the idea, but began a hunt in Bombay for good Avocados. It was quite a task. They would be either underdone or over ripe and always, always very expensive.

I finally found a store, and now I get ripe to be eaten – the day I want – type of Avocado whenever I so please. It’s still a tad expensive, but it’s exotic fruit (yes Avocado is a fruit!) in India, and we pay for the glamour.

Do try out this recipe. It’s super easy and actually mashing the fruit – I found it kind of stress relieving.

avocados

http://therecipelarder.com/wp-content/uploads/2018/02/guac-converted-with-Clipchamp.mp4

Storage

Guac gets black very fast, as it starts oxidising when exposed to oxygen in the air. Lemon helps keep its colour, but it still needs further help. As such it’s best to make Guac just before serving, but it’s not always possible. To store Guac without letting the exposure affect it, store in a air tight box, or in a bowl, and cover with cling film, letting the cling film stick right on top of the guac. When you serve the guac, you will have to scrape the guac off the cling film, but it’s worth the effort.

If you want to use only one half of the fruit, retain the stone (seed), push it back into the cavity of the left over half, and cling film it tightly and keep refrigerated. This helps to a certain level, but eventually you better consume the fruit as soon as you can.

Cheers! to good fat!


Guacamole
Print Recipe
Quick and easy recipe for a healthy snack.
  • CourseAppetizer, Snack
  • CuisineMexican
Servings Prep Time
3/4 pax 10 minutes
Cook Time
5 minutes
Servings Prep Time
3/4 pax 10 minutes
Cook Time
5 minutes
Guacamole
Print Recipe
Quick and easy recipe for a healthy snack.
  • CourseAppetizer, Snack
  • CuisineMexican
Servings Prep Time
3/4 pax 10 minutes
Cook Time
5 minutes
Servings Prep Time
3/4 pax 10 minutes
Cook Time
5 minutes
Ingredients
  • 1 Ripe Avocado
  • 2 Tbspn onions Finely chopped
  • 1 Tspn Sea Salt
  • 1 Tspn Jalapeno Chillies Fresh and finely chopped, (or any other spicy green chilly)
  • 1/2 Tspn Paprika
  • 2 Tspn Cumin Powder (jeera)
  • 2 Tspn Black Pepper Coarsely ground
  • 2 Tspn Fresh Corriander roughly chopped
  • 2 - 3 Tspn lemon juice
  • 1-2 cloves garlic optional
Servings: pax
Instructions
  1. Cut the Avocado from the stem to the root, slicing the fruit into two
  2. Pull apart the two ends, and scoop out the seed with a spoon.
  3. Using a sharp knife, make horizontal and vertical slits into the flesh of the fruit.
  4. Now scoop out the flesh with a spoon, scraping into the skin of the fruit.
  5. Put all the flesh into a bowl.
  6. Add all the ingredients into the bowl with the avocado, and start pulverising with a fork. First break down the fruit and then start mashing the rest of the ingredients with the avocado.
  7. Lastly add the lemon juice and mix some more.
  8. Voila - it's ready to serve with nacho chips.
Share this Recipe

Filed Under: Cocktail Parties, Snacks Tagged With: avacado, foodfad, garlic, glutenfree, goodfat, guac, guacamole, healthy, healthyfat, healthysnack, highfibre, mexican, nachos, nogluten, snack, tortillas, Vegan, vegetarian

Matar Ka Nimona

December 28, 2017 By appu Leave a Comment

Green peas, warian from Amritsar, and gentle spices make this an amazing winter dish.

Hare Matar ka Nimona

We were in Amritsar recently, and the fresh vegetables caught my friends eyes and she really wished to take some back home.

Fresh Peas

Fresh Peas

Alas! We had all shopped so much (and hey! it was cold, we had heavy jackets as well!), that our bags were collectively over weight. My poor bereft friend had to let go of the farm fresh vegetables. But to make things a wee better we had true Punjabi Warian with us.

Warian made with lentils and spices and dried in the heat of Amritsar

Warian

Many years back I had Matar Ka Nimona at my cousins place. I remember eating bowl fulls much to her delight and finally to her dismay. She was worried I would get an upset stomach!!

Farm Fresh green peas, spiced Warian from Amritsar and gentle spices

Hare Matar Ka Nimona

This is actually a dish famous in Uttar Pradesh. It is mostly made during the winters when the peas are fresh and juicy. Wadi (Warian is Punjabi) in Uttar Pradesh, is made with fresh white pumpkin, urad dal, and garam masala. It’s dried in the heat of summer and remains intact for the year round.

I made this recipe many times last year. It’s very suitable to the Indian palate. Too alien for foreigners. It goes well with any kind of Indian Roti. Even tastes good with rice.

fresh green peas, spiced warian and a curry , just right for winters

Hare Matar Ka Nimona

You can easily avoid the onion and garlic and reduce the spice quotient. But some amount of spice is definitely needed, don’t do away with it totally. I prefer to make this without the onion and garlic.

There is something about this dish, which appeals to me greatly. The mouth feel of the pea paste and  a subtle hint of flavour left behind by the cooking  wadi, and then of course the wadi itself, along with a soft pillowy taste of potatoes cooked in the simmering gravy. The gravy tends to thicken as it goes, and thickens even more when it’s left till it is consumed. So, adding enough water is essential, and just before serving (if made a little ahead of time) add a little salted water and cook till boiling and serve immediately.

Try and get small fresh peas. That will lend to the dish an inherent sweetness, which when combined with the garam masala of the wadi makes it resonate in your mouth.


Matar Ka Nimona
Print Recipe
Farm fresh winter peas, potatoes, warian and gentle spices, make this a festive yet comforting winter dish.
  • CourseMain Dish, Snack
  • CuisineIndian
Servings Prep Time
4 pax 10 minutes
Cook Time
15 - 20 minutes
Servings Prep Time
4 pax 10 minutes
Cook Time
15 - 20 minutes
Ingredients
  • 2 1/2 Cup Peas shelled
  • 3/4 Cup Warian lightly packed
  • 1 Potato cubed into 8 -10 pcs
  • 1/2 Inch Ginger
  • 2 Green Chillies
  • 1 Bay Leaf
  • 4 Tspn Ghee
  • 1/2 Tspn Jeera (cumin)
  • Pinch Hing (asafoetida)
  • 1 Tspn red chilly powder
  • 2 Cloves garlic optional
  • 1 onion optional
  • 3 Cups Water
Servings: pax
Instructions
  1. Make a coarse paste of the peas, onion, garlic, green chilly, ginger and keep aside.
  2. Break the warian into small pieces. The warian should be broken into pieces which would fill appx half a tablespoon. We don't want powder here.
  3. Chop the potato into 10 large pieces and keep aside in water.
  4. On medium flame, add the ghee. When hot but not smoking, add the cumin and bay leaf and lastly the hing.
  5. Now add the warian and fry for appx 2 minutes.
  6. Then add the pea paste and fry till it becomes a bit dry.
  7. Now add the potatoes and fry again for a minute.
  8. Add the red chilly powder.
  9. Keep stirring as the pea paste will get caught at the bottom.
  10. Scrape all the brown parts stuck at the bottom and now add the water.
  11. Cover and let it simmer till the potato has cooked.
  12. As soon as the potatoes are done turn off the fire.
  13. Please make this dish as close to serving as possible, because the peas, potato and warian all soak up the water, and your dish will start drying out and becoming thick. Good gravy is the key to this dish.
Share this Recipe

Filed Under: Dinner, Lunch Tagged With: Amritsar, Dish from uttarpradesh, garam masala, Green peas, Green PEas Nimona, Kulcha, Matar Ka Nimona, Nimona, Papad, The Golden Temple, Uttar pradesh, Warian

Seed Paté

August 6, 2017 By appu Leave a Comment

Some time back, the husband and I started on a diet with Deepika, who works with Luke. She has been in touch with me on a daily basis, and I cannot convey in words how wonderful we both started feeling within weeks of our nutritional plan. Unlike other “dieticians” they don’t nail our heads to a wooden plank, if we cheat or if we don’t follow instructions to the hilt. It’s actually a slow gentle coaxing to start changing our lifestyle and eating habits. So many small issues like sleeplessness, bloating etc are taken care of, using natural home remedies. And I must say it works, because now I sleep like the proverbial log, and in the mornings the bed and I are like lovers – loathe to leave each other.

Without realising, we have now changed our eating habits. The old hogging days no longer appeal to us, and on a very elemental level, we have started opting for healthy, nutritious and wholesome meals. Overeating even a little bit makes us groan and moan unbelievably.

This diet takes care of us very holistically. Small ailments are sorted almost immediately. Over the period of a year, my blood pressure and cholesterol are within normal limits.They care for our mental, emotional and physical health. After all this, we cannot return back to our old ways of eating aimlessly and only for taste. I now look for recipes that are healthy but tasty. This  Seed Paté is one of the many such recipes.

It’s a very versatile recipe. You don’t have to follow it the way it’s written. The dill can be replaced with coriander or any other herb of your choice.  Please read the notes following the recipe, before making the Seed Paté.

It can be used in many different ways. Eat it like a sandwich, mix it in vegetables as a gravy, dip with pita, layered with a salad — the options are endless and left to your imagination.

I hope you enjoy it as much as we do.


Seed Pate
Print Recipe
Versatile, super quick, easy, gluten free and healthy.
  • CourseSnack
  • CuisineFusion
Servings Prep Time
4 pax 5 minutes
Cook Time
5 minutes
Servings Prep Time
4 pax 5 minutes
Cook Time
5 minutes
Seed Pate
Print Recipe
Versatile, super quick, easy, gluten free and healthy.
  • CourseSnack
  • CuisineFusion
Servings Prep Time
4 pax 5 minutes
Cook Time
5 minutes
Servings Prep Time
4 pax 5 minutes
Cook Time
5 minutes
Ingredients
  • 3/4 Cup Mixed Seeds (Mildly roasted) Pumpkin, Water melon, Melon, Sunflower, Flax, Sesame.
  • 1/2 Cup Boiled Chickpeas
  • 1/4 Cup Water from boiled Chickpeas
  • 8 Cloves garlic
  • 1 1/2 Tbspn Tahini
  • 1 Tspn Dill
  • 1 Tspn parsley
  • 1 Tbspn Extra Virgin Olive oil
  • 1/4 Tspn soya sauce gluten free or optional
  • 1 Tbspn Black Pepper
  • 1/2 Tspn salt
  • 4 Slices Multigrain toast.
  • 1 Tbspn Sesame seeds - roasted for garnish
  • 1 Tbspn Extra virgin
Servings: pax
Instructions
  1. Put everything in a mixie and grind to a coarse mix.
  2. Don't over grind. You want a coarse texture. Even if some seeds are only partially ground, it's fine. That's what you want.
  3. Cut the bread slices into 1 inch broad fingers and toast till crisp.
  4. To serve, heap the paté on the toast and spread. It should be a thick layer.
  5. Garnish with sesame seeds and olive oil and serve immediately. Preparing too much in advance will make the toast soggy.
  6. The paté can also be had as a dip.
Recipe Notes

Seeds : You can use any of these seeds, or a mix of all. I have used Pumpkin, Water melon, Melon, Hemp and Sunflower.

Water: I have used the same water which was left over from boiling the chickpea. The left over water is thick, and sluggish and does not flow easily. This lends a heavy texture to the paté and does not make it runny. If for some reason, you are not using this water, you can use normal filtered water. BUT REDUCE THE QUANTITY. Use a little at a time. You will not need more than 1 - 2 Tbpsn max.

Herbs: The flavour of dill is very strong. But the quantity in the recipe is just enough to give you a hint of flavour. You can do away with dill altogether and increase the parsley. You can also replace it with coriander, or basil. It's totally up to you and your preference. But some herb definitely has to be used.


Share this Recipe

Filed Under: Gluten Free, Healthy, Snacks Tagged With: deepikarathod, easysnack, glutenfree, healthy, highfibre, lukecoutinho, quicksnacks, s esayfood

Tawa Ka Tikla

July 20, 2017 By appu Leave a Comment

Tawa ka Tikla

This is a classic dish made by Marwaris. It’s healthy, wholesome and extremely satisfying. As a kid, I took it for school lunch almost three times a week. It’s made with whole wheat flour, so – healthy!! Ghee – good fats! Ajwain – great digestive. Whats not to like. And it’s yummylicious to boot!

The name Tawa ka Tikla is derived from the fact that it is made on a tawa (girdle) and there is no roasting on direct fire – like the normal roti’s and chapattis. The other Tikla we make is fried in ghee. Lethally tasty – that one too!

When we were growing up, we had no gas stoves at home. We were as organic as it could get. The food was cooked on a mud stove, and charcoal was used to light the fire. Of course, the kitchen got as black as well -soot, but Oh My! the food that we ate had an aroma which no smoke machine can impart. All fresh, earthy and hearty!

The stove was large and there was additional place around to keep the ready food. All the dal, rice and veggies were kept in that area. It would be hot and therefore kept the food also piping hot. No reheating, no microwave. The chapati was made directly on coal – no smell of gas and no artificial flavours. The cook would dust off the soot, liberally dribble homemade ghee and serve it to us. And nowadays, we crave “wood-fired” pizza!!

My grand mom’s man Friday would clean the stove after every meal with water, washing away all remnants of food, leaving the place clean and shiny. We needed no pest control. The hot stove would allow no cockroaches to roost. The burnt coal was converted to ash, and that was used to wash the vessels. We had to recycle before it became a fancy word.

Once every few months the man Friday, would lovingly renew the stove with fresh mud and fill up the cracks and crevices.

The simple grub was nourishing and rich and healthy. I still maintain that I hated the veggies because it was insipid at it’s best. But that was the fault of the cook and not the system. I have still not eaten that kind of dal and chapati ever again.

My sister still makes this dish – Tawa ka Tikla. I had forgotten all about it until one day I got a longing and craving to eat this ghee laden yummy snack. I could eat only one, but back in school it was a staple and I could polish off a whole lot with pickle, in the name of lunch.

It’s very simple to make. It can be cooled and kept in an airtight container for a week plus.

SOME NOTES:

Enough ghee should be put into the dry ingredients so that the flour when closed into a fist stays intact and does not fall down and disintegrate like powder.

Warm water should be used to make the dough. Add it slowly, making the consistency a bit rubbery. Each flour quality reacts its own way, so a little more or less water might have to use, than specified in the recipe.

Please don’t try to go easy on the ghee. It’s a very indispensable ingredient and if you are following the latest health trends, – then – ghee is a vital and important fat and should be consumed in restrained quantities.

The holes are made, so that the Tikla does not puff up, and gets firm and semi-crisp, as you keep pressing and cooking it.

While rolling the dough, if it’s too sticky and is cracking and breaking up, it means that the dough needs more flour and a dribble of water. Add little at a time according to consistency.

Here is the video

http://therecipelarder.com/wp-content/uploads/2017/07/tawa-tikla-converted-with-Clipchamp.mp4


It’s an excellent and nutritive dish for kids tiffins, to keep as a quick snack. Top it with hummus, a mix of cucumber tomato kachumber, serve it with hot garlic chutney, with dry potato veggie – Just go for it. Dig in!!

I hope you make it and enjoy it. Cheers!

Tawa Ka Tikla
Print Recipe
Made with whole wheat flour, this traditional Marwari dish can take the place of a quick lunch, or a satisfying snack.
  • CourseBreakfast, Brunch, Snack
  • CuisineIndian
Servings Prep Time
12 - 15` pieces 10 minutes
Cook Time
15- 20 minutes
Servings Prep Time
12 - 15` pieces 10 minutes
Cook Time
15- 20 minutes
Ingredients
  • 2 Cups Whole Wheat flour (atta)
  • 1 Tspn salt
  • 1 1/2 Tbspn Ajwain (caraway seeds)
  • 1/3 Cup Ghee (for making the dough)
  • 1/3 Cup Ghee appx - for cooking the tikla
  • 1/2 Cup Plus Filtered water
Servings: pieces
Instructions
  1. Mix all the dry ingredients and give it a good whisk
  2. Heat the ghee mildly. You should be able to dip your finger into it.
  3. Add the ghee, and mix it well
  4. When the dough is held in your fist, it should not disintegrate and should hold for a few seconds.
  5. Once its mixed well, slowly add the water.
  6. Do not add it all at once
  7. Keep adding the water and keep kneading.
  8. The dough should be such that it's easily rollable, and not break when its being rolled.
  9. So if it breaks while rolling add a tspn or so of whole wheat flour and a dribble of water.
  10. This happens because the flour is not consistent in quality. Your flour could be different from mine. It could soak more water or less.
  11. Once the dough is ready, knead it on the counter.
  12. Make small balls and keep aside
  13. Roll each ball, on the counter into a small roti.
  14. Do not make it very thin. The video gives you an estimation.
  15. Once all the rotis are rolled, set the girdle on medium heat.
  16. Keep the ghee ready.
  17. Keep a ladle ready, which can help you press and flip the tikla.
  18. Once the girdle is warm, put the roti on it. You can put as many rotis as you like, as long as there is place for them to be flipped and not bang into each other and break.
  19. Once the girdle down side is semi cooked (see video), flip it.
  20. Add ghee to the top and to the sides (see video)
  21. Poke holes with the same spoon. Do so gently. It just needs some air perforation and does not need to go all the way through totally.
  22. Keep pressing and flipping.
  23. Do so till both sides are caramel brown.
  24. At this point it will be soft. It will harden a little more when it cools down.
  25. Blot on a kitchen towel.
  26. Keep cleaning your girdle intermittently, before cooking another lot, otherwise the left over oil will smoke and char your tikla.
  27. Serve hot, with mirchi (green chilly) ka or nimbu (lemon) ka achaar (pickle)
Share this Recipe

Filed Under: Breakfast, Lunch, Snacks Tagged With: ashes, charcoal, easy food, ghee, Lunch, make and keep, marwari cuisine, mud stove, old culture, old fashioned, organic, rajasthan, recycle, satisfying, snacks, Staple, tawa ka tikla

Zucchini flowers stuffed with goat’s cheese

January 6, 2017 By appu 1 Comment

zuchini growing

It’s that time of the year when the farm turns green once more. Flowers, fruits and vegetables, growing over red soil, makes my heart soar. The thought of walking around the gardens and randomly plucking what is ready to harvest, tasting ripe strawberries on the way back to the house – and planning in my mind, what to make with the mud-encrusted produce in my hands.

pea shoots

Pea Shoots.

I planted Zucchini seeds this year, hoping we will get some fresh organic ones to eat. Frankly, I am not a great lover of Zucchini. I was actually eyeing the flowers. I had eaten some delicious stuffed Zucchini flowers, in a restaurant long ago. These flowers are not available in Bombay markets. The only way to get hold of them was to grow them – so grow them we did.

zuchini flower

And grow they did –Oh! Boy. How they grew!! Wild and unrelenting. An entire plot is covered with various sizes of Zucchini. I was completely delighted to see huge Zucchini’s hidden amongst the foliage. Sunshine yellow flowers, curling under the leaves, nestled next to the vegetable.

The flowers are very very delicate. I had my camera and some more equipment in my hand and bent down to pluck a flower. –And I damaged it. By the time I could stand up to see what I had pulled out, the poor little flower was almost wilting. I freed my hands and did what the flowers wanted to me to do. Show them some reverence. We were only two of us, so I slowly, with great care, plucked 5 more flowers from the stems.

zuchini flowers

The flowers in themselves, have a soft cosy mouthfeel, and a certain mild sweetness leant to it by the stamens. I had goat’s cheese at hand, so I decided to use that, with no additional flavouring.

stuffed flowers

I had to gently reach into the flower, (an not matter how careful I was, the petal tore at one end) and pull out the stamen. There is only one stamen per flower. Then I stuffed the cheese into the flower and gently, very gently closed the mouth. At this point, the flower should not be handled too much. Just a gentle two-fingered pinch at the mouth works. The cheese is a bit sticky, and will not come out, so this process is just to our satisfaction.

After this, I dredged the flower in egg batter, and then in breadcrumbs. I like the egg batter as it gives a lovely crisp edge. But I will also be giving you the recipe for eggless batter, which works just as well.

frying zuchini flowrrs

When you bite into soft petals, oozing with salty yet tart, goat’s cheese and the mouth fills up with a party of textures, just close your eyes and savour the goodness of this sunshine yellow very seasonal, and very difficult to get – flowers.

close up pf finsihed flowers

zucchini flowers stuffed with gat's cheese

zucchini flowers stuffed with goat’s cheese

finished stuffed zuchini flowers

close up of finished flowers2

Zucchini flowers stuffed with goat's cheese
Print Recipe
Exotic soft flowers, tart interior and crunchy crumbly crust. Simple to make, yet so fancy it makes a party come alive. The sunshine yellow flowers will take a powerful hold over you.
  • CourseSide Dish, Snack
  • CuisineFrench
Servings Prep Time
2 people 10 minutes
Cook Time
10 minutes
Servings Prep Time
2 people 10 minutes
Cook Time
10 minutes
Ingredients
  • 6 flowers
  • 6 Tbspn goat's cheese
  • oil for frying
Egg batter
  • 1 Small egg
  • 1 Tbspn mixed peppers
  • 1/2 Cup Bread crumbs
Eggless batter
  • 1 Cup all purpose flour
  • 1 Cup Ice cold water
  • 1/2 Cup Bread crumbs
Servings: people
Instructions
  1. Open the flowers delicately with two fingers, pinch the stamen and pull it out.
    Open the flowers delicately with two fingers, pinch the stamen and pull it out.
  2. Make oblong shaped rounds of Goat's Cheese, just a little smaller than the flower that you are going to stuff it in. Compact the cheese, to make it like a small lump.
    Make oblong shaped rounds of Goat's Cheese, just a little smaller than the flower that you are going to stuff it in. Compact the cheese, to make it like a small lump.
  3. Open the petals very gently, and pop the lump of goat's cheese inside the flower. Don't push and prod too much.
  4. Gently close the mouth of the flower. Be careful not to put too much pressure.
Egg Batter
  1. Whisk egg and milk together till it is just mixed. Do not over-beat.
  2. Transfer the crumbs in a shallow plate.
  3. Dredge the stuffed flowers in the egg batter, turning it continuously. The flower should only touch the surface of the egg batter. Do not drown the flowers.
    Dredge the stuffed flowers in the egg batter, turning it continuously. The flower should only touch the surface of the egg batter. Do not drown the flowers.
  4. Gently flick away excess egg batter and now coat the flowers in the breadcrumbs.
  5. In a flat pan, take approximately 1/2 an inch of oil and fry the stuffed flowers turning it till all sides are done.
    In a flat pan, take approximately 1/2 an inch of oil and fry the stuffed flowers turning it till all sides are done.
  6. Drain in paper towel. Eat immediately.
Eggless Batter
  1. Whisk the flower in ice cold water really well, so that no lumps remain.
  2. Dredge the stuffed flowers in the excess batter, turning it continuously. The flower should only touch the surface of the excess batter. Do not drown the flowers.
  3. Gently flick away excess batter and now coat the flowers in the breadcrumbs.
  4. In a flat pan, take approximately 1/2 an inch of oil and fry the stuffed flowers turning it till all sides are done.
  5. Drain in paper towel. Serve immediately.
    Drain in paper towel. Serve immediately.
  6. In a flat pan, take approximately 1/2 an inch of oil and fry the stuffed flowers turning it till all sides are done.
Share this Recipe

Filed Under: Cocktail Parties, Snacks Tagged With: farm, goat's cheese, mahableshwar, stamen, sunshine flowers, zucchini flowers

Mexican Fruit with Tajin

July 14, 2016 By appu Leave a Comment

Peaches and Pineapples with Tajin

Peaches and Pineapples with Tajin

Another Mexican dish? I’m telling you – the last trip to San Diego, I really revved on Mexican Food. It was so very different from the typical Enchilada, Burrito, Nachos!

San Diego stands on the edge of Mexico. My son was told in his orientation, to be very careful while on the local train. One stop further and he would be in Mexico, and if he did not have his visa and college papers, he would land into big trouble. That’s how close Mexico is! Now you can imagine, the Mexican food influence in San Diego!

The Mexican Street Food, was so yum! Very close to Indian food in some ways, yet a different taste bud was touched with each dish. This particular Fruit Salad was and is my favourite. The only hitch is you have to get hold of the Tajin mix, available easily online and in supermarkets all over USA.

Tajin

Tajin

Mexican fruit salad was served to us in a broad glass. They stuffed in strips of Pineapple, Apple, Mango, (and when I made it in India, I used Alphonso — OOOH! the taste!!) Melon, and a dried spicy mango, easily available in Trader Joe. The bottom of the glass had a huge dollop of this Tajin mix, and it copiously laden on the fruits too. I wanted to shove my face into the glass and lick up all the Tajin, once the fruits were over. My son had a friend join us for lunch that day. Poor chap must have thought his friend’s mom is completely addled!

watermelon wit tajin

watermelon wit tajin

Eat it on a hot day – refreshing, on a rainy day – soothing, on a blustery windy day – warming. This dish just makes you upbeat! The sour, tangy, mildly spicy (it looks very spicy, but is not), will make you want to sing and dance – the happy tune emanating from your palate. It hits all the right spots in your taste buds, and sends a zing up your body, almost like an adrenalin rush.

Use it with whatever fruit catches your fancy. Strawberries, Kiwi, Apples, Oranges, Pineapple, Peaches, Dried Fruits etc.

Pineapple with Tajin

Pineapple with Tajin

It takes only minutes to make – the major task being cutting the fruits. We had it with drinks, and it went very well with Whisky and Beer.

Peaches with Tajin

Peaches with Tajin

Let me know if you went as crazy over this dish as I did.


Mexican Fruit with Tajin
Print Recipe
Easy and immensely satisfying dish to make.
  • CourseSalad, Sides, Snack
  • CuisineMexican
Servings Prep Time
6 people 15 minutes
Servings Prep Time
6 people 15 minutes
Mexican Fruit with Tajin
Print Recipe
Easy and immensely satisfying dish to make.
  • CourseSalad, Sides, Snack
  • CuisineMexican
Servings Prep Time
6 people 15 minutes
Servings Prep Time
6 people 15 minutes
Ingredients
  • 500 gms Pineapple Cut into thick strips 3 inches long
  • 2 Mangoes Peeled and cut into thick slices
  • 2 Peaches Peeled and cut into thick slices
  • 3 pieces Dried Mango (Trader Joe) Cut to equal sizes
  • 1 Orange Peeled and segments separated.
Tajin Mix
  • 5 Tablespoon Tajin Mix
  • 4 Tablespoon lemon juice
Servings: people
Instructions
  1. Cut all the fruits and Chill.
  2. Add Tajin and Lemon juice. Add the juice a little at a time. The mixture should be a thick paste and not runny.
  3. Tajin mix already has dried lemon in it, so you don't want to drown the Tajin in too much lemon.
  4. You can make more Tajin, if the mix is less than you need. If making less the ratio become 1:1 - Tajin powder : lemon juice.
Assembling
  1. Arrange all the fruits in a dish.
  2. Drizzle the Tajin mix over the fruits.
  3. Serve a small bowl of the Tajin mix with the fruits. Some people might want to dip in for an extra dose of this amazing mix.
Share this Recipe

Filed Under: Snacks Tagged With: amazing, fruits, mexican street food, salad, sour, spicy, trjin, vegetarian

How to roast corn.

June 23, 2016 By appu 2 Comments


roasting corn

Firstly – apologies for a late blog. I have been stubbornly trying my hand at making a video. (Sometimes a 7 sec video does the work of 70 words!) You will see the videos – its a clumsy first effort – but its there! And I refused to sit and refine it further as I was too impatient to get this post out!

It’s the monsoons in Western India, and corn grows like a rapidly thriving weed in this season. Our farm in Mahabaleshwar (Mahabaleshwar is known for corn) is throwing them out by the bushels. Unfortunately, my corn loving daughter is in the throes of digging our skulls and bones in the Caribbean. The husband travels around too much and the son and mom are not too fond of corn.


(Check out the anatomy of a cob of corn.)

Nevertheless, the way we roast the corn is something I wanted to share with you. (btw – I looked up the word roast in the thesaurus. It has a completely different meaning than what I am trying to do to the corn!!)

During the monsoon, every corner has a street vendor selling corn. We were in the market in Mahabaleshwar and saw this new technique. It takes longer, but the corn gets less burnt and tastes way sweeter.

The corn is peeled off all its layers, except the last. The silk (long strands) stays inside that layer. Then over hot charcoal, the corn is cooked, turning it repeatedly, along with the last layer of the husk (leaves). What happens is that the corn inside starts getting steam cooked, and the sweetness of the silk (the long thin strands) and the flavour of the husk (leaves) permeates into the kernel.

http://therecipelarder.com/wp-content/uploads/2016/06/stage-one-roasting-corn_CLIPCHAMP_keep.mp4

Once the leaf layer, burns off, you will start seeing the kernels. The corn might burn a bit if you are not careful and if the flame is too high (as it did when I shot the video!). So one has to be a bit careful here.

http://therecipelarder.com/wp-content/uploads/2016/06/stage-2-roasting-corn_CLIPCHAMP_keep.mp4

After the last bit of husk and silk are burnt off, and you feel the corn has cooked (press a kernel and check) you can manually peel away the rest of the (now semi-charred) husk.

almost done corn

http://therecipelarder.com/wp-content/uploads/2016/06/roasting-corn-stage-3_CLIPCHAMP_keep.mp4

Your corn is now ready to eat.In India, we rub this corn with a slice of lemon, dipped in salt and red chilly powder. While rubbing the corn, squeeze the lemon wedge into the corn. You can make it as tart and as spicy as you like. This is a typical street style corn on the cob.

I make this very often for the husband. But this time around I made Mexican style street style corn (next on the blog).  The son had taken us to an excellent restaurant in San Diego, called Puesto. Mexican food bug bit me hard there. The menu was so very different from the typical Nachos, and Burritos. There is another dish that I have to put up on the blog soon – Street style fruits. I was very reluctant to let go of the water glass they had served it in. Bits of the spicy tangy mix was left over and I wanted to push my face in and lick it clean. I think letting go of the glass was as difficult as letting go of my kid when she first went to kindergarten.

Its the season to walk hand in hand with your partner or kid, get wet in the rains and munch on a hot spicy corn on the cob, straight from the street vendor. Go do yourself this favour – immediately!!

Then bring back home some corn and try roasting it my way too! How you eat it is up to you!  😛


How to roast corn.
Print Recipe
Sweet corn, over a hot charcoal grill ..... what's not to like??
  • CourseSide Dish, Snack
  • CuisineIndian
Servings Prep Time
1 person 15 minutes
Cook Time
5-10 minutes
Servings Prep Time
1 person 15 minutes
Cook Time
5-10 minutes
How to roast corn.
Print Recipe
Sweet corn, over a hot charcoal grill ..... what's not to like??
  • CourseSide Dish, Snack
  • CuisineIndian
Servings Prep Time
1 person 15 minutes
Cook Time
5-10 minutes
Servings Prep Time
1 person 15 minutes
Cook Time
5-10 minutes
Ingredients
  • 1 cob Corn Husk intact.
  • 1 wedge lemon
  • 1/2 tspn salt
  • 1 Tspn red chilly powder
Servings: person
Instructions
  1. Start the charcoal grill. When flames are medium high peel the cob, till the last layer of husk (leaf) remains on the kernels.
  2. Start roasting the corn on the fire. Keep turning the cob repeatedly.
  3. Once the husk starts burning off, your corn might burn so be careful and turn the corn faster.
  4. Check a kernel to test for doneness.
  5. If you think the corn is ready, manually remove the left over husk and silk. Be careful, it might be hot.
    If you think the corn is ready, manually remove the left over husk and silk. Be careful, it might be hot.
  6. Mix the salt and red chilly powder.
  7. Dip the wedge of line into the salt and chilly mix and rub into the cob, squeezing the lime a little all along the way.
  8. Serve hot on a thick wad of husk - the Indian way of eating it.
Share this Recipe

Filed Under: Sides, Snacks Tagged With: cob, corn, husk, kernel, monsoon, rainy day food, slik, street style food, vegetarian

Mango and Milk

May 16, 2016 By appu 4 Comments

I am off to the USA tonight – for 3 weeks. My daughter, backbone and sounding board, graduates in a few days. Life has come on a full turn for us very very proud parents. From a broken toothed sweet child, we see an independent, perfect-toothed young lady in her graduation gown, entering a brand new phase of life. I will put on a few pounds of pride weight on the 28th of May 2016!! Congratulations Kanak Somani. We love you!

Kanak loves this dish, and much as I would love to take some mangoes to USA, and make it for her, I have no intention to get delayed meeting my babies (the son meets us too!)  because of food and customs issues!!

mango milk - aka aam doodh

mango milk – aka aam doodh

————————————————————————————————————————————————-

Are you overdosed with Mango yet?? C’mon – it’s such a limited season. How can I refrain from posting these recipes? But this is the last one – I promise! And it’s the best one.

mango milk

mango milk

Mango milk – or Aam doodh as we call it in Hindi – was described to me by one of my favourite people – Manjari. Sister to my husband, and sister of my heart! I have always been a fan of milk. Of FULL FAT milk!! According to me, any other milk other than full fat should be fed to the calves. Watery skimmed milk is blemish to the world of dairy. I grew up drinking glasses and glasses of milk. I hated eating – it was a waste of time. Drinking milk, on the other hand, was quick and it was tasty. Till much, to my angst, I had to stop. I could no longer digest those copious quantities.

milk

milk

But once in a while, I still crave milk. And when that sweet Manjari mentioned this recipe I had to try it out. I make it once in a while during the mango season. And when I feed myself spoonfuls of mango soaked and rose water fragrant milk, I close my eyes and imagine my milk drinking days. I relish every single drop and spoon.

mango milk

mango milk

The tantalising flavour of mango, and milk with sugar and rose water can take you to a paradise like a garden, where the flowers are in full bloom, the wind balmy on your face and a small spring singing next to you. Bees are humming and butterflies that sit close to you, take off with a small flap of their wings after having their fill of nectar. The sun shines bright, through the shade of a mango tree. The fragrance of slowly ripening mangoes satiate your senses and send you to lethargic sleep. And when you wake up, you are pleased to no end!

Sigh!!!

Such is the charisma of this quick dish.

Whoever invented this recipe deserves a standing ovation and a lifetime supply of mangoes. And when mangoes are out of season, the supply will be of milk! This person should never be wanting off any of this two food, for the rest of her life!

Enjoy! Do let me know how you liked it.

PS: Mango milk uses Rose or Screwpine water. Please don’t mix water with essence. Water is an extract of the flower petals. It’s natural and organic. Essence is potent and most times has a chemical like aftertaste. So if you do use essence, use just a few drops. Vanilla essence will overpower the taste of mango, whereas these flower waters lend it an amazing balance.

More information on Screwpine Water here.


Mango and Milk
Print Recipe
Charming mango and milk dish.
  • CourseBreakfast, Brunch, Dessert, Side Dish, Snack
  • CuisineIndian
Servings Prep Time
1 person 10 minutes
Passive Time
4 hours
Servings Prep Time
1 person 10 minutes
Passive Time
4 hours
Mango and Milk
Print Recipe
Charming mango and milk dish.
  • CourseBreakfast, Brunch, Dessert, Side Dish, Snack
  • CuisineIndian
Servings Prep Time
1 person 10 minutes
Passive Time
4 hours
Servings Prep Time
1 person 10 minutes
Passive Time
4 hours
Ingredients
  • 250 ml Full fat milk
  • 2 Tspn sugar
  • 2 Tspn Rose / Screwpine water (Gulab or Kewra water)
  • 1 Mango
Servings: person
Instructions
  1. Add sugar to the milk and stir to dissolve it. Use a large container. The milk will chill faster, and you need to dip your hand into it for a later step.
  2. Chill.
  3. Peel and cut the mango into cubes. Keep aside.
  4. Take the seed of the mango, and dipping it into the milk with your hands, rub all the pulp into the milk.
  5. Stir and add the mango cube.
  6. Add the rose or screwpine water and stir again.
  7. Chill for 2 hours minimum. The flavour of the rose/screwpine water seaps in, as does that of the mango pulp and pieces.
  8. Serve chilled.
Share this Recipe

Filed Under: Beverages, Breakfast, Desserts Tagged With: chilled, cold, full fat milk, Mango, milk, yum

Meet the Author

For the 21 years and some months that I have been alive, there has been this crazy, eccentric, always-charged-up woman with a full-time job of being a mother to 6 (2 children, 4 dogs).

In her spare time she blasts music on her DJ console, reads like a maniac, downloads shows (because God forbid she runs out of something to watch), runs an entire household, and to top it all off, manages a very successful catering business which makes the most delicious food in the entire world. Once you have her food, everything else will taste like stale socks.

This is what you call "Maa ke haath ka khana".

- Kanak

Subscribe to Blog via Email

RECIPE BY CATEGORY

Copyright © 2023 THE RECIPE LARDER