THE RECIPE LARDER

  • Home
  • Nuts and Bolts, Sauces and Pans
  • Recipes
  • Contact

Cheesy paprika beans – by Rekha

March 28, 2020 By appu Leave a Comment

Cheesy paprika beans - by Rekha
Print Recipe
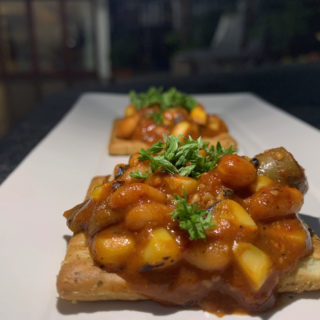
A quick easy and super tasty recipe by Rekha, one if my favourite cooks in this whole wide world. Best part about this recipe is that it can be used as a dip or a main.
  • CourseAppetizer, Main Dish, Side Dish
  • CuisineFusion
Servings Prep Time
6 pax 15 min
Cook Time
10 min
Servings Prep Time
6 pax 15 min
Cook Time
10 min
Ingredients
  • 2 Tbspn olive oil
  • 1/2 Cup onion Finely chopped
  • 2 Tbspn Garlic ginger paste
  • 1 Tspn Green Chillies Finely chopped
  • 1-2 Tbspn Red Chilly Paste (depends on your level of spice)
  • 1 1/2 Cups tomatoes Skin removed and finely chopped
  • 1/4 Cup Water
  • 2 Tbspn Red Pepper Charred and finely chopped
  • 2 Tbspn Yellow pepper Charred and finely chopped
  • 2 Tbsn Green pepper Charred and finely chopped
  • 1 Fresh Jalapeno Charreed and finely chopped (optional)
  • 1 Corn on the cob Charred and corn kernels removed
  • 1/4 Cup Sliced Green Olives
  • 1/2 Cup Grated Cheese (any good melting cheese)
  • 1 tspn salt
Servings: pax
Instructions
  1. Char the corn, pepper and jalapeno.
  2. Take the corn kernels off.
  3. Chop the charred peppers and jalapeno and keep aside.
  4. Skin and finely chop the tomaotes.
  5. In a pan, add the oil. When hot add the onions and saute for a bit till onions are translucent
  6. Then add the ginger garlic paste and saute till a bit brown.
  7. Add the chopped green chillies and saute again.
  8. Now add the chilli paste and saute once for for appx 2 minutes.
  9. Add the skinned tomatoes, and saute till it becomes a bit pulpy and mashed. Add water and let it cook till completely mush. Add the salt.
  10. Add the charred and chopped peppers and the jalapeno and saute for a bit.
  11. Now add the corn and mix well.
  12. Then add the cheese and stir till it melts completely and incorporates with the other ingredients.
  13. Add the olives stir and turn off the fire.
  14. Add the beans and mix and incorporate everything together.
  15. This can be served on toast, on cream cracker or salted biscuits, on sourdough etc. Can be served as a starter or a main dish.
Recipe Notes


My mami (Rekha) is my backbone and my best friend. All that I have learnt in cooking and about cooking is from her. She has this fabulous gift – she opens her pantry cupboard, randomly pulls out ingredients and makes the most amazing dish you could never have thought of. Some ingredients you would not even imagine cohabiting well together. And the best part is that all these dishes are simple, and can be made really quickly. What I find most amazing is that she rarely ever repeats any dish!

For this post, I asked her to come up with one of her creations. We were in Mahabaleshwar, with odds and ends and luckily I had all the things she wanted for this dish. I tried it and it was as usual flawless.


At this point, when things are going all over the place, I really want to express my gratitude for having her in my life. We have had such wild, hilarious and at times intense moments together. Life has been very good because she existed in it. Her laughter is so infectious, her dancing so enjoyable and she sparkles wherever she goes.

I love you mami, and may we do more wild things together soon!


About the recipe :

Char the corn and peppers very lightly. We don’t want black stuff coming onto the dish. The purpose of charring is to draw out the juices and not burn it. Once charred, scrape off the few black skins that have burnt completely.

Olives gave an excellent tang to the dish. If you don’t have sliced olives, just pit the ones you have and slice them. Add them last like I have shown in the recipe. It does not cook and leaves the slight sour and crisp taste at every bite.

Skinning the tomatoes is a must. It mashes super well into the mix and leaves behind no fiber. It looks better also, than pieces of skin floating around in a otherwise neat looking, colourful dish.

Jalapeno is optional if you don’t like heat. But do not reduce quantities of any other ingredients.

It can act as a main dish, just serve with toast. Or serve it on cream cracker biscuits or on sourdough. Garnish with some chilly flakes and I would also recommend a hint of finely chopped chives.

Any cheese which melts and does not clump is good. I used normal Britannia cheese mixed with a little left over Britannia Cheeza (pizza cheese mix).


The Trick: in this recipe is that, each time you add an ingredient, sauté it for a bit. Take your time, the flavours just swell up and burst.

I hope you like this recipe. Do tag us on our insta page. #therecipelarder

PS: the dish in the video and pictures were made on two different days. Same recipe - different cheese.

Cheers!

YOUTUBE LINK to recipe :   https://youtu.be/uXKI5UPpY-s


Recipe Video here:


http://therecipelarder.com/wp-content/uploads/2020/03/Cheesy-Paprika-sauce-with-beans-converted-with-Clipchamp.mp4

Share this Recipe

Filed Under: Cocktail Parties, Sides, Snacks Tagged With: bakedbeans, maindish, mains

Beetroot Carpaccio with Tamarind Redution Vinaigrette.

March 19, 2020 By appu Leave a Comment

Beetroot Carpaccio with reduced Tamarind Redution.
Print Recipe
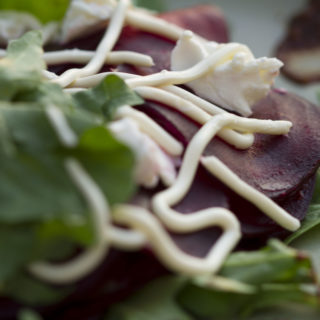
Thin veils of roasted beetroot, a fusion tamarind reduction and goats cheese. A salad made for cosy afternoons.
  • CourseSalad
  • CuisineFusion
Servings Prep Time
3 pax 15 minutes
Cook Time Passive Time
1 hour - plus 30 minutes
Servings Prep Time
3 pax 15 minutes
Cook Time Passive Time
1 hour - plus 30 minutes
Ingredients
  • 2 Beetroots
  • 2 Tbspn Tamarind
  • 2 Kashmiri Chillies
  • 1 Chipotle Chilly
  • 1 Tspn Corriander seeds
  • 1 Tspn Fenel Seeds
  • 1 Tspn Cumin Seeds
  • 1 Tspn Black Pepper
  • 2 Tbspn Water for cooking the tamarind reduction.
  • 1/2 Tspn salt
  • 1/1 Tspn soya sauce
  • 100 gms goat's cheese
  • 10 Salad Leaves preferably - rocket, aurugula, baby spinach.
Servings: pax
Instructions
  1. Preheat oven to 200 Deg F.
  2. Wash the beetroots well and scrub it.
  3. Enclose the wet beetroots in foil and place in the middle rack of the oven. This should take appx 1 hour.
  4. Soak the tamarind in hot water and leave aside for appx 30 minutes. Use only as much water to soak the tamarind. Do not use excess water.
  5. Soak the chillies and seeds and black pepper together in a bowl, with hot water. Keep aside for appx 30 minutes
  6. After appx 30 minutes, mash the tamarind and strain the juices with a strainer. Throw away the pulp (or use for marination) and keep the juices.
  7. In a grinder, grind to paste the strained tamarind, chillies, seeds and black pepper.
  8. Heat some oil in a pan and saute the tamarind and red chilly paste.
  9. Add salt and the 2 tbspn water and let it cook for appx a minute.
  10. Set aside to cool in a bowl.
  11. ASSEMBLY: (see video) 1) Place the leaves on the plate. 2) Arrange the beets in a circle on the leaves. 3) Smear scantily, the reduced tamarind vinaigrette. 4) Place blogs of goats cheese on the smeared beets. 5) Repeat again with the beets, then tamarind reduction and goats cheese, till all the beets are over.
  12. Garnish with piped cheese cream and more salad leaves.
  13. Serve totally chilled.
Recipe Notes

I have been a wee bit obsessed with all things carpaccio for a bit. Those thin, almost translucent slices of veggies fascinate me. These thin veils, with their dressing or sauce, melting in the mouth – the whole experience just makes me feel so good. I mean how can something so thin leave behind an explosion of flavors?


Goat’s cheese is my all time favourite cheese, snack, and go to for balance in taste. Tamarind is one of my favourite sour sides, and a very underrated variety. When have you heard of tamarind being used as a salad vinaigrette and yet it’s a kin of the oft used balsamic (sort off!!)


I don’t want to gabber too much, because you really need to go check out the recipe and make it. Now is a good time to experiment huh?


Please do tag us on #therecipelarder on insta and facebook, with pictures if you make this recipe.


Cheers!

Check out the video here


http://therecipelarder.com/wp-content/uploads/2020/03/Beetroot-carpaccio-with-reduced-tamarind-reduction-edited.mp4


Share this Recipe

Filed Under: Dinner, Healthy, Lunch Tagged With: tamarind, vinaigrette

Seed Paté

August 6, 2017 By appu Leave a Comment

Some time back, the husband and I started on a diet with Deepika, who works with Luke. She has been in touch with me on a daily basis, and I cannot convey in words how wonderful we both started feeling within weeks of our nutritional plan. Unlike other “dieticians” they don’t nail our heads to a wooden plank, if we cheat or if we don’t follow instructions to the hilt. It’s actually a slow gentle coaxing to start changing our lifestyle and eating habits. So many small issues like sleeplessness, bloating etc are taken care of, using natural home remedies. And I must say it works, because now I sleep like the proverbial log, and in the mornings the bed and I are like lovers – loathe to leave each other.

Without realising, we have now changed our eating habits. The old hogging days no longer appeal to us, and on a very elemental level, we have started opting for healthy, nutritious and wholesome meals. Overeating even a little bit makes us groan and moan unbelievably.

This diet takes care of us very holistically. Small ailments are sorted almost immediately. Over the period of a year, my blood pressure and cholesterol are within normal limits.They care for our mental, emotional and physical health. After all this, we cannot return back to our old ways of eating aimlessly and only for taste. I now look for recipes that are healthy but tasty. This  Seed Paté is one of the many such recipes.

It’s a very versatile recipe. You don’t have to follow it the way it’s written. The dill can be replaced with coriander or any other herb of your choice.  Please read the notes following the recipe, before making the Seed Paté.

It can be used in many different ways. Eat it like a sandwich, mix it in vegetables as a gravy, dip with pita, layered with a salad — the options are endless and left to your imagination.

I hope you enjoy it as much as we do.


Seed Pate
Print Recipe
Versatile, super quick, easy, gluten free and healthy.
  • CourseSnack
  • CuisineFusion
Servings Prep Time
4 pax 5 minutes
Cook Time
5 minutes
Servings Prep Time
4 pax 5 minutes
Cook Time
5 minutes
Seed Pate
Print Recipe
Versatile, super quick, easy, gluten free and healthy.
  • CourseSnack
  • CuisineFusion
Servings Prep Time
4 pax 5 minutes
Cook Time
5 minutes
Servings Prep Time
4 pax 5 minutes
Cook Time
5 minutes
Ingredients
  • 3/4 Cup Mixed Seeds (Mildly roasted) Pumpkin, Water melon, Melon, Sunflower, Flax, Sesame.
  • 1/2 Cup Boiled Chickpeas
  • 1/4 Cup Water from boiled Chickpeas
  • 8 Cloves garlic
  • 1 1/2 Tbspn Tahini
  • 1 Tspn Dill
  • 1 Tspn parsley
  • 1 Tbspn Extra Virgin Olive oil
  • 1/4 Tspn soya sauce gluten free or optional
  • 1 Tbspn Black Pepper
  • 1/2 Tspn salt
  • 4 Slices Multigrain toast.
  • 1 Tbspn Sesame seeds - roasted for garnish
  • 1 Tbspn Extra virgin
Servings: pax
Instructions
  1. Put everything in a mixie and grind to a coarse mix.
  2. Don't over grind. You want a coarse texture. Even if some seeds are only partially ground, it's fine. That's what you want.
  3. Cut the bread slices into 1 inch broad fingers and toast till crisp.
  4. To serve, heap the paté on the toast and spread. It should be a thick layer.
  5. Garnish with sesame seeds and olive oil and serve immediately. Preparing too much in advance will make the toast soggy.
  6. The paté can also be had as a dip.
Recipe Notes

Seeds : You can use any of these seeds, or a mix of all. I have used Pumpkin, Water melon, Melon, Hemp and Sunflower.

Water: I have used the same water which was left over from boiling the chickpea. The left over water is thick, and sluggish and does not flow easily. This lends a heavy texture to the paté and does not make it runny. If for some reason, you are not using this water, you can use normal filtered water. BUT REDUCE THE QUANTITY. Use a little at a time. You will not need more than 1 - 2 Tbpsn max.

Herbs: The flavour of dill is very strong. But the quantity in the recipe is just enough to give you a hint of flavour. You can do away with dill altogether and increase the parsley. You can also replace it with coriander, or basil. It's totally up to you and your preference. But some herb definitely has to be used.


Share this Recipe

Filed Under: Gluten Free, Healthy, Snacks Tagged With: deepikarathod, easysnack, glutenfree, healthy, highfibre, lukecoutinho, quicksnacks, s esayfood

Cucumber Boat Salad

February 20, 2017 By appu 2 Comments

Chilled Cucumber Boat Salad

The Daughter made another demand — I’m so pleased she has got into cooking! The chef in me feels fulfilled and the mom and me feel happy! 😛

I make this salad very often at home. It needs to be served really really chilled, so it is a good idea to make it a wee bit in advance.

It’s a messy salad though! Be prepared for a white moustache and a few drips down your chin! But it’s worth the dishevelled look you will sport while eating it.

Look for crisp cucumbers with a clean green interior. I always cut off the side of the cucumber and taste it before using it. Sometimes cucumbers can be very very bitter, and even one bitter cucumber in a salad of 20 cucumbers can spoil the entire dish. Taste it and throw it away if its bitter. (You can always chuck it in the compost pile of course!)

The yoghurt should be thick, so hang it for an hour or so if you want. There is zero neatness in this salad, so there really isn’t any right or wrong way to fill it. Slice the spring onions really thin and small. Garlic can be upped as per your taste. To my mind, too much garlic takes away the sweetness of the yoghurt and the original taste of the cucumber.

I add a little of chilli flakes, but you can always add some herbs too – parsley, thyme, oregano. Don’t use very strong herbs. Again – it takes away the original flavours.

The boats can get very wobbly, as the base is rounded. You can slice off a small part of the cucumber from the bottom to make a little steadier base. But – mostly, it will wobble and fall a little to the side, but if the yoghurt is not too drippy things should not slide out and drip into the plate.

I’m attaching a quick video for you.

I hope you enjoy this salad. Do write in.

As always – Cheers! and Happy Times!

http://therecipelarder.com/wp-content/uploads/2017/02/cucumber-boat-salad_CLIPCHAMP_480p.mp4

Cucumber Boat Salad
Print Recipe
Crips. filling, gooey, and crunchy. Great as a cocktail snack, as well as a salad. Don't let the fancy look deter you from making this perfectly easy and hearty salad.
  • CourseSalad
  • CuisineFusion
Servings
4 peopl
Servings
4 peopl
Cucumber Boat Salad
Print Recipe
Crips. filling, gooey, and crunchy. Great as a cocktail snack, as well as a salad. Don't let the fancy look deter you from making this perfectly easy and hearty salad.
  • CourseSalad
  • CuisineFusion
Servings
4 peopl
Servings
4 peopl
Ingredients
  • 2 large cucumbers peeled and slit lengthwise
  • 1/2 cup hung curd or greek yoghurt
  • 1 green oinion finely chopped with greens
  • 1 tspn salt
  • 1 tbspn garlic coarsely pounded
  • 1 tspn Black Pepper
  • 1 tspn chilli flakes
  • 1 tspn herbs optional.
  • 50 grams alfa alfa sprouts soaked in cold water
Servings: peopl
Instructions
  1. Peel and slit the cucumbers lengthwise.
  2. De seed the inner core using a spoon (see video) Chill in refrigerator till you need to fill it.
  3. Chop the green onions finely. Use all the whites and some of the greens
  4. Soak the alfa alfa in iced water, so that it untangles and the sprouts open up. Drain before using.
  5. In a clean bowl, mix the hung curd or greek yoghurt with all the other ingredients.
  6. Taking a small spoon, fill the cores of the cucumbers with the filling. A little will drip out. You can either leave it, or wipe it with a clean paper towel.
  7. Heap the sprouts on the yoghurt mix.
  8. This salad can be filled in advance, or just before eating. Either way, the filled boat, or the filling and cored cucumber should be in the refrigerator till served.
Share this Recipe

Filed Under: Brunch, Cocktail Parties, Dinner, Lunch Tagged With: Alfa Alfa Sprouts, Chilled Salad, Chilli flakes, crisp, cucumbers, Foodie, Greek Yoghurt, Hung Curd, salad, Serve Chilled, Stufed

Aamba Haldi on Goat’s Cheese toast.

November 25, 2016 By appu Leave a Comment

amba haldi

amba haldi

This is something my grandmother used to have on her table, every winter – with big chunks of garlic and green chillies. This tart, sour mix tastes absolutely amazing with Indian meals. Try it with khichadi, roti, rice and dal, anything.

I made something completely off beat with it though. This is how it happened – I had guests coming over for dinner, I had fresh goat’s cheese on hand, and I love goat’s cheese, – And – I was bored of serving the same old goat’s cheese with the quintessential caramelised onions, or roasted veggies. So I looked in the fridge and saw my freshly made amba haldi.

I ran the tastes of both goat’s cheese and amba haldi in my mind, and thought it was worth taking the risk. I served it with great trepidation and waited with baited breath for feed back (no I had no time to taste it before serving it! – in any case I had already liked the pairing in my head!)

amba haldi on goat's cheese toast

amba haldi on goat’s cheese toast

Everyone liked it. They loved the taste. And thank God, because it was very offbeat and very risky to serve something so bizarre!

Amba Haldi, is basically fresh white turmeric or mango turmeric. This is the yellow slices you see. The orange one is new turmeric. Ordinarily these two go together in this very traditional Indian pickle, optionally along with garlic and green chillies. It’s available in the onset of winter, and makes for a good healthy pickle which also works to build your immunity.

amba haldi with garlic and green chillies, in lemon juice

amba haldi with garlic and green chillies, in lemon juice

Amba haldi, tastes sour and tart. A lot like raw mango; even without the lemon juice decoction. Turmeric – well most of us have turmeric as a spice in our food. It really has no taste, but the raw turmeric does. It has an odd piquant taste, not very strong. Not something you need to get used to like truffles. It’s just a very different taste. I cannot liken it to any other flavour I have had.

Scrape the skin with a sharp knife, as the peeler will take away too much of the flesh. The skin is so thin and new that scraping with a  sharp knife is good enough. Be careful as the turmeric will colour your hands yellow. It needs a load of lemon juice. Adding garlic and chillies is completely your call, as is adding salt. We Indians, any case eat a lot of salt in our diet, so I skipped it in my amba haldi pickle.

amba haldi on goat's cheese toast 5

pile on the amba haldi as per your taste

pile on the amba haldi as per your taste

It hits the market as soon as the weather starts getting pleasant and the skin feels a bit dry! Also, try and get the fresh green peppers. I will give you the recipe for that real soon.

Enjoy and do send me feedback about this very off the beaten track combination.


Aamba Haldi on Goat's Cheese toast.
Print Recipe
Sour, tart amba haldi with soothing goats cheese.
  • CourseSide Dish
  • CuisineFusion, Indian
Servings
4 -6 people
Servings
4 -6 people
Aamba Haldi on Goat's Cheese toast.
Print Recipe
Sour, tart amba haldi with soothing goats cheese.
  • CourseSide Dish
  • CuisineFusion, Indian
Servings
4 -6 people
Servings
4 -6 people
Ingredients
amba haldi
  • 250 gm amba haldi fresh
  • 250 gm fresh hadli (turmeric)
  • 30 large lemons squeeze out the juice
  • 8 green chilles split length wise (optional)
  • 8 pods garlic sliced (optional)
  • 2 tspns rock salt optional
goats cheese toast with amba haldi
  • 200 gms fresh goat's cheese
  • 1 loaf french baguette sliced diagonally into 1/2 inch slices
other stuff
  • 1 large glass jar with an air tight cover
Servings: people
Instructions
  1. Scrape the amba haldi and fresh turmeric and dip in cold water to clean remnants of peels
  2. Slice into long thin slices (juliennes)
  3. Put the juliennes and the optional green chillies, garlic, salt in the glass jar.
  4. Top with lemon juice
  5. Keep in sun for 2 days (optional). You can also just leave it outside at room tempreture
  6. Use after two days.
  7. Can be served as a pickle with meals. Referigerate.
For the goat's cheese toast
  1. Slightly toast the baguette slices
  2. Add a good thick layer of goat's cheese (appx 2 tbspn) and spread it.
  3. Add juliennes of amba haldi on it. Do this just before serving, as the goat's cheese will get stained yellow. Add as many juliennes as you would like.
  4. Some people will not be able to have too many at a go, while some might like a load of it. You could leave it for your guest to add at their discretion. Though I wouldn't do that. Forcing them to try atleast a slice, with a few pieces would be ideal.
  5. You could leave some of the amba haldi in a bowl for people to add more if they so desire.
Recipe Notes

To keep your amba haldi fresh and uncomtaminated till it's over, always use a fresh clean and dry spoon to take it out of the jar. If you need to take out some more after the first round, use another spoon. We normally keep our spoons on the counter, where it either mixes with something else, or gets contaminated via the surrounding air and its bacteria.

Remember - each time a new spoon. And don't leave the spoon inside the jar.

Share this Recipe

Filed Under: Sides Tagged With: amba haldi, fresh turmeric, fusion, goat's cheese, indian, Lemon juice, mango turmeric, pickle, yummy

Lettuce Wedge Salad

November 18, 2016 By appu Leave a Comment

I first had Lettuce Wedge Salad, in London, in a restaurant called Roka. Of course, the restaurant has stayed a favourite, as has this salad. I would always, analyse it, gaze at it in wonder and awe, thinking I will replicate it in some manner. And – I would always forget.

lettuce wedge salad

The fresh crisp lettuce, perfect square wedges of stacked leaves, the immensely flavourful dressing – everything made it a favourite, of ordered a dish.

 lettuce wedge salad

I went on a hunch, (because I was daunted by those perfect square wedges) and bought two fresh heads of lettuce. I had no idea how to cut it. No matter how many times I would visit the salad in my mind’s eye, knife in hand, I could not figure out how to cut it. I have no formal training in cuisine, so these skills are alien to me, till I figure them out.

lettuce wedge salad2

With great trepidation, I cut the salad in half, vertically, root to the top of the head. Then I sank all the four heads in ice water, (more ice, less water) and left it to hydrate for approximately 30 minutes. Let me tell you what happened! The lettuce took in so much water, it took me another 10 minutes to drain it. But the lettuce was happy to have had that water. The leaves were crisp and clean.

Then I randomly chopped here and there, but the wedges were nowhere near perfect. I took a pause and really visualised, and them hit on the right technique.

This is how it is done.

Firstly – try not to use a metal knife. The metal in the knife oxidises the leaves and makes them look soggy.  A plastic or ceramic knife works very well. I had bought a ceramic knife from Japan, Kyocera brand, and was warned that it could lop off my fingers if I am not careful. I use it very sparingly, because hey! I love my digits.

Now then on to the method –

I am going to be showing pics at every step because I am finding it very difficult to explain the process! Words are just not enough.

Chop the lettuce vertically, from the root to the top. (see pic below)

Cut from root to top.

Cut from root to top.

Dunk in ice water, and drain well after 30 minutes.

Now take the chopped side, the side where you can see all the layer of leaves, and place that to your right. (see pic below)

The side which is cut, keep it to your right

The side which is cut, keep it to your right

Then, take three, (if you have a larger head of lettuce then take four or five) long wooden barbecue sticks, (they should be larger than cocktail toothpicks – about 4 to 5 inches long) and leaving an inch from the side of the cut side of the lettuce, poke them at 1 and 1/2 inches interval. This is done 90 Deg from the cut side of the lettuce, and not parallel to the root and cut side of the lettuce. (see pic below)

Stick bbq sticks into the lettuce

Stick bbq sticks into the lettuce

The cutting will happen from the non-cut side of the lettuce. The one which is the root side and on your left. The opposite side of the cut side of the lettuce. (see pic below)

This from where you will cut a large wedge

This from where you will cut a large wedge

Taking your knife and leaving an inch from the uncut side of the lettuce, cut off the part with the toothpick inserts. The toothpick inserts should now be all in a row, and the large wedge should have separated from the main head of lettuce. (see pic below)

how to cut into wedges 2

Slice of the entire strip with the bbq sticks

Slice of the entire strip with the bbq sticks

Now, just lop off individual wedges, seeing that you get as close to a square as possible. (see pic below)

Cut off individual wedges.

Cut off individual wedges.

Trim the wayward leaves, and push the stack of cut lettuce wedge further into the stick.

Garnish, turning it all around.

Garnish well - rotating all sides.

Garnish well – rotating all sides.

Serve Chilled.

Lettuce wedge salad with Japanese sesame oil dressing

Lettuce wedge salad with Japanese sesame oil dressing


Lettuce Wedge Salad
Print Recipe
Crisp, refreshing and immensely flavourful salad. Quick and easy to make, though it looks a bit daunting.
  • CourseSalad
  • CuisineFusion, Japanese
Servings Prep Time
4 people 20 minutes
Passive Time
30 minutes
Servings Prep Time
4 people 20 minutes
Passive Time
30 minutes
Ingredients
  • 2 heads lettuce fresh
For the dressing
  • 6 Tbspn Sesame oil
  • 2 Tbspn light soya sauce
  • 2 Tspn White wine vinegar
  • 1.5 Tspn salt
  • 3.5 Tbspn garlic Minced
  • 2 Red thai , or bird's eye chilly dried or fresh
  • 3/4th Tspn Black Pepper ground
Last garnish
  • 2.5 Tbspn Sesame Seeds Roasted
Servings: people
Instructions
  1. Chop the lettuce vertically, from the root to the top.
    Chop the lettuce vertically, from the root to the top.
  2. Dunk in ice water, and drain well after 30 minutes.
  3. Now take the chopped side, the side where you can see all the layer of leaves, and place that to your right.
    Now take the chopped side, the side where you can see all the layer of leaves, and place that to your right.
  4. Then, take three, (if you have a larger head of lettuce then take four or five) long wooden barbecue sticks, (they should be larger than cocktail toothpicks - about 4 to 5 inches long) and leaving an inch from the side of the cut side of the lettuce, poke them at 1 and 1/2 inches interval. This is done 90 Deg from the cut side of the lettuce, and not parallel to the root and cut side of the lettuce.
    Then, take three, (if you have a larger head of lettuce then take four or five) long wooden barbecue sticks, (they should be larger than cocktail toothpicks - about 4 to 5 inches long) and leaving an inch from the side of the cut side of the lettuce, poke them at 1 and 1/2 inches interval. This is done 90 Deg from the cut side of the lettuce, and not parallel to the root and cut side of the lettuce.
  5. The cutting will happen from the non cut side of the lettuce. The one which is the root side and on your left. The opposite side of the cut side of the lettuce.
    The cutting will happen from the non cut side of the lettuce. The one which is the root side and on your left. The opposite side of the cut side of the lettuce.
  6. Taking your knife and leaving an inch from the uncut side of the lettuce, cut off the part with the toothpick inserts. The toothpick inserts should now be all in a row, and the large wedge should have separated from the main head off lettuce.
    Taking your knife and leaving an inch from the uncut side of the lettuce, cut off the part with the toothpick inserts. The toothpick inserts should now be all in a row, and the large wedge should have separated from the main head off lettuce.
  7. Now, just lop off individual wedges, seeing that you get as close to a square as possible.
    Now, just lop off individual wedges, seeing that you get as close to a square as possible.
  8. Trip the wayward leaves, and push the wedges little further into the bbq stick.
  9. Repeat the same way with the balance left over lettuce head.
  10. if serving later, keep covered, in ice water.
Sesame oil dressing
  1. Mix all the ingredients and give it a good whisk.
Finishing
  1. Rotate the lettuce wedges, and drizzle dressing generously.
  2. Serve Chilled. Garnish with sesame seeds just before serving.
Share this Recipe

Filed Under: Brunch, Dinner, Lunch Tagged With: cermaic knife, lettuce, lettuce wedge salad, light soya sauce, minced garlic, sesame oil. garlic

Beer Battered Onion Rings

October 27, 2016 By appu 2 Comments

First and foremost let me be fiercely profuse in my apologies for just disappearing. I spent 3 weeks running around Europe having a mad time. First two weeks with my girlfriends in Ireland, and then with the husband and another couple in Germany. It was a sabbatical of enormous proportions.

The super special girls' trip.

The super special girls’ trip.

Our farm in Mahabaleshwar is well on its way to being planted. The rains were particularly vicious this year. We lost many trees and shrubs. But well, that’s the ebb and flow of life, and we are looking forward to some organic, homegrown fruits and vegetables.

I had my best friend over in Mahabaleshwar, and we kindled up the wood-fired oven and made ourselves some pizza. I make the dough using fresh yeast. When it is nice and plumply risen, I roll out small rounds and give it an initial dance into the fire. Once it’s mildly pre-cooked, I add the pizza sauce, cheese and toppings and send it for another jig. As a result, I get thin – and I mean ultra thin pizzas, with a crunchy crisp bite.

Nishi and me.

Nishi and me.

This time around, the wood was still wet from the rains. The fire would not catch, the hearth would not heat and the pizzas would just not pre-cook. After a few exasperated tries (the dough was rising, and would have spoilt) I picked up the rolled out pizza dough and flipped it straight into the flames.

I heard a collective gasp from my helpers. One started dancing on his feet, saying “ It will burn, it will burn”. I just grinned and took a tong and flipped it over to let it cook the other side. All this took just a few seconds. And out came the most fantastic precooked pizza. It had blown up like a pita bread, but the results were sooooo good. Crunchy, with oozing melting cheese which stuck to our palates and teeth.

beer battered onion rings

beer battered onion rings

What I am trying to say here is cooking is an art – agreed, but it is also instinct. When I give cooking classes, I always tell my students, don’t think too much. If you want to substitute an ingredient with another do it. If you want to increase the heat do it. There is no right or wrong in cooking. Some person somewhere must have had jam with goat’s cheese and then started the trend of serving preserves with cheese. To my taste buds – nothing tastes better!

beer battered onion rings with a sprinkling of chaat masala

beer battered onion rings with a sprinkling of chaat masala

Enjoy the beer battered onion rings. These are my favourite fried snack, and my kids love them.

Darned easy to make. Just a little planning, as the onions have to marinate at least for two hours before they can be fried.

I make a quick fix, cheat sauce with these onion rings. They taste way better than, some store-bought sauce (though mine is a mix of store bought sauces :P) The fried ring, with the tart hot sauce gives it an amazing balance. Of course, you can substitute it with any other sauce of your choice. But do give my recipe a fair chance too.

beer battered onion rings and a chilled beer

beer battered onion rings and a chilled beer

Baking powder is a crucial ingredient in this recipe, so don’t try to substitute or do away with it. It is what gives the onion rings the crisp and crunchy texture when mixed with a beer in the batter.

My friend and me feasted on them, in Mahabaleshwar. Hope you like them too – PS: they go really well with chilled beer!!!


Beer Battered Onion Rings
Print Recipe
My favourite snack, darned easy to make. It will be an instant hit amongst your friends.
  • CourseAppetizer
  • CuisineAmerican, Fusion
Servings Prep Time
4 people 15 minutes
Cook Time Passive Time
15 minutes 2 hours
Servings Prep Time
4 people 15 minutes
Cook Time Passive Time
15 minutes 2 hours
Ingredients
For the onion rings
  • 2 large onions peeled and diced into 1 cm thick rings
  • 2 cups beer - larger appx 1 pint
  • 2 teaspoons vinegar
  • 1 tspn salt
  • 1 tspn Black Pepper crushed
For the batter
  • 3/4 cup corn starch or corn flour
  • 3/4 cup all purpose flour (maida)
  • 1 plus cup beer appx 1/2 pint
  • 1 tspn Baking Powder
  • 1 tspn salt
  • 1 tspn Red chilly flakes crushed
other stuff
  • Milk for frying
  • 2 tbspn Chaat masala
  • deep pan for frying
  • tongs for frying
  • kitchen towel for drying the onion rings before frying
Quick Cheat Sauce
  • 2 tbspn Ketchup
  • 1 tbspn hot sauce Use any. Even Tobassco is good.
  • 1/2 tspn soya sauce
  • 1 tspn garlic finely minced
  • 1 tspn Black Pepper
Servings: people
Instructions
To make the marinade
  1. Mix all the ingredients of the marinade in a vessel.
  2. Pull out all the rings of onions from the diced rounds. Each onion should be separated. The ring should be whole, without any cuts.
  3. Submerge the rings into the beer marinade and refrigerate for minimum 2 hours, and a maximum of 4 hours.
To make the batter
  1. Add all ingredients of the batter in a bowl
  2. The batter should be thick and should fall with a plop when dropped from a spoon.
  3. Give the batter a good mix with a whisk. It should have no lumps.
  4. Make this batter just before you need to fry the onion rings.
For frying the rings
  1. Pour oil into the non stick and heat well on slow to medium flame. It should not start smoking. If it does, let it cool down before popping in the onion rings.
  2. Wipe each ring, using a kitchen towel or a good quality paper napkin. Each ring should be completely dry.
  3. Dip one ring at a time, into the batter. Give it a quick flick to take off extra batter.
  4. Drop the ring into the hot oil.
  5. Work quickly and put in as many onions as you can, till the pan fills up.
  6. After appx 30 seconds (or when the batter looks well fried) turn the rings, using the tong, so that the other side can fry.
  7. Pick out the fried rings with the tong and place on a paper napkin to drain off excess oil. You can press it down slightly (not too hard) with another towel to drain off more oil.
  8. Sprinkle some chaat masala and serve hot, with the cheat sauce.
For the sauce
  1. Add all ingredients together and mix well.
Share this Recipe

Filed Under: Cocktail Parties, Sauces, Sides, Snacks Tagged With: beer, beer battered, beer battered onion rings, cheat sauce, onion rings, quick sauce., sauce, snacks, yummy

Cheese Toast

September 6, 2016 By appu Leave a Comment

Cheese toast with Cucumbers, onions and green chillies

Cheese toast with Cucumbers, onions and green chillies

Whats so special about cheese toast? For me — very special, because my grandmom used to make it the minute I entered her house. It was my absolute favourite and I still have it when I need some comforting.

Why is it special for you? Because it’s not just a cheese toast. It is many other things clinging to the cheese. Cucumbers, onion, green chillies….

My grandmom (Nani) was an amazing cook. Hell- she was an amazing lady. We lost her a few years ago, and that hole will never fill up. But the memories now make me smile and laugh and sometimes shed a tear or two. Always perfectly coiffured, immaculately dressed, Nani taught me everything I seem to know to survive and exist.

my perfect grand mom

my perfect grandmom and me

She decided she must perfect her English, so she grabbed hold of a teacher and started reading and understanding books I would not read unless I had an exam on it. She borrowed some money from her husband, learnt how to dabble in stocks, and struck gold. Then she decided she should help the underprivileged kids for education, so she opened an NGO, which now runs 2 schools and 1 vocational training centre. We used to get sweets as treats every year when the school results were declared.

When I made the cheese toast recently, the smell emanating from the oven, gave me a huge wave of nostalgia. I was thrown back into her house where I practically grew up.

open cheese toast

open cheese toast

The heavenly very soothing and reassuring fragrance of my favourite food, unlimited coke, my Nani’s gorgeous smile, those days spent learning how to walk, speak, garden, just about everything that a kid needs to feel loved and wanted. I know she is with me, when I cook when I eat and when I hug my loved ones.

my nani's special cheese toast

my nani’s special cheese toast

I make many of her recipes, but this one has a special place in my heart. It can be a complete meal on its own, or just pair it with soup- serve it as an appetiser. However, you use it – don’t forget to derive comfort from the melting cheese and crunchy cucumbers and onion as it hits your palate.

And Hey!! Go hug your grandmom right now!! Life is full of small pleasures!

cheese toast

cheese toast


Cheese Toast
Print Recipe
Melting cheese with a heavy dose of cucumbers and love.
  • CourseSide Dish, Sides
  • CuisineAmerican, Fusion
Servings Prep Time
2 slices 10 min
Cook Time
10 min
Servings Prep Time
2 slices 10 min
Cook Time
10 min
Cheese Toast
Print Recipe
Melting cheese with a heavy dose of cucumbers and love.
  • CourseSide Dish, Sides
  • CuisineAmerican, Fusion
Servings Prep Time
2 slices 10 min
Cook Time
10 min
Servings Prep Time
2 slices 10 min
Cook Time
10 min
Ingredients
  • 1/3 Cup Grated Cucumber squeeze out the water.
  • 1/3 Cup Cheddar Cheese grated
  • 1/4 Cup onions Finely Chopped
  • 1 Tspn Green Chillies Finely Chopped
  • 2 Tspn Butter room temerature
  • 2 Slices Bread white or multigrain
  • pinch salt
Servings: slices
Instructions
  1. Slater the bread slices with butter and keep aside
  2. Pre heat oven to 150 Deg C
  3. Grate cucumber and squeeze out the water.
  4. Chop onions finely.
  5. Add all ingredients together and give it a good mix.
  6. Spread the cheese mix on the toast and bake in hot oven till cheese melts.
  7. Cut into squares and serve hot with ketchup or chilli sauce.
Recipe Notes

You can increase or decrease the spice level to your liking, but don't do away with it altogether.

Enjoy!

Share this Recipe

Filed Under: Snacks Tagged With: cheese toast, cucumbers, open sandwich, spicy, toasted

Garlic Mashed Potatoes

June 14, 2016 By appu 2 Comments

Our trip to Japan was largely about Japanese food. Tofu meals, Zen meals and meals in the temple. We all developed a love and respect for Tofu and all its variations. This one restaurant that we went to and which was purely fusion was Rigoletto, in the Roppongi area of Tokyo. They had very few choices for vegetarians, but all of them were sumptuous.

I made the garlic mashed potatoes for my husband’s birthday. It was a smashing hit.

Garlic Mashed Potatoes

Garlic Mashed Potatoes

Yeah yeah, it has a lot of calories and all that. But hey! it is really tasty. And you gotta cheat once in a while right? How else will you enjoy life?

The potatoes have to be boiled and later mashed along with all the other ingredients. The entire mixture can be a heavy load for most blenders. Even mine protested mightily but held its own. By no means am I proclaiming Technora blenders to be the best, but where I am concerned it has stood the test of time and use. I love their inbuilt stirrer. I don’t have to open the lid and stir the food, I can do it while the blending is on. Pure genius.

garlic potatoes

This is a copycat recipe, so my imagination can take no credit for it. But I added a twist to its story, by cooking it in an earthen bowl. It wasn’t coated inside with any kind of ceramic polish. Just pure earthenware. So when the garlic mashed potatoes cooked, the flavour and fragrance of the natural clay seeped into the potato, giving it that extra kick and twist.

Wash the earthenware once and dry it in the sun if you can. Fill the mashed goodness, add dollops of butter, garnish and bake. It’s a quick and easy recipe, and I shall become famous – because everyone is going to ask you for this recipe.

😉

Have fun guys – I promise you a piece of heaven!

Ciao!

garlic mashed potatoes 2

Garlic Mashed Potatoes
Print Recipe
Served in earthen ware, so the smells and flavours infuse into one good yummy dish!
  • CourseBrunch, Side Dish
  • CuisineFusion
Servings Prep Time
12 pieces 20 minutes
Cook Time Passive Time
20 minutes 10 minutes
Servings Prep Time
12 pieces 20 minutes
Cook Time Passive Time
20 minutes 10 minutes
Ingredients
For the potatoe
  • 1 Kg potatoes Starchy "Russet" are the best.
  • 500 Grams Cream
  • 75 Grams Butter Softened
  • 100 Grams garlic Mildly crushed
  • 2 Tspn salt
  • 10 Grams Black Pepper Coarsley ground.
To Garnish before cooking.
  • 25 Grams garlic
  • 1/2 Tspn olive oil
  • 1/8 Tspn salt (basically a pinch!)
  • 1 Tbspn Finely chopped parsley
  • 1 Tbspn Red Chilli Flakes
  • 30 Grams Butter Softened.
Accessories
  • Potato Ricer
  • Heavy Duty Blender
  • oven 150 Deg C
  • 15 Earthen pots for serving (optionally baking dishes can be used)
  • Spatula
Servings: pieces
Instructions
  1. Boil the potatoes.
  2. Once the potatoes are boiled, peel and run it through the ricer.
  3. Add all the ingredients for the potatoes and load it into the blender.
  4. Blend well. You might have to do it in parts. It should have no lumps.
Garnish
  1. While the potato is boiling, peel the garlic meant for the garnish. Slice the garlic into thin slivers.
  2. Rub the olive oil and salt on it and pop into the oven. Bake for appx 10 minutes, till it is dehydrated and a wee bit brown. You don't want to make it crisp and completely baked
    Rub the olive oil and salt on it and pop into the oven. Bake for appx 10 minutes, till it is dehydrated and a wee bit brown. You don't want to make it crisp and completely baked
Final Dish
  1. Ladle the mixture in the earthen ware / baking dish, garnish with parsley, chilli flakes and the par baked garlic.
  2. Add dollops of butter (the one kept aside for the garnish) on all sides and slide into the oven.
  3. Bake for 10 minutes. First the butter will melt and then cook and infuse into the potato. When the butter sizzles, and the garlic on top looks browned, take out and serve hot.
Share this Recipe

Filed Under: Brunch, Sides Tagged With: garlic, Garlic mashed potatoes, Mashed Potatoes, technora

Scrambled Eggs with Truffle Oil

June 10, 2016 By appu 4 Comments

Scrambled eggs with truffle oil

Scrambled eggs with truffle oil

We ate at the most amazing restaurant in Hong Kong a few months back. Chef Patrick of La Table De Patrick. It was a small restaurant, with immediate and intimate service. We had called earlier to let them know we are vegetarians. He rotated our entire 5-course meal around it, using wonderful freshly available ingredients.

One dish which Chef served had a sprinkling of truffles on it. With gleeful hands, we tore at the food, but it came up short on the truffle flavour. It was crunchier and had very mild to non-existent truffle taste.

Chef explained that it was summer truffles, and has very little flavour. We uneducated, but truffle fans, learnt a lot that evening.

The most flavourful truffles are the winter ones. The white winter truffles are available from October to Christmas. These have a strong flavour and can deter new truffle tasters.

The black winter truffles are what most people serve and is more easily available. Its the most preferred variety of the lot. Available from Mid Jan to Easter. (What will happen to us truffle lovers from Christmas to Mid Jan? Hoarde! Hoarde! )

The summer Truffle is available from April to July and has a very light flavour. Almost non-existent. None of us much appreciated it.

Autumn burgundy truffles are more medium bodied and great for someone who likes truffles but cannot have too much of it because of the strong flavour and aroma.

scrabled eggs


scrambled egg with truffle oil

scrambled egg with truffle oil

In my family of four – three of us adore it, while the fourth needs to taste the autumn burgundy one to start developing a taste. (I have no clue where to get it from!!)

scrambled on toast

It was an educative and tasty evening and inspired me to make this scrambled egg.

If you have seen the movie or read the book – A hundred foot journey- the, to be a great chef, Hassan meets Mallory the owner of the restaurant. This is a synopsis from the book -Hassan, having heard from Marguerite that Mallory hires potential chefs by taste-testing an omelette and deciding whether the person is indeed a great chef, asks if he may cook an omelette for her to his recipe. Due to his injured hands, Mallory helps under Hassan’s supervision. After tasting the omelette, Mallory recognizes Hassan’s potential and invites him to work for her.

The omelette they made looked so amazing!! I used a part of the recipe for this blog.

Take a look!


scrambled egg and oil bottle

Scrambled Eggs with Truffle Oil
Print Recipe
Simple scrambled eggs, finished with a copious dash of black truffle oil.
  • CourseBreakfast, Brunch
  • CuisineFusion
Servings Prep Time
1 person 10 minutes
Cook Time
5 minutes
Servings Prep Time
1 person 10 minutes
Cook Time
5 minutes
Scrambled Eggs with Truffle Oil
Print Recipe
Simple scrambled eggs, finished with a copious dash of black truffle oil.
  • CourseBreakfast, Brunch
  • CuisineFusion
Servings Prep Time
1 person 10 minutes
Cook Time
5 minutes
Servings Prep Time
1 person 10 minutes
Cook Time
5 minutes
Ingredients
The Eggs
  • 3 Eggs Whole
  • 1/4 Cup Milk
  • 1 Tspn Mint Finely chopped
  • 1/2 Tspn chilli flakes
  • salt
  • pepper
  • 2 Tbspn Black or White Truffle Oil
  • 1 Tbspn Butter For cooking.
  • Toast Optional
The Accessories
  • 1 Med Bowl For mixing eggs
  • 1 Whisk
  • 1 Skillet
  • 1 Wooden Spatula
Servings: person
Instructions
  1. Break the eggs in the bowl. Yolks and all.
  2. Add the milk, salt and pepper and whisk gently. We dont need air here, just the mixture semi blended.
  3. Add the mint and chilli flakes, and mix gently till incorporated well.
  4. Heat the skillet (medium high) and drizzle some butter. Coat the skillet with the butter and let it sizzle.
  5. Pour the mixture into the skillet and let it be for approximately 45 seconds. It should not set and start turning into and omelette.
  6. Now start agitating the eggs, with the wooden spatula. Keep moving in small but consistent circles all over the skillet.
  7. After about 45 seconds, the eggs will clump but still be runny and soft. At this point if you like your eggs a bit runny, take it off on a plate.
  8. If you like it a little more well done, continue cooking, moving the eggs in the same round pattern. Do not stop agitating the eggs.
  9. Take it off on a plate and immediately drizzle the truffle oil. Enjoy hot off the skillet!!
  10. Umm! Goes really well with Champagne or white wine 😛
Recipe Notes

Here is the link to more happy education on truffles.

Share this Recipe

Filed Under: Uncategorized Tagged With: Black Truffle, Eggs, Lunch, Scrambled, Truffle Oil, White Truffle, White Wine

  • 1
  • 2
  • Next Page »

Meet the Author

For the 21 years and some months that I have been alive, there has been this crazy, eccentric, always-charged-up woman with a full-time job of being a mother to 6 (2 children, 4 dogs).

In her spare time she blasts music on her DJ console, reads like a maniac, downloads shows (because God forbid she runs out of something to watch), runs an entire household, and to top it all off, manages a very successful catering business which makes the most delicious food in the entire world. Once you have her food, everything else will taste like stale socks.

This is what you call "Maa ke haath ka khana".

- Kanak

Subscribe to Blog via Email

RECIPE BY CATEGORY

Copyright © 2021 THE RECIPE LARDER