THE RECIPE LARDER

  • Home
  • Nuts and Bolts, Sauces and Pans
  • Recipes
  • Contact

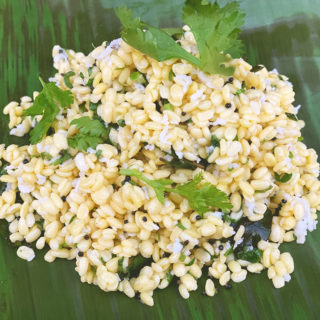
Soong Dal

March 4, 2019 By appu 1 Comment

It’s that time of the year when Mahabaleshwar beckons, with its myriad sunsets, fresh fragrant strawberries and over powering array of flowers. We had ourselves farm fresh and organic vegetables just off the farm.


Since we do not use fertilisers or pesticides of any kind, we pluck off cherry tomatoes and radish straight from the Canadian pharmacy plants and merrily munch it on the go!

fresh off the farm.

For a day and a half, we were just mom and son! We ate, drank and had some crazy conversations.

We both wanted something a bit healthy for our brain doping lunch, and anyways friends who love this dish have been asking for the recipe. So we decided to make it and blog it.

This is a super healthy snack.  I sometimes have it as the lonesome dish for dinner too. It’s super filling, high in protein and very very healthy. It does not sit in your tummy, but leaves you feeling full and satiated. The tangy, spicy flavour makes it soooo very edible and tasty.

I optionally also add finely chopped raw mango (kairi) to it and reduce the lemon a wee bit. You can play around with it as you like. Reduce the spice, increase it (yaay!), add onions, take off the coconut, add a dash of green chutney!!! Just go for it. Not much can destroy this dish!

Add to it a dhokla mix, or to some other chaat item. Serve it mixed with broken idli and podi chutney. Let your creativity flow and do tell me also how you played with it!

Soong dal goes amazingly well with drinks. But serve it chilled. Like – absolutely and totally chilled. If you think of heating it – u might as well eat dal. So DO NOT HEAT this dish!!

Have fun! Cheers!


PS: Here is the video shoot we did for the Soong Dal. It’s very basic and rustic, as is the kitchen in our farm.

http://therecipelarder.com/wp-content/uploads/2019/02/soong-dal-converted-with-Clipchamp.mp4

Soong Dal
Print Recipe
A healthy and tasty snack. Super with drinks.
  • CourseAppetizer, Salad, Side Dish
  • CuisineIndian
Servings Prep Time
4 pax 5 minutes
Cook Time Passive Time
5 minutes 4 hours
Servings Prep Time
4 pax 5 minutes
Cook Time Passive Time
5 minutes 4 hours
Soong Dal
Print Recipe
A healthy and tasty snack. Super with drinks.
  • CourseAppetizer, Salad, Side Dish
  • CuisineIndian
Servings Prep Time
4 pax 5 minutes
Cook Time Passive Time
5 minutes 4 hours
Servings Prep Time
4 pax 5 minutes
Cook Time Passive Time
5 minutes 4 hours
Ingredients
  • 1 Cup Yellow Moong Dal
  • 1 Tspn oil
  • 1/2 Tspn Mustard Seeds
  • 1/4 Tspn Hing
  • 10-15 Curry Leaves
  • 1 Tspn salt
  • 1/4 Cup Coconut grated
  • 2 Tbspn Corriander Leaves finely chopped
  • 1 Tspn Green Chillies (or less/ more - according to taste)
  • 1 Tbspn lemon juice
  • 1 Tbspn Raw Mango (optional) finely chopped (reduce lemon juice)
Servings: pax
Instructions
  1. Wash and soak the yellow moong dal for 4 hours.
  2. Drain the water, rinse the dal and keep on a draining sieve for appx 20 minutes, so that no water is left.
  3. Once the water has drained, get the tadka ready. Keep the moong dal in a mixing bowl.
  4. In a tadka pan, add the oil.
  5. When hot, add the mustard seeds.
  6. When spluttering, add the hing and finally the curry leaves.
  7. All the curry leaves should splatter, so mix it with a spoon once, while still on the fire.
  8. Take off the fire and put it on the moong dal.
  9. Now add the salt, chopped corriander, coconut and green chillies (and optionally the raw mango)
  10. Lastly squeeze in the lemon juice.
  11. Mix well.
  12. Serve completely chilled.
Share this Recipe

Filed Under: Healthy, Sides Tagged With: appetizer, fresh, healthy, indian, lentils, Moondal, protein, protein power, quick, salad, Serve Chilled, snacks, south indian, spicy, tangy, yellow dal, yum

Lasooni Palak

November 30, 2017 By appu 2 Comments


If you have been following my blog, you would have realised that my favourite flavour is garlic. I have grown up in a family that cooked without onion and garlic, for religious purposes. Garlic is said to have “tamsik” qualities. Tamsik food is considered unhealthy, and it brings out the negative in you, gives rise to anger and other repugnant emotions. During the Vedic times, everything that was considered not good, was given a religious decree of non consumption.

I have realised over the years that a lot of do’s and dont’s of the Vedic ages are now being proven scientifically true. Take for example the benefits of turmeric. The world over, turmeric is prescribed for it’s qualities. But there is also the other side of science, which has proven some foods that were earlier considered bad, are now proven to have health benefits. Garlic is very good for the heart.

As for me – I like to live dangerously and garlic is very good for my soul!

I can have garlic in every single meal, and not get tired of the taste. I think I am still making up for my lost childhood!


Nishi enjoying the taste!

Lasooni Palak, or Saag as its called in some places, is my favourite version of consuming spinach. I like the smooth texture, but I also like the chopped version. So I came up with a recipe that was a mix of both. I like my food on the little spicier side (more Tamsik me!!) and somehow the taste of garlic, rough and smooth spinach with a hint of fire sets me in the absolutely perfect mood!

I experimented with this recipe in the green environs of Mahabaleshwar.  The spinach was not fresh off the farm, but it was still from the hills of Panchgani, and as fresh as one could possibly get. But the spinach I grow in our farm, is far superior, completely organic and I pluck it when still in baby stages. The result is a sweeter taste, with a hint of bitterness and then of course we add the ever loved garlic and fiery spices. In the near future, when the garlic grows green and fragrant in my farm, I will try this same recipe with new green garlic stalks. The taste will be a little different – more herby!

The recipe goes best with chappati, made with whole wheat or jowar.


Lasooni Palak or Lasooni Saag
Print Recipe
Greens flavoured with heady garlic, a perfect Indian veggie for any meal.
  • CourseMain Course
  • CuisineIndian
Servings Prep Time
2/3 people 15 minutes
Cook Time
15 minutes
Servings Prep Time
2/3 people 15 minutes
Cook Time
15 minutes
Lasooni Palak or Lasooni Saag
Print Recipe
Greens flavoured with heady garlic, a perfect Indian veggie for any meal.
  • CourseMain Course
  • CuisineIndian
Servings Prep Time
2/3 people 15 minutes
Cook Time
15 minutes
Servings Prep Time
2/3 people 15 minutes
Cook Time
15 minutes
Ingredients
  • 3 Bunch Spinach (each bunch has appx 25-30 leaves)
Tadka 1
  • 30 cloves garlic roughly chopped
  • 3 Green Chilly roughly chopped
  • 1 small onion roughly chopped
  • 1 Tspn Jeera (cumin)
  • 1 Red Kashmiri Chilly whole
  • 1 Tbspn oil
  • 1 tspn salt
Tadka 2
  • 1 Tbspn oil
  • 1 Bay Leaf whole
  • 1 tspn Jeera (cumin)
  • 1 Red Chilli Kashmiri whole
  • 1 tspn salt
  • 1/4 Cup Water
  • 1 Tbspn Yoghurt
Servings: people
Instructions
Spinach
  1. Blanch all three bunches of spinach in hot water. After 2/3 minutes, drain the hot water and dunk the spinach into ice cold water. This helps it to retain its colour.
  2. Finely chop appx one bunch of spinach and leave aside.
  3. Roughly chop the remaining two bunches of spinach and leave aside.
Tadka 1 with roughly chopped spinach
  1. In a pan, add and heat the oil. Add the jeera till it splutters. Now add the green chillies, red chilly and let these splutter.
  2. Now add the onion and garlic and cook till a bit brown.
  3. Add the roughly chopped spinach.
  4. Add salt and mix well.
  5. Leave aside to cool.
  6. Once its cool, run it in a mixer grinder till it becomes a fine paste. All the ingredients should be made into a paste, red chillies and all.
Tadka 2 with finely chopped spinach
  1. Heat oil in a pan. When hot add the jeera.
  2. When it splutters add the bay leaf and red chilly.
  3. Add the finely chopped spinach.
  4. Now add the salt and the water.
  5. Mix well and leave aside.
Finishing the dish.
  1. Add the spinach which has been ground to a paste, to the finely chopped spinach in the pan. The heat should be on.
  2. Add the yoghurt and mix well. Voila your dish is ready!
  3. Serve hot with any form of Indian Bread.
Share this Recipe

Filed Under: Vegetable Tagged With: fibre, glutenfree, healthy, indian, indianmeal, ironrich, serve with indian bread, spinach, vegetable

Palak Kebab

March 25, 2017 By appu 2 Comments

Palak Kebab

Another shout out from my daughter, for this recipe. I had made it for their friends when they were here and it was polished off in no time.

Well, many a good news hovering around me. The daughter got into Yale, my cooking classes have taken off and this darned blog has got fixed. There were some major issues, so all those of you who tried to come back for your favourite recipes and found gibberish in the ingredient section, my apologies. My very profound and heartfelt apologies. It could have got fixed earlier, but as usual, I was travelling.

I was in Mahabaleshwar, a small quaint hill station a few hours from Bombay. I have a home and a farm there, so this time the 12 days I stayed there, I ate off the farm, played with the new pup and chilled with my best friend Nishi.

We cooked, ate and drank!

We would wake up in the mornings, sit in the sun, (it was cold there!), and sip our tea and coffee. Then after a leisurely breakfast, we would put face packs (moisturising ones – like I said it was Brrrrr!) and jabber away for an hour or so. By the time the watch thought of turning both its hands to 12 – we would be sitting with our afternoon drinks – again yakking away to our hearts’ content. It was the most idyllic holiday one can have.

I plucked fresh Spinach, from the field and made this ultra easy and very delicious recipe. It needs very little preparation time. I have cooked it on a non-stick, with very little oil, but if you have a large party you can easily fry it in oil. I did it for the kid’s 21st birthday party and it vanished into mouths as soon as freshly fried plates were put in front of them.

cocktail snacks

I have also made a video, for a quick look-see. The first video I made was not “good enough” and my niece and son insisted I work a little harder and produce a better one. Well, they are not all that happy with this one either, but I lack patience so there is for all to view.

Unfortunately, I am not able to load the video here because of (temporary – I will fix it asap) data restrictions. But here is the Facebook URL

FACEBOOK URL FOR VIDEO OF PALAK KEBAB

and there is the google drive URL.

CLICK HERE FOR GOOGLE DRIVE LINK

I hope you will see the video and try the recipe. It makes for great cocktail snacks, lunch box sides, or sides.

Promise to get back with a recipe soon. I’ve been tardy!


Palak Kebab
Print Recipe
Quick and easy, with minimum fuss and preparation. Great as cocktail snacks.
  • CourseSide Dish, Sides
  • CuisineIndian
Servings Prep Time
3 /4 Pax 30 minutes
Cook Time
15 minutes
Servings Prep Time
3 /4 Pax 30 minutes
Cook Time
15 minutes
Palak Kebab
Print Recipe
Quick and easy, with minimum fuss and preparation. Great as cocktail snacks.
  • CourseSide Dish, Sides
  • CuisineIndian
Servings Prep Time
3 /4 Pax 30 minutes
Cook Time
15 minutes
Servings Prep Time
3 /4 Pax 30 minutes
Cook Time
15 minutes
Ingredients
  • 1/2 Cup Whole Black Masoor Dal (Indian Brown Lentils)
  • 1 Bunch Spinach
  • 1/3 Cup Cottage Cheese (or Ricotta cheese)
  • 5 Cloves garlic
  • 2 pcs green chilles
  • 1 Inch Ginger
  • 1/3 Cup onion Finely chopped.
  • 2 Tbspn Cashews, crushed
  • 1 1/2 Tspn Garam Masala
  • 1 Tspn salt
  • 2 Tbspn - Plus oil for cooking and oiling hands
  • Water
Garnish
  • 1 Tbspn Chaat masala
  • 1 onion Sliced.
Servings: Pax
Instructions
  1. Soak the dal for 30 minutes.
  2. In a mortar and pestle, pound together the chilles, garlic and ginger.
  3. Wash and chop the spinach into very fine strands.
  4. Bring water to a boil, and boil the Spinach for a 2 / 3 minutes.
  5. Wash and grind the soaked dal into paste with as little water as possible. Preferably no water.
  6. In a non stick skillet, add a appx 1 Tbspn oil.
  7. Add the ginger, chilly and garlic paste. Fry till it is brown.
  8. Add the onions, and fry till brown.
  9. Now add the Dal paste, and again fry till it forms lumps and all the water has evaporated.
  10. Now add the spinach and mix and cook till incorporated.
  11. Add the cottage cheese/ ricotta cheese. Break it and sprinkle it all around for a better mix.
  12. Mix till incorprated.
  13. Add the cashews, garam masala and salt.
  14. Mix well and take off the fire on a plate to cool.
  15. Oil your hands and make small rounds, appx the size of a small lemon.
  16. Flatten it. Repeat with the entire mix.
  17. In a skillet add appx 1 Tbspn oil and cook the kebabs, pressing it and turning it till it browns on both the sides.
  18. You can also fry these kebabs in oil.
  19. Serve hot, sprinkled with chaat masala and garnished with onions. Serve with a corriander chutney.
Share this Recipe

Filed Under: Cocktail Parties, Sides, Snacks Tagged With: cocktail snack, healthy, quick and easy snack, snack, spinach, vegetarian

Sailani Dal

February 7, 2017 By appu Leave a Comment


Being Indian, and bought up on typical desi meals, Dal has been a staple dish served over lunch and dinner. After years and years of eating dal – Dal tadka, Gujarati Dal, Dal Langarwale, Kaali dal, etc etc, all felt so mundane – so overrated and so damned boring. At some point, I just lost faith in Dal!!

At a wedding recently, I saw the tag read Sailani Dal. Now that sounded completely new and something I had never heard of, let alone eat. I timidly tried a spoon, hoping my boredom towards dal would not bias my taste. My eyes sprang open, and my mouth instantly watered for more. I quickly filled up a soup bowl and made a meal of the dal.

The taste, the different flavours stayed in my mind for the longest time. It’s like one of those right moments when you read, smell or taste something, your senses just inhale it and push it deep into your conscious mind, keeping that memory forever fresh. And at any time when you bring it to your mind, it feels like it happened only a few moments ago.

Completely besotted, I went online for a hunt for the word “Sailani”. What was it? Turns out, it was the Maharaja of Sailana who invented this recipe. The Sailana’s hail from the Indian, Princely State of Madhya Pradesh. They were avid foodies and revamped recipes not only from their hometown but from all over India. In the 1980’s a book of their recipes was published but is no longer available easily.

The dal itself is super easy to make. Even the ingredients are minimal. The recipe calls for Toor (Arhar – Split pigeon peas). I urge you to use the best quality spices while making the Sailani Dal. Eat it with rice, or roti – it’s up to you. But eat it you must-


PS_ dedicating this recipe to my baby girl Kanak, who sits far away in the USA. She had loved this dal when I made it for her. HEY! Kanak – do try this out and send me pictures. KISS KISS!!

Sailani Dal
Print Recipe
Flavourful and by far the tastiest and easiest dal you could make.
  • CourseMain Course
  • CuisineIndian
Servings Prep Time
4 people 30 minutes
Cook Time
20 minutes
Servings Prep Time
4 people 30 minutes
Cook Time
20 minutes
Sailani Dal
Print Recipe
Flavourful and by far the tastiest and easiest dal you could make.
  • CourseMain Course
  • CuisineIndian
Servings Prep Time
4 people 30 minutes
Cook Time
20 minutes
Servings Prep Time
4 people 30 minutes
Cook Time
20 minutes
Ingredients
  • 1/2 Cup Toor ( Arhar, Split Pigeon Peas) soaked for 30 minutes
  • 2 1/2 Cups Water Divided
  • 1 Pinch Haldi (Turmeric) Scant
  • 1/4 Tspn Hing (Asafoetida) Use a good quality one.
  • 1/2 Tbspn oil
  • 3 Tbspn Ghee
  • 6 Pods garlic Coarsely crushed
  • 5 Cloves Whole
  • 1 1/2 Tspn salt
  • 3 Tbspn Kasuri Methi leaves (Dried Fenugreek)
Servings: people
Instructions
  1. Soak the dal for 30 minutes. Wash well and drain the water.
  2. Add haldi and hing, along with 1 Cup of water and add to pressure cooker.
  3. Boil the remaining water, and keep it very hot. Set aside for use later.
  4. The cooked dal should be thick, not thin and watery.
  5. When completely cooked, place a heavy bottomed pan on medium fire.
  6. Add the oil and ghee.
  7. When hot, but not smoking, add the cloves and garlic.
  8. Sauté for a few minutes.
  9. Add the dal. Add the balance hot water.
  10. Add the salt and let it cook till it starts to boil.
  11. Add the kasuri methi and cook for a few minutes more.
  12. Serve hot.
Recipe Notes

The dal tastes better if cooked atleast 2 hours before it is consumed.

Share this Recipe

Filed Under: Dinner, Lunch Tagged With: Dal, desi, Different, Dinner, Flavor, India, Lunch, Staple

Mirchi ka Thecha

January 25, 2017 By appu 4 Comments

I first had this fiery crushed green chilly mixture, many many years ago, made by a Maharashtrian lady. It fired up my taste buds, made my eyes water, my nose run, but I craved more. That day I ended up overeating my lunch because I wanted to keep eating more and more of this spirited dish. Over ate lunch because one cannot have this just as it is by the spoonfuls. You have to eat it with some sort of roti or rice.

Non heat eaters – REFRAIN!!


My taste buds start craving this, as soon as December starts fading away. The best spicy green chillies, come around January first week, and these make the best Thecha. I went hunting in the farmers market and came upon a lady selling only chillies. Luster green, shinning chillies. I did not have my camera with me ( a lesson learnt), else it would have made a very evocative and vocal picture.

This is a very quick recipe. Eat it with traditional, dal chawal, roti, khichdi, omelette – just about anything. If you are game to experiment – add to Kachumber, any vinaigrette, in yoghurt for a raita mix — let loose your imagination.

I used a mix of spicy and less spicy green chillies. You can use the entire lot as spicy green chillies, or less spicy ones. The less spicy chillies, will not give it the punch, but hey if you cannot stand too much spice, at least you will get a taste of this amazing chutney.

If you are allergic to the spice of the chillies – oil your hands before chopping, or wear gloves. If  I have any sweat on my face, the vapour of the chillies sets my face on fire. I always, always use help for chilly chopping. If I have to do it myself, I use kitchen scissors.

This stays well in the refrigerator for a month or two. Use a clean spoon to take out as much as you need, (each time), and nothing will happen to it.

Enjoy! And do write back and tell me how you liked it.


Mirchi Ka Thecha
Print Recipe
Fiery, spicy, highly addictive chutney/ pickle.
  • CourseSide Dish
  • CuisineIndian
Servings Prep Time
500 grams 20 minutes
Cook Time
15 minutes
Servings Prep Time
500 grams 20 minutes
Cook Time
15 minutes
Mirchi Ka Thecha
Print Recipe
Fiery, spicy, highly addictive chutney/ pickle.
  • CourseSide Dish
  • CuisineIndian
Servings Prep Time
500 grams 20 minutes
Cook Time
15 minutes
Servings Prep Time
500 grams 20 minutes
Cook Time
15 minutes
Ingredients
  • 1/2 Kg Spicy Green Chillies
  • 1/2 Kg Less Spicy Green Chillies
  • 15 pods garlic
  • 1/2 Cup oil
  • 2 Tbspn Jeera (Cumin) seeds
  • 2 Tbspn Rai (mustard seeds)
  • 3 +1 Tbspn + Tspn salt
  • 1/2 Tspn Good quality hing (asafoetida)
  • 3/4 Cup Grated Coconut packed
  • 1 Tspn vinegar
  • 1/4 Cup Curry Leaves packed
Servings: grams
Instructions
  1. Wash and dry the chillies.
  2. Cut each chilly into three pieces. The larger ones cut into four.
  3. Heat the oil, in a heavy bottomed pan, large enough to hold all the chillies.
  4. Add the jeera and rai and let it splutter.
  5. Add the hing and curry leaves. When the curry leaves crackle, add the garlic and coconut, and sauté well, till it browns a bit.
  6. Add the chillies and cook for 10 odd minutes - till it looses a little of its original colour.
  7. Add the salt and vinegar and cook for 5 more minutes.
  8. Take off the fire and cool down completely.
  9. Blend in a mixie, using pulsing action. Do not over blend and make into a chutney. Keep it coarse. Pieces of chillies should be seen.
  10. Store in sterile jars.
  11. Refrigerate. Shelf life is appx 1 to 2 months.
Share this Recipe

Filed Under: Chutneys Tagged With: achaar, addictive, chutney, fiery, hot, mirchi, pickle, spicy, tasty, thecha

Zucchini flowers stuffed with goat’s cheese

January 6, 2017 By appu 1 Comment

zuchini growing

It’s that time of the year when the farm turns green once more. Flowers, fruits and vegetables, growing over red soil, makes my heart soar. The thought of walking around the gardens and randomly plucking what is ready to harvest, tasting ripe strawberries on the way back to the house – and planning in my mind, what to make with the mud-encrusted produce in my hands.

pea shoots

Pea Shoots.

I planted Zucchini seeds this year, hoping we will get some fresh organic ones to eat. Frankly, I am not a great lover of Zucchini. I was actually eyeing the flowers. I had eaten some delicious stuffed Zucchini flowers, in a restaurant long ago. These flowers are not available in Bombay markets. The only way to get hold of them was to grow them – so grow them we did.

zuchini flower

And grow they did –Oh! Boy. How they grew!! Wild and unrelenting. An entire plot is covered with various sizes of Zucchini. I was completely delighted to see huge Zucchini’s hidden amongst the foliage. Sunshine yellow flowers, curling under the leaves, nestled next to the vegetable.

The flowers are very very delicate. I had my camera and some more equipment in my hand and bent down to pluck a flower. –And I damaged it. By the time I could stand up to see what I had pulled out, the poor little flower was almost wilting. I freed my hands and did what the flowers wanted to me to do. Show them some reverence. We were only two of us, so I slowly, with great care, plucked 5 more flowers from the stems.

zuchini flowers

The flowers in themselves, have a soft cosy mouthfeel, and a certain mild sweetness leant to it by the stamens. I had goat’s cheese at hand, so I decided to use that, with no additional flavouring.

stuffed flowers

I had to gently reach into the flower, (an not matter how careful I was, the petal tore at one end) and pull out the stamen. There is only one stamen per flower. Then I stuffed the cheese into the flower and gently, very gently closed the mouth. At this point, the flower should not be handled too much. Just a gentle two-fingered pinch at the mouth works. The cheese is a bit sticky, and will not come out, so this process is just to our satisfaction.

After this, I dredged the flower in egg batter, and then in breadcrumbs. I like the egg batter as it gives a lovely crisp edge. But I will also be giving you the recipe for eggless batter, which works just as well.

frying zuchini flowrrs

When you bite into soft petals, oozing with salty yet tart, goat’s cheese and the mouth fills up with a party of textures, just close your eyes and savour the goodness of this sunshine yellow very seasonal, and very difficult to get – flowers.

close up pf finsihed flowers

zucchini flowers stuffed with gat's cheese

zucchini flowers stuffed with goat’s cheese

finished stuffed zuchini flowers

close up of finished flowers2

Zucchini flowers stuffed with goat's cheese
Print Recipe
Exotic soft flowers, tart interior and crunchy crumbly crust. Simple to make, yet so fancy it makes a party come alive. The sunshine yellow flowers will take a powerful hold over you.
  • CourseSide Dish, Snack
  • CuisineFrench
Servings Prep Time
2 people 10 minutes
Cook Time
10 minutes
Servings Prep Time
2 people 10 minutes
Cook Time
10 minutes
Ingredients
  • 6 flowers
  • 6 Tbspn goat's cheese
  • oil for frying
Egg batter
  • 1 Small egg
  • 1 Tbspn mixed peppers
  • 1/2 Cup Bread crumbs
Eggless batter
  • 1 Cup all purpose flour
  • 1 Cup Ice cold water
  • 1/2 Cup Bread crumbs
Servings: people
Instructions
  1. Open the flowers delicately with two fingers, pinch the stamen and pull it out.
    Open the flowers delicately with two fingers, pinch the stamen and pull it out.
  2. Make oblong shaped rounds of Goat's Cheese, just a little smaller than the flower that you are going to stuff it in. Compact the cheese, to make it like a small lump.
    Make oblong shaped rounds of Goat's Cheese, just a little smaller than the flower that you are going to stuff it in. Compact the cheese, to make it like a small lump.
  3. Open the petals very gently, and pop the lump of goat's cheese inside the flower. Don't push and prod too much.
  4. Gently close the mouth of the flower. Be careful not to put too much pressure.
Egg Batter
  1. Whisk egg and milk together till it is just mixed. Do not over-beat.
  2. Transfer the crumbs in a shallow plate.
  3. Dredge the stuffed flowers in the egg batter, turning it continuously. The flower should only touch the surface of the egg batter. Do not drown the flowers.
    Dredge the stuffed flowers in the egg batter, turning it continuously. The flower should only touch the surface of the egg batter. Do not drown the flowers.
  4. Gently flick away excess egg batter and now coat the flowers in the breadcrumbs.
  5. In a flat pan, take approximately 1/2 an inch of oil and fry the stuffed flowers turning it till all sides are done.
    In a flat pan, take approximately 1/2 an inch of oil and fry the stuffed flowers turning it till all sides are done.
  6. Drain in paper towel. Eat immediately.
Eggless Batter
  1. Whisk the flower in ice cold water really well, so that no lumps remain.
  2. Dredge the stuffed flowers in the excess batter, turning it continuously. The flower should only touch the surface of the excess batter. Do not drown the flowers.
  3. Gently flick away excess batter and now coat the flowers in the breadcrumbs.
  4. In a flat pan, take approximately 1/2 an inch of oil and fry the stuffed flowers turning it till all sides are done.
  5. Drain in paper towel. Serve immediately.
    Drain in paper towel. Serve immediately.
  6. In a flat pan, take approximately 1/2 an inch of oil and fry the stuffed flowers turning it till all sides are done.
Share this Recipe

Filed Under: Cocktail Parties, Snacks Tagged With: farm, goat's cheese, mahableshwar, stamen, sunshine flowers, zucchini flowers

Puran Poli

May 31, 2016 By appu 2 Comments

Aloha! From Maui – Hawaii!

It’s been a busy happy week for us. Our daughter graduated with double majors in History and Anthropology! What a ceremony and what a delightful time for us proud parents. A huge bunch of us attended her graduation – her grandparents, brother, parents and her many many loyal friends. We hooted and cheered, and of course, her dad n me wept quite openly.

Will post pictures soon……! It’s all in the camera right now, and we are vacationing in Hawaii!


————————————————————————————————————————————————-

puran poli

puran poli

It’s a recipe from Rekha once more. Rekha of the serene nature and yummy cooking!

The recipe is really tedious for the first time. But once you make it (and you will – again and again, I promise you), it will become easier and easier.

puran poli - cooked to perfection

puran poli – cooked to perfection

The trick is in the dough. Once you have got that right, everything falls into place as easily as a beer in a glass.

She made it on a plastic surface, but she said using a banana leaf gives amazing results. “The flavour of the leaf seeps in”, she said.

I have given the measurement for the water, but each flour behaves differently from the other. Some soak up too much water, while others use less. Use the water little at a time, till you get the right consistency. I have put up images and videos for the same.

Stack Of Puran Poli

Stack Of Puran Poli

Without further ado – here is the recipe.

the filling of the poli

the filling in the poli


Puran Poli
Print Recipe
A little work, but the final dish will have you dancing.
  • CourseMain Course
  • CuisineIndian, South Indian
Servings Prep Time
15 pieces 30 minutes
Cook Time
45 minutes
Servings Prep Time
15 pieces 30 minutes
Cook Time
45 minutes
Puran Poli
Print Recipe
A little work, but the final dish will have you dancing.
  • CourseMain Course
  • CuisineIndian, South Indian
Servings Prep Time
15 pieces 30 minutes
Cook Time
45 minutes
Servings Prep Time
15 pieces 30 minutes
Cook Time
45 minutes
Ingredients
For the filling
  • 1 Cup Channa Dal (Yellow split peas)
  • 1 Cup Dried Coconut Desiccated / grated
  • 1 Cup Jaggery Crumbled / grated
  • 2 Pods Cardomom
For the dough
  • 1 1/2 Cup Maida (Refined flour)
  • 1 Cup Water
  • 1/4 Cup oil
For making the poli
  • 15 inch square food grade plastic
  • 3/4 Cup Ghee (Clarified Butter)
Optional
  • 15 inch Banana leaf
For cooking
  • Mortar Pestle
  • heavy bottomed pan
  • A Big Plate
  • Non stick Pan
Servings: pieces
Instructions
The filling.
  1. Wash and boil the channa dal, till it is well cooked. It should not be over cooked. The grains should look whole, and when pressed with a spoon should smash.
  2. Once cooked, leave it to drain completely. No water should be left in the dal.
  3. Deseed the cardamom pods and smash the seeds in a mortar.
  4. In a heavy bottomed pan, add the drained dal, jaggery, cardamom pods and desiccated coconut. Stir and cook for 5 minutes, till the jaggery just melts.
  5. Scrape out on a plate and let it cool.
  6. Once cool, blend it in a heavy duty blender. Blend little at a time. The mixture will be very dense and you might think of adding a little water. DO NOT DO IT. Be patient.
  7. Make 35 gm oblong balls.
For the dough.
  1. Make a sticky dough using a little water at a time. Keep your hands oiled, using the oil mentioned in the ingredient list. Do not pour the oil in the dough mixture. PLEASE SEE THE VIDEO AT THE BOTTOM OF THE RECIPE FOR THE DOUGH TEXTURE.
  2. Once the dough is kneaded, let it rest for 15 minutes.
  3. Make 25 gram balls.
Filling
  1. Take the dough balls and flatten them into a 2 inch diameter circle.
  2. Take the balls made with the filling, and roll in into an oblong shape. It should look way larger than the dough ball.
    Take the balls made with the filling, and roll in into an oblong shape. It should look way larger than the dough ball.
  3. Put the filling into the ball and start pushing the filling into the ball, gently but firmly. At the same time keep pushing the dough over towards the top of the filling. Basically the dough has to engulf the filling. PLEASE SEE VIDEO NO 2 AT THE BOTTOM OF THE RECIPE FOR INSTRUCTIONS ON HOW TO FILL THE FILLING INTO THE DOUGH.
  4. Once the filling has gone into the dough, cover the top with a twist of the dough and pat it into a 3 inch circle. KEEP YOUR PALMS AND FINGERS OILED. (I'm glaring at you when I say that!!)
How to roll the poli
  1. Oil the banana leaf. If you are not using a banana leaf, you will need a 15 inch square of food grade plastic.
  2. Keep spreading the poli till it is really thin and you think now it will break. PLEASE SEE VIDEO NO 3 AT THE BOTTOM OF THE RECIPES FOR INSTRUCTIONS.
Cooking
  1. Heat the non stick pan. Keep the flame / intensity to medium high.
  2. Ladle a teaspoon of ghee into the non stick pan.
  3. Gently lift the poli off the banana leaf and put into the non stick pan.
  4. Spread another spoon of ghee all around the poli
  5. After a few minutes lift and turn the poli. The non cooked side will now be touching the non stick pan.
  6. Add another spoon of ghee and take off the fire, after 3 odd minutes.
  7. The filling is dry and the flour used for the dough is greedy for ghee. You may add as much as you require or as less. But remember, that hot poli eaten with a small spoon of hot ghee spread on it tastes the best.
  8. Serve warm with ghee and red chilli chutney. (See previous blog!)
    Serve warm with ghee and red chilli chutney. (See previous blog!)
Recipe Notes

http://therecipelarder.com/wp-content/uploads/2016/05/dough-texture.mp4


http://therecipelarder.com/wp-content/uploads/2016/05/how-to-fill_CLIPCHAMP_keep.mp4

http://therecipelarder.com/wp-content/uploads/2016/05/how-to-make-it_CLIPCHAMP_keep.mp4


Share this Recipe

Filed Under: Dinner, Lunch Tagged With: coastal cusine, happy meal. yum. yummly, main course, pural poli, south indian, vegetarian

Fried Fish

May 2, 2016 By appu Leave a Comment

I grew up next to the sea, where the fishermen cast off the unwanted pieces of catch and left it for the dogs and birds. A friend, who lived in the North of India, would reach Bombay, and put his nose up in the air, would take deep breaths with a grin on his face. He said that the salt in the air invigorated him. Next time when I came back to Bombay from a trip, I  did the same thing. That’s when I knew what he was talking about, and that’s also when I realised that I cannot live away from the sea for too long.

The balmy salty air, the smell of drying fish, the clash of the waves, the grains of sand under my feet, the sea which answers your questions if you ask them of her. This is home, and that’s the reason why the smell of fish never offended me.

I am primarily a vegetarian. But I had to post this recipe for my meat loving readers.

Fried Fish

Fried Fish


I have a friend. Actually, she is my best pal, and her husband is an amazing cook. I believe his mutton dish (which he slow cooks for hours) have actually made people lick their fingers till they had sores.

Finger lickin good

Finger licking good

They had invited our entire gang (our kids are high school mates). All our friends had gone deathly quiet while eating his fish. Other than looking up to take another piece, (and fresh, hot ones were being served continuously), I could not meet any of their eyes, or talk to any of them. “Such was the taste”, they said later. “We forgot you guys (who did not eat fish!) existed!”

Fried Fish - Indian Style

Fried Fish – Indian Style

I was thrilled to see so many people sniffing (it can be spicy) yet stuffing their mouths with fish after fish. (Needless to say, they were all rolled home – no one could walk!)

The foodie in me was very excited, and on my recent visit to Bangalore (where my friend has shifted, much to my continued disgust!) I decided to get her to make some fish, so that I could take some pics and rob her recipe 😉

She has an amazing house, opening on two levels, to two different gardens. I clicked the pictures under the shade of a tree.

The recipe is disturbingly simple. The trick she says is, to marinate it for days and days. They wash the fish, then marinate it, put it next to each other in a dish, cling wrap it and leave it in the freezer for as long as they can. A minimum of 4 days to a maximum of 10 days or more. The longer it marinates, the better it tastes.

Yummy Indian Style masala fried fish

Yummy Indian Style masala fried fish

They mostly like to use Surmai, (Kingfish) as it has only one central bone. If Surmai is not available, they go for Pomfret. Indigenous fish like Surmai, Pomfret, lend better to this very Indian, desi recipe.

They buy a huge fish (when its Surmai), and cut slices, no thicker than half an inch. It is immediately washed, marinated and frozen, once it got home. When they want to fry it, they take it out of the freezer section and pop it into the normal refrigerated section for appx 2 hours. Once thawed it can be fried anytime you require. All it takes is a frying pan and some olive oil. The marinade splatters all over, while cooking, It’s a mess to clean up, so you can put a lid on the fish, while it cooks, then take it off and make it more crisp, at a later stage.

fried fish

fried fish

Squeeze fresh lemon juice over the hot fillet, and eat it with freshly cut onions and green chillies. Pop a beer!! The combinations is amazing.

Cheers!!

Fried Fish
Print Recipe
Absolutely easy, and the yummiest fish ever!
  • CourseMain Course
  • CuisineIndian
Servings Prep Time
1 Serving 20 minutes
Cook Time Passive Time
20 minutes 4 days
Servings Prep Time
1 Serving 20 minutes
Cook Time Passive Time
20 minutes 4 days
Fried Fish
Print Recipe
Absolutely easy, and the yummiest fish ever!
  • CourseMain Course
  • CuisineIndian
Servings Prep Time
1 Serving 20 minutes
Cook Time Passive Time
20 minutes 4 days
Servings Prep Time
1 Serving 20 minutes
Cook Time Passive Time
20 minutes 4 days
Ingredients
Fish
  • 1 slice Surmai / Pomfret Fillet
  • 100 ml oil for frying
Marinade - for one slice of fish.
  • 1 tspn salt
  • 1 tspn red chilly powder
  • 1 tspn Turmeric
  • 1 +1/4 tspn vinegar
Other things
  • fridge to freeze the fish
  • cling flim
  • lid to cover the fish while cooking
  • Non stick Pan
Servings: Serving
Instructions
Marination
  1. If using a Surmai, cut into half inch thick slices. If its a Pomfret, debone. Wash the fish slice. Wipe dry using a paper towel.
  2. Mix the salt, turmeric powder and red chillies with the vinegar and make a thick paste. Put the vinegar a little at a time. The paste should not get runny.
  3. Marinate both sides of the fish. The marinade on both sides should be thickly applied.
  4. Keep next to each other in a dish. Fish should not be kept on top of each other as the marinade will get stuck to each other. Cover with cling film.
  5. Freeze the marinated fish for a minimum of 4 days.
To fry
  1. Thaw fish in normal refrigerated section for appx 2 hours.
  2. Add oil to the non stick pan.
  3. Let it heat, but should not smoke.
  4. Slide a slice of the fish, and cover with lid. While cooking the marinade splashes all over, so its better to cover with a lid.
  5. After 5 odd minutes, open the lid and turn over the fish, so that the other side cooks.
  6. After another 5 minutes, take off the lid and fry the fish on both sides till it gets a little crisp and brown.
  7. The marinade will now look brown / black.
    The marinade will now look brown / black.
  8. Fry as crisp as you like. The marinade has cooked, so if you want it less crisp its okay to take it off the fire.
    Fry as crisp as you like. The marinade has cooked, so if you want it less crisp its okay to take it off the fire.
To serve
  1. Serve hot, with lime, onions and green chillies. And Oh!! Open a beer!!
    Serve hot, with lime, onions and green chillies. And Oh!! Open a beer!!
Share this Recipe

Filed Under: Dinner, Lunch Tagged With: beer, coastal cuisine, Fried Fish, hot and spicy, indian recipe, indian style fish, marinade, marinated fish, marination, pomfret, spicy fish, surmai

Fried Garlic

April 26, 2016 By appu 7 Comments

It’s garlic again folks, and I am very excited to share this recipe with you.

This almost pedestrian cousin of onion (yes, it’s first cousins with onion, shallots and leeks!) can add flavour to almost any dish.

Freshly harvested garlic, drying in the sun.

Freshly harvested garlic, drying in the sun.

It has its own health benefits too. 

I love garlic, and it seems so does the world! There is a restaurant in San Francisco by the name of “The Stinking Rose”, which even serves garlic ice cream. I haven’t eaten there, but just for the sake of being a good foodie, I will definitely try it out once.

spicy fried garlic

spicy fried garlic

This dish was suggested by my mother in laws, a gym instructor. It intrigued me to no end, so I decided to try it out the very next day. Simple, easy and one of the tastiest tidbits I have ever had with a drink. So much so that I forgot the drink and kept eating the fried garlic.

fried garlic. my new go to fa v cocktail snack

fried garlic. my new go to fa v cocktail snack

It’s one of the quickest most simple dishes to make. Try and get new garlic, with the pink/purple skin. It tastes much better, as it is fried with the skin on and the thinner the skin, the nicer it is to eat it.

Chillies can be added as per your taste – I love spicy food, and it tastes absolutely yum with whisky!

When you bite into it, its crisp and then the tender garlic hits your tongue and causes the taste buds to do a nice little jig. And then the salt and chillies ping inside your mouth and the entire taste makes you want to go on and on eating fried garlic.

on the rocks with fried garlic

on the rocks with fried garlic

I’m going to try these with scrambled eggs, cheese toast and pizza!

Try variations – With wasabi and light soy sauce. Black pepper and sea salt. Fry some green chillies with it!

Do let me know if you try any of these variations. I would love to hear from you.

_MG_9070

fried garlic

fried garlic


Fried Garlic
Print Recipe
Super easy, super quick and super yummy!
  • CourseDrinks, Sides
  • CuisineIndian
Servings Prep Time
2/ 3 people 10 min
Cook Time
10 min
Servings Prep Time
2/ 3 people 10 min
Cook Time
10 min
Fried Garlic
Print Recipe
Super easy, super quick and super yummy!
  • CourseDrinks, Sides
  • CuisineIndian
Servings Prep Time
2/ 3 people 10 min
Cook Time
10 min
Servings Prep Time
2/ 3 people 10 min
Cook Time
10 min
Ingredients
  • 50 gms garlic Pull out cloves from the bulb, but don't peel the cloves.
  • 200 ml oil for frying
  • 1/4 tspn salt heaped.
  • 1/4 tspn red chilly powder
For Frying.
  • heavy bottomed pan
  • slotted spoon
  • paper napkin to blot extra oil.
Servings: people
Instructions
  1. Heat the oil till hot but not smoking. Set stove to medium heat.
  2. Fry cloves of garlic with skin on.
  3. When the garlic looks a tad brown take it out with the slotted spoon and blot on paper.
    When the garlic looks a tad brown take it out with the slotted spoon and blot on paper.
  4. Add salt and red chilly powder.
  5. Tah dah!! It's ready. Pour yourself a drink and enjoy! It tastes very nice warm. But I quite liked the taste when it has cooled down too. Something about piping hot and spicy, is not very enjoyable.
    Tah dah!! It's ready. Pour yourself a drink and enjoy! 

It tastes very nice warm. But I quite liked the taste when it has cooled down too. Something about piping hot and spicy, is not very enjoyable.
Share this Recipe

Filed Under: Cocktail Parties, Sides Tagged With: cocktail snack, fried garlic, garlic, new garlic, rum, spicy garlic, tidbits, whisky

Meet the Author

For the 21 years and some months that I have been alive, there has been this crazy, eccentric, always-charged-up woman with a full-time job of being a mother to 6 (2 children, 4 dogs).

In her spare time she blasts music on her DJ console, reads like a maniac, downloads shows (because God forbid she runs out of something to watch), runs an entire household, and to top it all off, manages a very successful catering business which makes the most delicious food in the entire world. Once you have her food, everything else will taste like stale socks.

This is what you call "Maa ke haath ka khana".

- Kanak

Subscribe to Blog via Email

RECIPE BY CATEGORY

Copyright © 2023 THE RECIPE LARDER